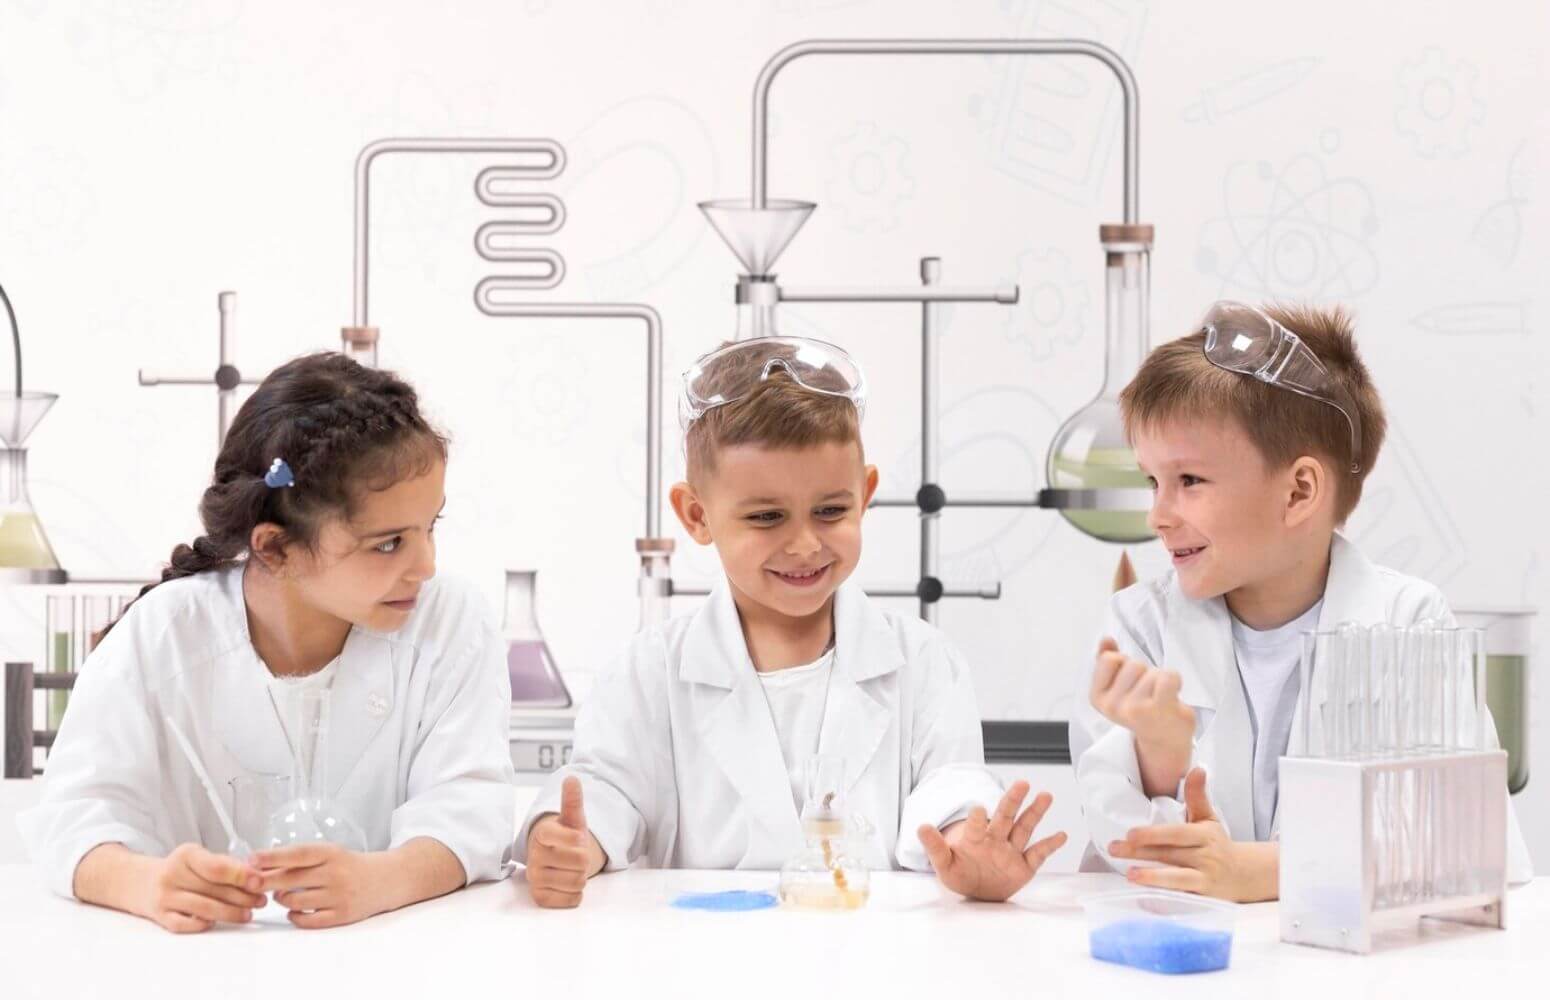
Diving into the world of science can be a thrilling adventure, especially for curious 4th graders! You know the challenge: keeping young minds engaged and eager to learn. That’s where the magic of hands-on science experiments comes in. These activities aren’t just fun; they’re gateways to understanding complex scientific concepts in a way that’s both accessible and enjoyable.
In the following sections, we’ll explore 40 innovative 4th grade science experiments, each designed to spark creativity and foster a deeper appreciation for the wonders of science. From creating a solar oven to exploring the lifecycle of butterflies, these projects address a wide range of topics including ecology, physics, chemistry, and more.
Get ready to embark on a journey that promises to transform curiosity into knowledge and experiments into excitement. Let’s ignite the scientific spark in every 4th grader!
40 Innovative and Educational Science Projects for 4th Graders
Basic Principles and Fun Experiments
1. Creating a Solar Oven – Understanding Solar Energy
Objective:
The aim of this project is to teach 4th graders about solar energy and how it can be harnessed to perform tasks like cooking. By building a solar oven, students will learn how solar power is a sustainable and eco-friendly energy source.
Materials:
- A pizza box (or any small cardboard box)
- Aluminum foil
- Plastic wrap
- Black construction paper
- Tape
- A stick or straw to prop open the lid
- Thermometer (optional)
- Ingredients for simple cooking, like marshmallows or cheese
Procedure:
- Prepare the Box: Cut a flap in the lid of the pizza box, leaving at least an inch border around the three sides.
- Reflective Surface: Cover the inner side of the flap with aluminum foil, ensuring it’s smooth to reflect the sun’s rays.
- Insulation: Tape a layer of plastic wrap over the opening you cut in the lid to create an airtight window for sunlight to enter.
- Absorption: Line the bottom of the box with black construction paper to absorb heat.
- Set-Up: Place the food item on top of the black paper, close the lid, and use the stick to prop open the foil-covered flap.
- Cooking: Position the oven outside in direct sunlight, adjusting the flap to reflect the sun’s rays into the box.
Observations:
Students should observe how the temperature inside the box increases, how long it takes for the food to show signs of cooking, and any changes in the effectiveness based on the oven’s position relative to the sun.
Through this experiment, students learn how solar energy can be captured and used for heating and cooking. They understand the principles of energy transformation from light to heat and the importance of renewable energy sources. This hands-on experience demonstrates the practical application of science in daily life and encourages environmental consciousness from a young age.
2. Homemade Barometer – Studying Atmospheric Pressure
Objective:
The goal of this experiment is to introduce 4th graders to the concept of atmospheric pressure and how it can be measured. By creating a homemade barometer, students will understand how changes in air pressure can be used to predict weather changes.
Materials:
- A clean, empty glass jar
- A balloon
- Scissors
- A straw
- Tape
- A ruler
- A marker
- Cardstock or sturdy paper
Procedure:
- Prepare the Jar: Cut the balloon so that you can stretch the piece over the open end of the jar, creating a tight, drum-like surface.
- Indicator Setup: Tape the straw to the center of the balloon surface, making sure a part of the straw extends over the edge of the jar.
- Calibration: Place the ruler vertically next to the jar and use the marker to make a reference line on the cardstock where the straw points.
- Observation Point: Position your barometer in a place where it won’t be disturbed and where it can be observed regularly.
Observations:
Encourage students to record the straw’s position relative to the reference line at the same time each day. They should note any changes in the straw’s position and correlate these changes with the weather conditions and temperature.
Through this experiment, students learn how atmospheric pressure affects the environment and can be an indicator of weather changes. The homemade barometer helps them understand that a rise in the straw indicates high pressure (generally signaling good weather), while a fall indicates low pressure (often signaling bad weather). This simple yet effective project not only teaches basic principles of meteorology but also encourages regular observation and data recording, fostering scientific thinking and curiosity about the natural world.
3. Ice Cream in a Bag – Exploring Freezing Point Depression
Objective:
This fun and tasty experiment aims to teach 4th graders about the concept of freezing point depression. By making ice cream in a bag, students will understand how adding salt to ice lowers its melting point, allowing the ice cream mixture to freeze.
Materials:
- Small Ziploc bags
- Large Ziploc bags
- Half and half cream or milk
- Sugar
- Vanilla extract
- Ice cubes
- Rock salt or table salt
- Measuring cups and spoons
- Gloves or towels (to protect hands from the cold)
Procedure:
- Ice Cream Mixture: In a small Ziploc bag, mix one cup of half and half, two tablespoons of sugar, and half a teaspoon of vanilla extract. Seal the bag tightly.
- Ice-Salt Mixture: Fill a large Ziploc bag halfway with ice cubes and add about six tablespoons of salt to it.
- Combining the Bags: Place the small bag with the ice cream mixture inside the large bag with the ice and salt. Seal the large bag.
- Shaking: Shake the bags for about five to ten minutes. Use gloves or a towel to hold the bags, as they will get very cold.
- Checking Consistency: After shaking, check the small bag to see if the ice cream has solidified to the desired consistency.
Observations:
Students should observe the process of the liquid mixture turning into ice cream. They should note the temperature change in the ice bag and how the addition of salt to ice speeds up the freezing process of the cream mixture.
This experiment demonstrates the scientific principle of freezing point depression, where the addition of a substance (salt) to a solvent (water) lowers its freezing point. Students learn that this is the reason why salt is used on icy roads in winter. The activity also encourages a hands-on approach to learning scientific concepts, making science fun and memorable, especially when the result is as delicious as homemade ice cream!
4. Dancing Corn – Observing Chemical Reactions with Baking Soda and Vinegar
Objective:
This experiment is designed to show 4th graders the fascinating effects of a chemical reaction. By creating ‘dancing’ corn, students will observe the reaction between baking soda and vinegar, providing a visual and engaging demonstration of gas production and density.
Materials:
- A clear glass or plastic cup
- Dried corn kernels
- White vinegar
- Baking soda
- Water
- A spoon
Procedure:
- Setup: Fill the glass about three-quarters full with vinegar.
- Adding Corn: Add a spoonful of dried corn kernels to the vinegar in the glass.
- Creating the Reaction: Add a teaspoon of baking soda to the mixture and stir gently.
- Observation: Watch as the corn kernels begin to ‘dance’ up and down in the glass.
Observations:
Students should observe the immediate reaction between the vinegar (acid) and baking soda (base), resulting in the production of carbon dioxide gas. These gas bubbles attach to the corn kernels, making them less dense and causing them to rise to the surface. Once the gas escapes, the kernels sink back down, only to be lifted again as more gas bubbles form.
This experiment demonstrates a basic acid-base reaction and the production of a gas as a byproduct. It helps students understand concepts of chemical reactions, gas production, and density in a fun and interactive way. The ‘dancing’ motion of the corn provides a clear and visual way to grasp these scientific principles, making it an excellent activity for young learners to engage with basic chemistry concepts.
5. DIY Periscope – Understanding Light Reflection and Angles
Objective:
The purpose of this project is to teach 4th graders about the principles of light reflection and how angles affect the path of light. By building a DIY periscope, students will learn how mirrors can be used to see objects that are not in the direct line of sight.
Materials:
- A milk carton or a long, rectangular cardboard box
- Two small mirrors
- Scissors or a craft knife (to be used under adult supervision)
- Duct tape or strong adhesive
- Ruler
- Marker
Procedure:
- Prepare the Box: Seal one end of the box if it’s open and then cut two squares at opposite ends of the box at a 45-degree angle, one at the top and one at the bottom.
- Positioning Mirrors: Place a mirror inside each square opening, positioning them so that they reflect the light from one to the other. The mirrors should be facing each other at a 45-degree angle.
- Securing Mirrors: Secure the mirrors in place using tape, ensuring they are firmly attached and positioned correctly.
- Testing the Periscope: Look through the lower hole and adjust the angle of the mirrors until you can see through the top hole clearly.
Observations:
Students should note how the light is reflected from one mirror to the other, allowing them to see over or around obstacles. They can experiment with the periscope by looking over walls or around corners, observing how the periscope changes their view.
This DIY periscope project demonstrates the basic principles of light reflection and the importance of angle in directing light paths. Through this activity, students learn that light travels in straight lines and can be redirected using mirrors. This fun and practical application of physics principles helps to demystify the concept of light reflection and offers a tangible example of how science is used in everyday objects.
Ecology and Environment
1. Biodegradable Plastic Creation – Learning About Environment-Friendly Materials
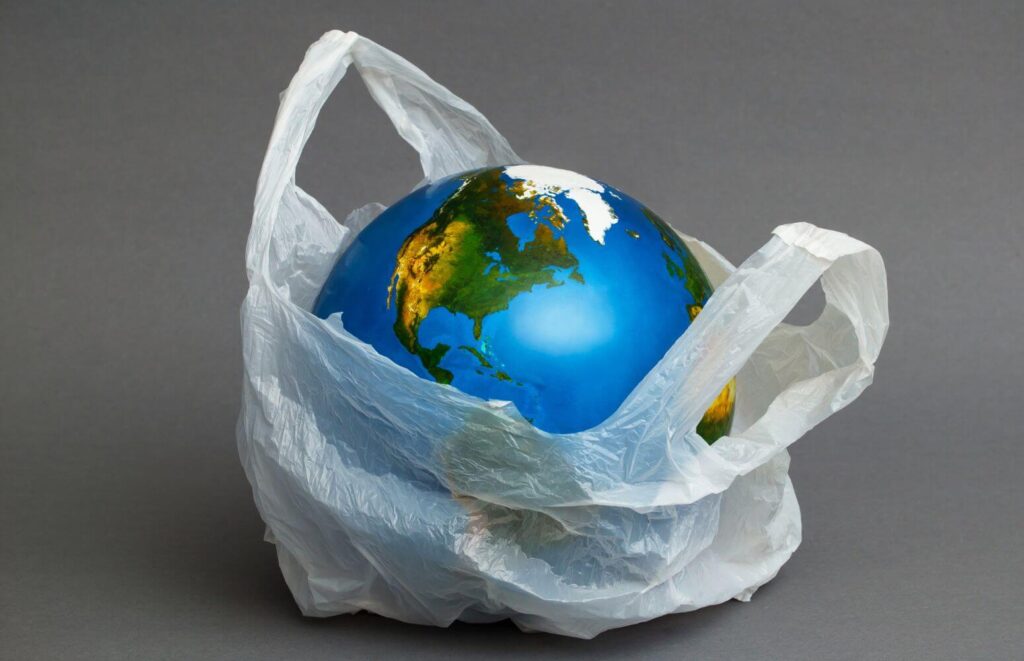
Objective:
The aim of this project is to educate 4th graders about the importance of sustainable materials and the environmental impact of plastics. By creating biodegradable plastic, students will understand the concept of biodegradability and the role it plays in reducing pollution.
Materials:
- Cornstarch
- Water
- Food coloring (optional)
- Vinegar
- Vegetable oil
- A saucepan
- A spoon
- Measuring cups and spoons
- Parchment paper
Procedure:
- Mix Ingredients: In the saucepan, mix 1 tablespoon of cornstarch, 2 tablespoons of water, 1 tablespoon of vinegar, and 1 teaspoon of vegetable oil. Add a few drops of food coloring if desired.
- Cook the Mixture: Heat the mixture over low heat, stirring constantly. As it heats, the mixture will begin to thicken and clump together into a gel-like substance.
- Cooling: Once the mixture has thickened, turn off the heat and allow it to cool slightly.
- Shaping: Spoon the mixture onto parchment paper and shape it as desired. It can be flattened to form sheets or molded into different shapes.
- Drying: Allow the shaped plastic to air dry for a few days until it hardens completely.
Observations:
Students should observe the change in the mixture from a liquid to a solid state. They can also check the durability and flexibility of the dried bioplastic and note any changes over time, such as brittleness or further hardening.
Through this experiment, students learn about the possibility and significance of creating environmentally friendly alternatives to conventional plastics. This hands-on project demonstrates how everyday ingredients can be transformed into a biodegradable material, emphasizing the importance of sustainable practices and innovation in materials science. It encourages students to think about the impact of materials on the environment and the potential for greener alternatives in everyday life.
2. DIY Terrarium – Studying Ecosystems and Plant Growth
Objective:
This project aims to teach 4th graders about ecosystems, plant growth, and the water cycle. By creating a DIY terrarium, students get a firsthand look at how plants interact with their environment and the basics of a self-sustaining ecosystem.
Materials:
- A clear, sealable jar or plastic container
- Small pebbles or gravel
- Activated charcoal (optional, helps with odors and mold)
- Potting soil
- Small plants (such as mosses, ferns, or succulents)
- Decorative elements like small figurines, rocks, or twigs (optional)
- Spray bottle with water
Procedure:
- Layering the Base: Start by placing a layer of pebbles or gravel at the bottom of the jar for drainage. Over this, if using, add a thin layer of activated charcoal.
- Adding Soil: Add a layer of potting soil, thick enough for the plants’ roots to grow.
- Planting: Carefully plant the small plants in the soil. Arrange them so each has enough space to grow.
- Adding Decorations: Place any decorative elements in the terrarium for aesthetic purposes.
- Watering: Lightly spray the inside with water, ensuring the soil is moist but not overly wet.
- Sealing: Seal the jar or container.
Observations:
Students should observe how water cycles within the terrarium, creating a self-contained ecosystem. They can monitor plant growth, condensation on the jar walls, and any changes in the plants’ health or soil condition.
Through this activity, students learn about ecosystems, plant care, and the water cycle in a miniature, controlled environment. The terrarium demonstrates how plants use and recycle water, and the importance of a balanced ecosystem. This project not only educates about environmental science but also instills responsibility and care for living things. It’s a vivid illustration of how various elements in an ecosystem work together, making it a practical and engaging educational tool.
3. Water Filtration System – Understanding Water Purification Processes
Objective:
The objective of this project is to educate 4th graders about the importance of clean water and how water filtration systems work. By constructing a simple water filtration system, students will learn about the processes involved in purifying water and the significance of clean water in the environment.
Materials:
- A clear plastic bottle (cut in half)
- Cotton balls or a piece of cloth
- Sand (both coarse and fine)
- Gravel or small pebbles
- Activated charcoal (can be found in pet stores)
- Dirty water (can be made by mixing garden soil with water)
- A glass or container to catch the filtered water
- A funnel (optional)
Procedure:
- Preparing the Bottle: Turn the top half of the bottle upside down (like a funnel) and place it into the bottom half.
- Layering Materials: Start by placing cotton balls or a cloth at the bottom of the upside-down bottle top. This acts as the first filter.
- Adding Charcoal: Add a layer of activated charcoal over the cotton. This helps remove odors and impurities.
- Adding Sand and Gravel: Place a layer of fine sand over the charcoal, followed by a layer of coarse sand. Finish with a layer of gravel or small pebbles.
- Pouring Water: Slowly pour the dirty water into the top of the bottle and let it drip into the lower part of the bottle.
Observations:
Students should observe the filtration process as the water passes through each layer and note the changes in the water’s appearance. They should compare the dirty water with the filtered water in terms of clarity, color, and any particles.
This experiment helps students understand how different materials can filter out contaminants from water, making it cleaner. It provides a basic understanding of how water purification systems work and highlights the importance of having access to clean water. This hands-on project not only educates about environmental science but also raises awareness about global water issues, emphasizing the need for effective water purification methods in our communities.
4. Recycled Paper Making – Exploring Recycling and Conservation
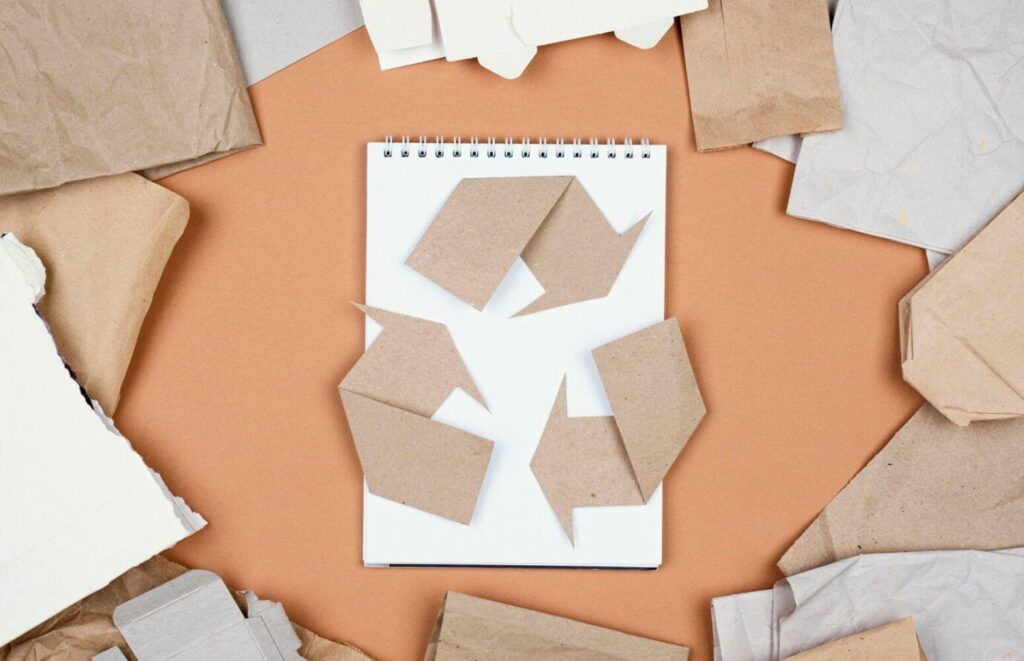
Objective:
This project is designed to teach 4th graders about the recycling process and the importance of conservation. By making recycled paper, students will learn how paper is recycled and the environmental benefits of recycling.
Materials:
- Scrap paper (used printer paper, newspapers, etc.)
- Water
- A blender or food processor
- A large basin or container
- A screen or mesh (an old window screen or mesh produce bag works well)
- A rolling pin or a bottle
- A sponge or towel
- An iron (optional, for use under adult supervision)
- Decorative items (like flower petals or leaves, optional)
Procedure:
- Preparing the Pulp: Tear the scrap paper into small pieces and soak them in water for a few hours or overnight. Blend the soaked paper into a pulp using a blender or food processor.
- Setting Up the Workspace: Place the screen or mesh over the basin or container. Pour the pulp onto the screen, spreading it out evenly.
- Forming the Paper: Use the rolling pin or bottle to press out as much water as possible. Use a sponge or towel to absorb extra moisture from the top.
- Drying the Paper: Carefully lift the screen and place the wet paper on a flat surface to dry. If desired, press flowers or leaves into the pulp for decoration before it dries.
- Finishing Touches: Once the paper is dry, it can be carefully peeled off the screen. If needed, an iron (used under adult supervision) can be used to flatten the paper.
Observations:
Students should observe the transformation of scrap paper into a new sheet of paper. They can note the texture, thickness, and strength of their recycled paper compared to regular paper.
Through this experiment, students learn about the recycling process and the concept of resource conservation. This project highlights how waste material can be transformed into useful products, promoting environmental sustainability. It also encourages creativity and resourcefulness, showing that recycling can be both practical and fun. By understanding the value of recycling, students become more aware of the importance of conserving natural resources and reducing waste in our environment.
5. Soil Erosion Demonstration – Demonstrating the Effects of Erosion
Objective:
This project aims to demonstrate the effects of soil erosion to 4th graders. By simulating erosion in a controlled environment, students will understand how natural elements like water and wind can lead to the loss of soil, and the impact this has on the environment.
Materials:
- Two large, shallow trays or baking pans
- Soil
- Grass seeds (optional)
- A watering can or spray bottle
- A fan or hairdryer (to simulate wind)
- A small bucket or container for water
- A ruler or measuring tape
Procedure:
- Preparation of Trays: Fill both trays with an equal amount of soil. In one tray, plant grass seeds and allow them to grow for a few days until a small layer of grass is established.
- Simulating Rain: Using the watering can or spray bottle, gently water both trays to simulate rainfall. Observe how the water interacts with the soil in each tray.
- Simulating Wind: Use the fan or hairdryer to blow air over both trays, simulating wind. Observe the effect of the wind on the soil in each tray.
- Measuring Soil Loss: After simulating rain and wind, measure any soil that was displaced from each tray to compare the amount of erosion in the tray with grass versus the tray without grass.
Observations:
Students should observe the differences in how the soil reacts in both trays. In the tray with grass, there should be less soil erosion compared to the tray without grass. They should also note the impact of both water and wind on the soil.
Through this experiment, students learn about the process of soil erosion and the importance of vegetation in preventing it. The grass acts as a natural barrier, holding the soil together and reducing the amount of soil lost due to elements like wind and water. This project not only educates students about environmental science but also emphasizes the need for sustainable land management practices to prevent soil erosion, which is crucial for maintaining healthy ecosystems and agriculture.
Physics and Mechanics
1. Simple Electric Circuit – Learning About Electricity and Circuit Design
Objective:
The aim of this project is to introduce 4th graders to the basics of electricity and circuit design. By building a simple electric circuit, students will learn how electrical circuits function and the role of each component in the circuit.
Materials:
- A small light bulb (like a flashlight bulb)
- Two AA batteries
- Electrical tape
- A small bulb holder (optional)
- Two pieces of insulated copper wire, each about 6 inches long
- A AA battery holder (optional)
- A small switch (optional)
Procedure:
- Preparing the Wires: Strip the ends of the copper wires to expose the metal.
- Connecting the Bulb: Attach one wire to the base of the light bulb or bulb holder. Secure it with electrical tape.
- Completing the Circuit: Attach the other end of this wire to one end of the battery or battery holder. Attach the second wire to the other terminal of the battery.
- Making the Connection: Touch the free end of the second wire to the metal part of the bulb or bulb holder. If using a switch, connect the switch between the wire and the bulb.
- Testing the Circuit: When the two free ends are connected, the bulb should light up, completing the circuit.
Observations:
Students should observe that the bulb only lights up when a complete circuit is made, allowing electricity to flow from the battery to the bulb. They can experiment with disconnecting and reconnecting the wires and observe how breaking the circuit stops the flow of electricity.
Through this experiment, students learn the basic principles of electrical circuits, including the necessity of a complete loop for electricity to flow. They also understand the roles of different components in a circuit, such as the power source (battery), conductors (wires), and the load (light bulb). This project provides a foundational understanding of electricity and circuitry, which are key concepts in physics and essential knowledge for future scientific learning.
2. Pendulum Experiments – Understanding Gravity and Motion
Objective:
The purpose of this experiment is to help 4th graders understand the concepts of gravity and motion through the study of pendulums. By observing how a pendulum moves, students will learn about periodic motion and the forces that influence it.
Materials:
- A length of string or yarn (about 1-2 meters long)
- A weight (such as a small metal washer or a key)
- A sturdy chair or a hook on the ceiling
- A protractor
- A stopwatch or timer
- Tape
- A ruler or measuring tape
Procedure:
- Setting Up the Pendulum: Tie the weight to one end of the string. Secure the other end of the string to the chair or hook, ensuring that the weight can swing freely without touching anything.
- Measuring Swing: Use the protractor to measure and mark different angles (like 15°, 30°, 45°) for the initial swing of the pendulum.
- Starting the Experiment: Pull the weight to one of the marked angles and release it, making sure not to push it.
- Timing the Swings: Use the stopwatch to time how long it takes for the pendulum to complete a set number of swings (for example, 10 swings).
- Repeating the Experiment: Repeat the experiment for different angles and record the time it takes for each.
Observations:
Students should observe how changing the angle affects the pendulum’s motion. They should note if the swing time changes with different angles and the behavior of the pendulum at varying heights.
This experiment demonstrates the principles of pendulum motion, showing that the period of a pendulum (the time it takes to complete a swing) is affected by its length but not by the weight or the initial angle. Students learn about the force of gravity and how it influences motion. This hands-on activity not only teaches important physics concepts but also encourages critical thinking and observational skills, as students analyze how different variables affect the pendulum’s movement.
3. Balloon Rocket – Demonstrating Newton’s Third Law of Motion
Objective:
This project aims to demonstrate Newton’s third law of motion – for every action, there is an equal and opposite reaction – using a simple and fun balloon rocket experiment. This hands-on activity helps 4th graders understand the basic principles of motion and force.
Materials:
- A long piece of string (about 10-15 feet)
- A balloon (regular party balloons work well)
- A plastic straw
- Tape
- Two chairs or sturdy objects to tie the string to
- A tape measure (optional)
Procedure:
- String Setup: Stretch the string between two chairs or other sturdy objects and tie it securely. Ensure the string is taut and horizontal.
- Preparing the Balloon: Inflate the balloon but do not tie it off. Carefully tape the straw lengthwise to the balloon without letting the air escape.
- Launching the Balloon Rocket: Thread the string through the straw. Hold the balloon at one end of the string, keeping the opening pinched to prevent air from escaping.
- Observation and Release: Let go of the balloon and watch as it rockets along the string.
Observations:
Students should observe the direction the balloon moves in relation to the air escaping from it. They should notice that the balloon moves in the opposite direction to the air being expelled.
This experiment visually and interactively demonstrates Newton’s third law of motion. The air rushing out of the balloon acts as the ‘action’ force, and the movement of the balloon in the opposite direction is the ‘reaction’ force. This simple yet effective demonstration helps students grasp a fundamental concept of physics. It not only makes learning about forces and motion exciting but also encourages curiosity and exploration in scientific principles.
4. Homemade Compass – Exploring Magnetism and Earth’s Magnetic Field
Objective:
This project is designed to teach 4th graders about magnetism and how Earth’s magnetic field can be used for navigation. By creating a homemade compass, students will learn how a magnetic needle can be used to find direction.
Materials:
- A sewing needle or small nail
- A small magnet
- A small bowl of water
- A small piece of cork or foam
- A marker
Procedure:
- Magnetizing the Needle: Stroke the needle or nail with the magnet around 30-50 times always in the same direction. This will magnetize the needle.
- Preparing the Float: Cut a small disc or square from the cork or foam. It should be big enough to hold the needle and float on water.
- Attaching the Needle: Lay the magnetized needle on the cork or foam piece.
- Setting Up the Compass: Fill the bowl with water and gently place the cork or foam with the needle on the surface of the water.
- Observation: Watch as the needle or nail aligns itself in a north-south direction.
Observations:
Students should observe how the needle aligns itself along a specific direction. They can use a compass or a smartphone app to check if the needle points towards the magnetic north.
Through this experiment, students learn about the properties of magnetism and how Earth itself acts as a giant magnet with a magnetic field. They discover that a magnetized needle, when free to rotate, aligns itself with the Earth’s magnetic field, pointing towards the magnetic north and south poles. This simple yet insightful experiment helps students understand the basic principles of navigation and the Earth’s magnetism, encouraging further exploration in the fields of Earth science and physics.
5. Optical Illusions with Mirrors – Studying Light and Reflection
Objective:
The purpose of this project is to teach 4th graders about the properties of light and reflection through the creation of optical illusions with mirrors. This experiment will help students understand how mirrors can alter our perception of reality by manipulating light and images.
Materials:
- Two small mirrors (they should be identical in size)
- Tape or a mirror holder to keep the mirrors at an angle
- Various small objects or toys
- A piece of paper and a marker (optional, for drawing and creating additional illusions)
Procedure:
- Setting Up the Mirrors: Position the two mirrors so that they are standing up and facing each other. Use tape or a mirror holder to keep them at a 90-degree angle (forming a ‘V’ shape).
- Placing Objects: Place a small object or toy in between the mirrors and observe how it is reflected.
- Creating Illusions: Experiment with moving the object around in the space between the mirrors. Try using different objects or drawing shapes or simple figures on paper and placing them between the mirrors.
- Observation and Reflection: Observe the number of reflections, how they change with the object’s position, and how the images interact with each other.
Observations:
Students should notice how the mirrors create multiple reflections of the object, making it seem like there are several identical objects in the space. They should also observe how changing the angle of the mirrors or the position of the object affects the reflections.
This experiment demonstrates the concept of reflection and how light bounces off surfaces, such as mirrors, to create images. It helps students understand that the angle of reflection is equal to the angle of incidence and how this principle can be used to create optical illusions. This activity not only teaches fundamental concepts of physics but also encourages creativity and exploration in the world of optics and light.
Chemistry and Reactions
1. Acid-Base Reaction with Cabbage Juice – Exploring pH Levels
Objective:
This experiment is designed to teach 4th graders about pH levels and acid-base reactions. Using red cabbage juice as a natural pH indicator, students will learn how to identify acidic and basic household substances.
Materials:
- Red cabbage
- Water
- A pot for boiling
- A strainer
- Clear glasses or test tubes
- Various household substances (e.g., vinegar, baking soda, lemon juice, soap, soda, etc.)
- A dropper (optional)
Procedure:
- Making Cabbage Juice: Chop the red cabbage into small pieces and boil it in water until the water turns a deep purple color. Let it cool and strain out the cabbage pieces. The resulting liquid is your pH indicator.
- Preparing Samples: Pour a small amount of cabbage juice into each glass or test tube.
- Testing Substances: Add different household substances to the cabbage juice. This can be done using a dropper or by simply pouring a small amount into the juice.
- Observation: Observe the color change in the cabbage juice to determine if the substance is acidic or basic.
Observations:
Students should notice that the cabbage juice changes color depending on the pH level of the substance added. Acids will turn the juice pink or red, bases will turn it green or yellow, and neutral substances will cause little to no color change.
Through this experiment, students learn about acids, bases, and pH levels in a visual and interactive way. The natural pH indicator of red cabbage juice helps them understand that different substances have different chemical properties, and these properties can be identified by their reaction to pH indicators. This activity not only educates about basic chemistry concepts but also demonstrates the practical application of science in everyday life.
2. Homemade Glue from Milk – Chemical Transformation Processes
Objective:
This project aims to teach 4th graders about chemical transformation processes by making homemade glue from milk. Students will learn how a chemical reaction can transform everyday materials into something entirely different and useful.
Materials:
- 1 cup of milk
- 4 teaspoons of white vinegar
- A small pot or saucepan
- A strainer or cheesecloth
- Water
- Baking soda
- A small container for the glue
Procedure:
- Creating Curds: Heat the milk in the pot until it is warm, not boiling. Add the vinegar to the milk and stir gently. The milk will curdle, separating into curds and whey.
- Separating the Curds: Strain the mixture through the strainer or cheesecloth to separate the curds from the whey. Keep the curds and discard the whey.
- Making the Glue: Rinse the curds with water to remove any remaining vinegar. Then, place the curds back into the pot and add a small amount of baking soda (about a teaspoon). Heat gently while stirring until the mixture thickens into a paste-like consistency.
- Storing the Glue: Transfer the paste to your container. Allow it to cool before using it as glue.
Observations:
Students should observe the curdling process, noting how the addition of an acid (vinegar) to the milk causes it to separate into solid curds and liquid whey. They should also note the changes in texture and consistency as the curds are transformed into glue.
This experiment illustrates the concept of chemical transformation, showing how combining certain substances can lead to a chemical reaction that creates a new product. In this case, acid (vinegar) is added to a protein (milk), causing it to curdle, and then neutralized and thickened with a base (baking soda) to create glue. This activity helps students understand the practical applications of chemistry in everyday life and encourages them to think about the science behind common products.
3. Color-Changing Flowers – Demonstrating Capillary Action and pH Changes
Objective:
This experiment is designed to show 4th graders the concepts of capillary action and pH changes in a visually engaging way. By using color-changing flowers, students will observe how flowers absorb water and how pH levels can affect the color of certain substances.
Materials:
- White flowers (such as carnations or daisies)
- Food coloring in various colors
- Clear glasses or vases
- Water
- Scissors
- Vinegar and baking soda (to alter pH, optional)
Procedure:
- Preparing the Flowers: Trim the stems of the flowers at an angle, so they can easily absorb water.
- Coloring the Water: Fill the glasses or vases with water. Add several drops of different food coloring to each glass. Stir to mix.
- Placing the Flowers: Place one flower in each colored water glass or vase.
- Observation: Over the next 24-48 hours, observe the flowers as they absorb the colored water. Notice any color changes in the petals.
- Experimenting with pH: For an additional experiment, alter the pH of the water in one of the glasses using vinegar (to make it more acidic) or baking soda (to make it more basic) and observe if there is a difference in how the color shows up in the flower compared to those in regular water.
Observations:
Students should notice the flowers gradually changing color as they absorb the colored water. They might also observe differences in the color intensity depending on the color of the dye used. If experimenting with pH changes, they may see a difference in how the color presents in the flower.
This experiment visually demonstrates how plants use capillary action to draw water up through their stems into their petals and leaves. It also shows how pH levels can affect the color of substances, in this case, the food coloring in the water. This project not only teaches important scientific concepts but also sparks curiosity and encourages further exploration into plant biology and chemistry.
4. Sugar Density Rainbow – Exploring Density and Solubility
Objective:
The objective of this experiment is to teach 4th graders about the principles of density and solubility through the creation of a sugar density rainbow. This colorful and interactive project helps students understand how different concentrations of a solution can affect its density.
Materials:
- Granulated sugar
- Warm water
- Food coloring in various colors
- A measuring cup
- Five small glasses or cups
- A spoon for stirring
- A dropper or a small syringe
- A tall, clear glass or jar
Procedure:
- Preparing Sugar Solutions: In each of the five small glasses, mix a different amount of sugar with a fixed amount of warm water to create solutions of varying densities. For example, start with one teaspoon of sugar in the first glass, two teaspoons in the second, and so on, up to five teaspoons in the fifth glass.
- Coloring the Solutions: Add a few drops of different food coloring to each solution and stir well until all the sugar is dissolved.
- Layering the Solutions: Carefully layer the solutions in the tall glass using the dropper or syringe, starting with the most sugar-dense solution (five teaspoons) at the bottom. Gradually add the less dense solutions, one by one, to form distinct layers.
- Creating the Rainbow: Continue until all the solutions are added, and observe the formation of a rainbow-like structure.
Observations:
Students should observe that the sugar solutions with higher density (more sugar) stay at the bottom, while those with lower density (less sugar) float on top, creating distinct and colorful layers. They can see how the difference in sugar content affects the density of each layer.
This experiment vividly demonstrates the concept of density in liquids, showing that the more solute (sugar) a solution has, the denser it becomes. It also illustrates the principle of solubility, as the sugar dissolves in water to form solutions of varying concentrations. The sugar density rainbow is not only a visually engaging experiment but also a practical demonstration of important chemical concepts, making learning both fun and educational for young students.
5. Yeast Inflation Experiment – Understanding Fermentation and Gases
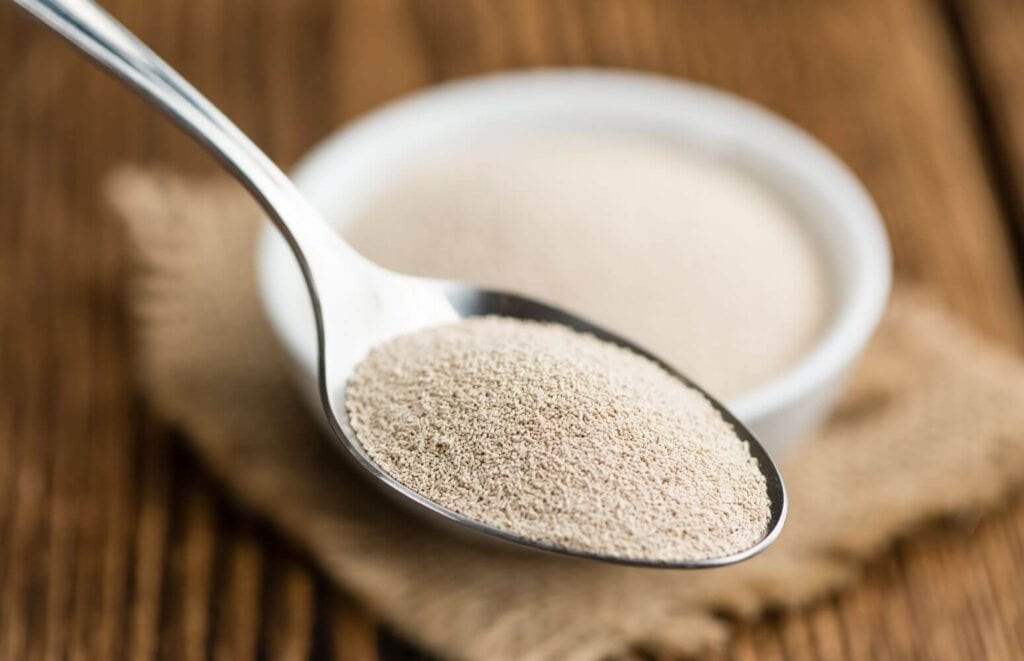
Objective:
The aim of this experiment is to teach 4th graders about the process of fermentation and gas production, specifically how yeast produces carbon dioxide. This hands-on activity helps students understand the biological and chemical principles behind fermentation.
Materials:
- A packet of active dry yeast
- Warm water
- Sugar
- A small, clear plastic bottle
- A balloon
- A funnel (optional)
- A measuring spoon
- A thermometer (optional)
Procedure:
- Preparing the Yeast Mixture: In the plastic bottle, mix a packet of active dry yeast with about a cup of warm water (ideally around 100°F or 38°C) using the thermometer to check the temperature.
- Adding Sugar: Add a tablespoon of sugar to the mixture and shake or stir to dissolve.
- Attaching the Balloon: Stretch the balloon by blowing it up a few times, then place it over the mouth of the bottle using the funnel if needed.
- Observation: Place the bottle in a warm place and observe changes over the next 30 minutes to an hour.
Observations:
Students should watch as the balloon begins to inflate. They should note the time it takes for the balloon to start inflating and how much it inflates, observing the gas production from the yeast.
Through this experiment, students learn about the process of fermentation, where yeast converts sugar into alcohol and carbon dioxide. The inflation of the balloon demonstrates the production of carbon dioxide gas, a byproduct of fermentation. This experiment helps students understand the role of yeast in baking and brewing and introduces them to basic concepts in biology and chemistry related to cellular respiration and gas production. It is a simple yet effective way to visualize and understand a biological process that has practical applications in everyday life.
Biology and Life Sciences
1. Plant Growth in Different Conditions – Studying How Environment Affects Growth
Objective:
This experiment is designed to teach 4th graders about the impact of environmental conditions on plant growth. Students will learn how factors such as light, water, and soil type affect the growth and health of plants.
Materials:
- Seeds (such as beans or peas, which are fast-growing)
- Potting soil
- Sand
- Water
- Several small pots or containers
- A sunny spot and a shaded spot
- Measuring cup
- Ruler or measuring tape
Procedure:
- Setting Up: Plant seeds in different pots using the same type of soil. Ensure each pot has drainage holes at the bottom.
- Varying Conditions: Place the pots in different environmental conditions. For example:
- Pot 1 in a sunny spot with regular watering.
- Pot 2 in a shaded spot with regular watering.
- Pot 3 in a sunny spot but with less frequent watering.
- Pot 4 in a mixture of sand and soil, with regular watering.
- Regular Care: Water the plants as per their designated schedule.
- Observation: Observe and record the growth of the plants in each pot daily or weekly. Measure the height of the plants and note any changes in the color and health of the leaves.
Observations:
Students should observe differences in growth rate, height, leaf color, and overall health among the plants in different conditions. They might notice that plants with adequate light and water grow healthier and faster.
This experiment demonstrates how different environmental conditions can significantly impact plant growth. Students learn that plants require certain conditions to thrive, such as proper light, water, and soil. This activity not only teaches basic principles of botany and ecology but also instills a sense of responsibility and care in maintaining living organisms. It highlights the importance of environmental factors in plant growth, providing a practical and hands-on approach to learning about the natural world.
2. Owl Pellet Dissection – Learning About Food Chains and Digestion
Objective:
The goal of this project is to provide 4th graders with a hands-on experience to learn about food chains, predator-prey relationships, and the digestion process in birds of prey, specifically owls. Dissecting owl pellets will help students understand how owls consume and digest their food.
Materials:
- Owl pellets (one for each student or group; these can be ordered from scientific supply companies)
- Dissection tools (tweezers, toothpicks, or small probes)
- Disposable gloves
- White paper or a dissection tray
- A magnifying glass
- Charts or guides for identifying bones and other remains found in the pellets
- Hand sanitizer
Procedure:
- Preparation: Give each student or group an owl pellet. Have them put on disposable gloves for hygiene.
- Dissecting the Pellet: Gently pull apart the pellet using the dissection tools. Spread the contents on white paper or a tray for easy observation.
- Identifying Remains: Use the magnifying glass and identification charts to examine and identify the bones and other remains found in the pellet. This may include skulls, bones, fur, and feathers of the owl’s prey.
- Recording Observations: Have students record their findings, noting the types of animals the owl has eaten and any other interesting observations.
Observations:
Students should note the different types of prey items found in the pellet. They can compare the contents with those found by others to see the variety in the owl’s diet.
Through this activity, students learn about the diet of owls and their role in the food chain as predators. The owl pellet dissection provides insight into the owl’s hunting and feeding habits and the process of digestion in birds of prey. This hands-on experiment helps students understand biological concepts like food chains, digestion, and adaptation in a tangible and engaging way. It also fosters skills in observation, analysis, and scientific recording.
3. DIY Stethoscope – Understanding Human Body and Heartbeats
Objective:
The purpose of this project is to teach 4th graders about the human body, specifically how to listen to and understand heartbeats. By creating a DIY stethoscope, students will learn about the function of the heart and how doctors use tools to check on our health.
Materials:
- A small funnel
- A length of flexible tubing (about 1-2 feet long, such as a garden hose)
- Tape (duct tape or electrical tape)
- Scissors
- A clock or stopwatch with a second hand
Procedure:
- Assembling the Stethoscope: Attach the narrow end of the funnel to one end of the tubing. Ensure it’s airtight by using tape to secure the connection.
- Using the Stethoscope: Place the wide end of the funnel against someone’s chest, over where their heart is. Put the other end of the tube in your ear.
- Listening to the Heartbeat: Listen carefully to hear the heartbeat. Count the number of beats in a minute using the clock or stopwatch.
- Experimenting: Try listening to the heartbeat after different activities like resting, jumping, or running, and observe how the heart rate changes.
Observations:
Students should be able to hear the heartbeat through their DIY stethoscope. They should note how the heartbeat sounds and how the rate changes with different activities.
This experiment helps students understand how the heart works and the importance of heart rate in indicating the body’s activity level. It demonstrates the basic principles of how a stethoscope works and gives them a hands-on experience in using a medical tool. This activity not only educates students about the human body and health but also sparks interest in biology and medicine. It’s a simple yet effective way to introduce them to the concept of monitoring and understanding bodily functions.
4. Butterfly Lifecycle Study – Observing Metamorphosis
Objective:
This project aims to educate 4th graders about the lifecycle of butterflies, focusing on the process of metamorphosis. By observing the transformation from caterpillar to butterfly, students will learn about the stages of development in insects and the concept of metamorphosis.
Materials:
- Live caterpillars (can be ordered from a science education supplier)
- A butterfly habitat or a large container with a lid (holes must be punched for ventilation)
- Fresh leaves or caterpillar food (usually provided with the caterpillars)
- Twigs or branches for pupation
- A notebook for recording observations
- A camera or drawing materials for documenting the stages
Procedure:
- Setting Up the Habitat: Place the caterpillars in the butterfly habitat or container along with fresh leaves or special caterpillar food.
- Daily Care and Observation: Feed the caterpillars daily and observe their behavior and growth. Note changes in size, shape, and activity.
- Pupation: Watch as the caterpillars eventually attach themselves to twigs or the sides of the container and transform into chrysalides (pupae).
- Observing Metamorphosis: Monitor the chrysalides until they emerge as butterflies. This transformation can take several days.
- Release: Once the butterflies are fully formed and their wings are dry, release them into the wild.
Observations:
Students should observe each stage of the butterfly’s lifecycle: from caterpillar to chrysalis, and then to butterfly. They should note the duration of each stage, changes in the caterpillar’s appearance, the formation of the chrysalis, and the emergence of the butterfly.
Through this experiment, students gain a firsthand understanding of metamorphosis, witnessing the dramatic changes that occur in the butterfly’s lifecycle. This project teaches important biological concepts, such as life cycles, growth stages, and adaptation. It also fosters a sense of responsibility and care for living creatures, as well as a deeper appreciation for the complexity and beauty of nature.
5. Microscopic World Exploration – Using a Microscope to Study Small Organisms
Objective:
The goal of this project is to introduce 4th graders to the world of microscopy and the diversity of life that exists at the microscopic level. Students will use a microscope to explore and study small organisms and materials, gaining an understanding of the complexity and variety of life forms that are not visible to the naked eye.
Materials:
- A light microscope (a simple student microscope will suffice)
- Prepared microscope slides (can include plant cells, animal cells, bacteria, etc.)
- Blank slides and cover slips
- Water samples from a pond or aquarium (to observe living organisms)
- Other items to observe (such as a piece of hair, a drop of blood, salt crystals, etc.)
- A notebook for recording observations
- A camera or smartphone for taking pictures through the microscope (optional)
Procedure:
- Learning to Use the Microscope: Familiarize students with the parts of the microscope and how to use it. Explain how to adjust the focus and change the magnification.
- Observing Prepared Slides: Start with prepared slides to observe a variety of cells and organisms. Have students adjust the focus and magnification to see different details.
- Preparing and Observing Own Slides: Allow students to prepare their own slides with water samples or other materials. They can place a drop of water on a slide, cover it with a cover slip, and observe.
- Recording Observations: Encourage students to draw or describe what they see under the microscope. If possible, take photographs through the microscope for documentation.
Observations:
Students should note the differences in shape, size, and structure of the various cells and organisms they observe. They can compare the complexity of different samples, such as the simplicity of single-celled organisms versus the complexity of multicellular organisms.
This project provides an eye-opening experience into the microscopic world, illustrating the diversity and complexity of life at a scale not visible to the naked eye. It introduces students to basic concepts in microbiology and cell biology, fostering a sense of curiosity and wonder about the natural world. This activity also helps develop skills in scientific observation and documentation, essential in the field of biology.
Earth and Space Sciences
1. Homemade Volcano – Understanding Geological Formations and Eruptions
Objective:
The aim of this project is to teach 4th graders about geological formations, specifically volcanoes, and the science behind volcanic eruptions. By building a homemade volcano and simulating an eruption, students will gain an understanding of how volcanoes form and why they erupt.
Materials:
- A small bottle or a glass jar (this will be the volcano’s “vent”)
- Modeling clay or play dough (to build the volcano)
- Baking soda
- Vinegar
- Red food coloring (for effect)
- Dish soap (to make the “lava” foamy)
- A tray or a large plate (to contain the mess)
- Safety goggles (optional, for eye protection)
Procedure:
- Building the Volcano: Use the modeling clay or play dough to build a volcano around the bottle or jar, leaving the opening at the top uncovered. The volcano should be sturdy and have a wide base.
- Preparing the Eruption Mixture: In the bottle, mix a few tablespoons of baking soda, a squirt of dish soap, and a few drops of red food coloring.
- Simulating the Eruption: Pour vinegar into the bottle and quickly step back to observe the eruption.
Observations:
Students should observe how the mixture in the volcano quickly reacts and overflows, simulating a volcanic eruption. They should note the foam’s color and consistency and how the reaction continues until the reactants are used up.
Through this experiment, students learn about the basic principles of chemical reactions, simulating the explosive nature of volcanic eruptions. The mixture of vinegar (acid) and baking soda (base) creates a reaction that releases carbon dioxide gas, causing the foamy “lava” to erupt out of the volcano. This activity not only educates students about geological processes but also demonstrates important concepts in chemistry, such as acid-base reactions and gas production, in a fun and engaging way.
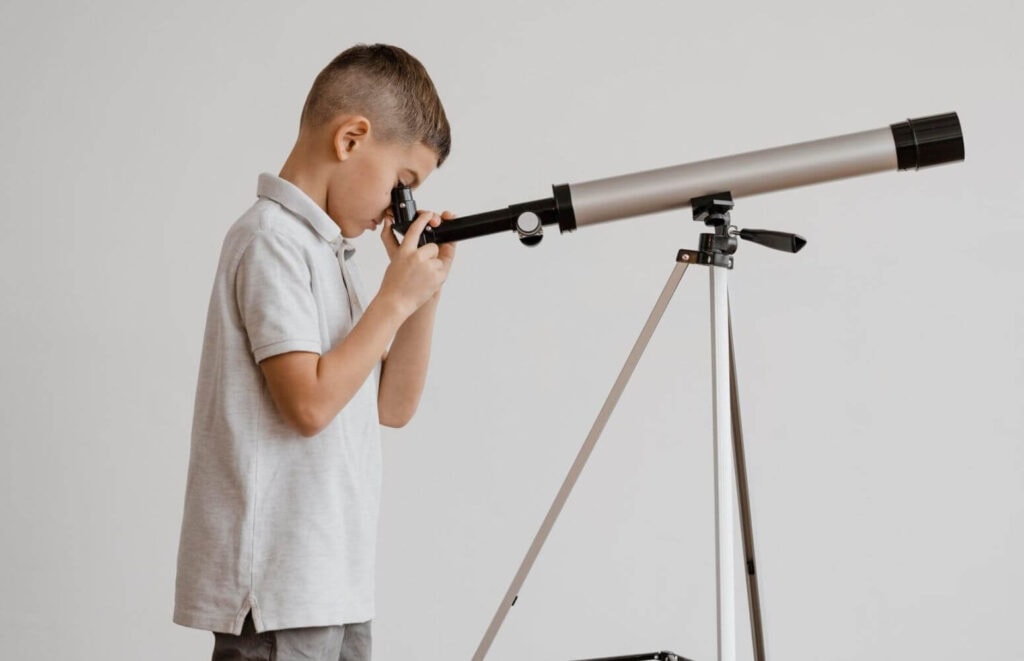
2. Basic Star Gazing – Exploring Constellations and Astronomy
Objective:
The objective of this project is to introduce 4th graders to the basics of astronomy and the night sky. Through star gazing, students will learn about different constellations, stars, and other celestial bodies, enhancing their understanding of the universe.
Materials:
- A star map or a star gazing app (many free options are available for smartphones)
- A clear night sky (preferably away from city lights)
- A flashlight (optional, for reading the star map)
- Blankets or chairs (for comfort)
- Binoculars or a telescope (optional, for a closer view)
- A notebook and pen (for recording observations)
Procedure:
- Choosing a Location: Find a dark spot with a clear view of the night sky, away from the bright lights of the city.
- Using the Star Map/App: Use the star map or app to identify different stars and constellations in the night sky.
- Observing the Sky: Look for constellations and notable stars. If available, use binoculars or a telescope for a closer view.
- Recording Observations: Have students write down or draw the constellations they find and note any interesting observations.
Observations:
Students should be able to identify several constellations and stars. They may also observe the moon, planets, or meteor showers if these are visible.
Through this activity, students gain a basic understanding of astronomy and the night sky. They learn how to identify constellations and stars, and they gain an appreciation for the vastness and beauty of the universe. This project encourages curiosity about space and science, and it can be a stepping stone to more in-depth astronomical studies. Additionally, it provides an opportunity for students to engage with nature and develop observational skills.
3. Weather Station Creation – Studying Meteorology and Weather Patterns
Objective:
The goal of this project is to educate 4th graders about meteorology and the observation of weather patterns. By creating a simple weather station, students will learn how to measure and record various weather elements such as temperature, rainfall, and wind direction.
Materials:
- A thermometer (to measure temperature)
- A rain gauge (can be homemade using a large, clear plastic bottle with measurements marked on the side)
- A wind vane (can be constructed from lightweight materials like cardboard, a straw, and a pin)
- An anemometer (can be homemade using cups and straws)
- A compass (for wind direction)
- A notebook and pen (for recording observations)
- A calendar (to track weather over time)
Procedure:
- Setting Up Instruments: Set up the thermometer in a shaded area, the rain gauge in an open area, and the wind vane and anemometer in a location with good exposure to wind but no obstructions.
- Recording Data: Each day at the same time, record the temperature, the amount of rainfall (if any), and the direction and speed of the wind.
- Observing Weather Patterns: Over time, observe and record any weather patterns or changes, such as changes in temperature throughout the seasons or variations in rainfall.
- Analyzing Data: After collecting data for a period, analyze the information to identify any trends or patterns in the weather.
Observations:
Students should observe the daily and seasonal changes in weather patterns. They might notice variations in temperature, differences in rainfall, and changes in wind direction and speed.
This project helps students understand the basics of meteorology and the importance of weather observation. By tracking and analyzing weather data, they learn about different aspects of weather and how it can vary over time. This activity not only teaches scientific observation and data collection skills but also fosters an interest in natural science and the environment. It illustrates the impact of weather on daily life and the environment, highlighting the importance of meteorology in understanding and predicting weather conditions.
4. Rock and Mineral Testing – Learning About Geology and Earth’s Composition
Objective:
This project aims to teach 4th graders about geology, specifically the properties of different rocks and minerals. Through hands-on testing, students will learn to identify various rocks and minerals and understand their composition and formation.
Materials:
- A collection of different rocks and minerals
- A magnifying glass
- A ceramic tile (for a streak test)
- A steel nail or paperclip (for a hardness test)
- Vinegar (to test for carbonate minerals)
- A notebook and pen for recording observations
- Safety goggles (optional for eye protection)
Procedure:
- Visual Inspection: Use a magnifying glass to examine the color, shape, size, and texture of each rock and mineral.
- Streak Test: Rub a rock or mineral across the ceramic tile to observe the color of its streak.
- Hardness Test: Use a steel nail or paperclip to scratch the surface of the rock or mineral to test its hardness.
- Acid Test: Carefully apply a few drops of vinegar to the rock or mineral to see if it fizzes, which indicates the presence of carbonate minerals.
- Recording Observations: Record the properties of each rock and mineral, including color, streak color, hardness, and reaction to vinegar.
Observations:
Students should observe the different properties of the rocks and minerals, such as color, streak, hardness, and reaction to acid. They might notice that some minerals leave a colored streak while others do not, or that some are harder than others.
This experiment helps students learn about the physical properties that geologists use to identify rocks and minerals. They gain an understanding of how these natural resources are categorized and the processes involved in their formation. This activity not only teaches basic geology but also encourages careful observation and analytical thinking, providing a foundation for further study in earth sciences.
5. Tornado in a Bottle – Demonstrating Vortex and Weather Phenomena
Objective:
The purpose of this project is to teach 4th graders about weather phenomena, specifically tornadoes, by creating a “tornado in a bottle.” This hands-on activity will help students understand how a vortex forms, simulating the motion of a tornado.
Materials:
- Two 2-liter clear plastic bottles
- Water
- A washer or a specially designed tornado tube connector (available at science stores)
- Glitter or food coloring (optional, for visual effect)
- Duct tape
Procedure:
- Preparing the Bottles: Fill one of the bottles about three-quarters full of water. If desired, add glitter or a few drops of food coloring to the water to make the tornado more visible.
- Connecting the Bottles: Place the washer over the opening of the water-filled bottle. Then, invert the second bottle and line up its opening with the washer. If using a tornado tube connector, screw one end into each bottle. Secure the two bottle openings together with duct tape to ensure they are tightly connected and leak-proof.
- Creating the Tornado: Turn the bottles so the one with water is on top. Swirl the bottles in a circular motion and then hold them steady. Observe the water as it creates a vortex while moving into the bottom bottle.
- Observation and Experimentation: Experiment with different swirling speeds and observe how it affects the formation and appearance of the tornado.
Observations:
Students should observe the formation of a funnel-shaped vortex as the water moves from the top bottle to the bottom one. They might notice that the speed and tightness of the vortex can be controlled by how fast they swirl the bottles.
This experiment provides a visual demonstration of vortex formation, similar to how tornadoes form in nature. Students learn about the motion and energy involved in creating a vortex and how these factors contribute to the formation of tornadoes. The activity not only educates students about an important weather phenomenon but also engages them in a fun, interactive way to explore physical concepts like motion, force, and energy transfer.
Technology and Engineering
1. Simple Robot Building – Introducing Basic Robotics
Objective:
This project aims to introduce 4th graders to the fundamentals of robotics and engineering. By building a simple robot, students will learn about basic electronics, mechanics, and the concept of automation in technology.
Materials:
- A small DC motor
- AA batteries and a battery holder
- A plastic cup or a small cardboard box (for the robot’s body)
- Wheels (can be made from bottle caps or small discs)
- A switch
- Electrical wires
- Tape or glue
- Optional: markers, stickers, or other materials for decoration
Procedure:
- Assembling the Body: Use the plastic cup or cardboard box as the robot’s body. Make holes for attaching the wheels.
- Installing the Motor: Attach the DC motor inside the body. It should be positioned so that when it’s activated, it will turn the wheels.
- Adding the Wheels: Attach the wheels to the motor’s axle and/or to the opposite end of the body for stability.
- Wiring: Connect the motor to the battery holder using electrical wires. Install the switch in between the motor and the battery holder to control the power.
- Completing the Circuit: Ensure all connections are secure and that the switch is in the ‘off’ position before inserting the batteries.
- Testing the Robot: Turn on the switch and observe how the robot moves. Experiment with different terrains and obstacles.
- Decoration: Decorate the robot’s body using markers, stickers, or other materials.
Observations:
Students should observe how the electrical connections power the motor, which in turn moves the wheels and propels the robot. They can experiment with different wheel sizes and body shapes to see how these changes affect the robot’s movement.
Through this project, students learn the basic principles of robotics, including power sources, motor operation, and simple electrical circuits. They gain an understanding of how different components work together to create movement in a machine. This activity not only introduces students to the fundamentals of robotics and engineering but also encourages creativity and problem-solving skills, providing a solid foundation for more advanced studies in technology and engineering.
2. Wind-Powered Car – Exploring Renewable Energy Sources
Objective:
The goal of this project is to teach 4th graders about renewable energy, specifically wind power, through the construction and operation of a wind-powered car. This hands-on activity demonstrates how wind energy can be harnessed to power movement, promoting understanding of sustainable energy practices.
Materials:
- A small, lightweight car or cart (can be made from a cardboard box, plastic bottle, or similar material)
- Wheels (can be made from CDs, bottle caps, or small circular objects)
- Axles for the wheels (wooden skewers, straws, or stiff wire)
- A large fan (to simulate wind) or a windy outdoor area
- Tape or glue
- A piece of stiff paper or lightweight plastic for the sail
- A ruler or a stick to support the sail
- Scissors
Procedure:
- Building the Car: Construct a small car or modify a pre-existing one. Attach the wheels to the axles and ensure they spin freely.
- Creating the Sail: Cut the paper or plastic into a sail shape and attach it to the ruler or stick.
- Attaching the Sail: Securely attach the sail to the car in an upright position.
- Testing the Car: Place the car in front of the fan or in a windy area. Adjust the angle of the sail to catch the wind effectively.
- Observation and Experimentation: Observe how the car moves when the wind hits the sail. Experiment with different sail sizes, shapes, and angles to see which is most effective.
Observations:
Students should note how the car’s movement is influenced by the wind acting on the sail. They may observe that the car’s speed and direction can be changed by adjusting the sail’s angle and position.
Through this experiment, students learn about wind energy and its potential as a renewable energy source. They understand how wind can be converted into mechanical energy to power movement, just as it’s used in wind turbines to generate electricity. This project not only teaches the principles of renewable energy and sustainability but also encourages experimentation and problem-solving, as students work to optimize their car’s design for maximum efficiency.
3. Paper Bridge Engineering – Learning About Strength and Structure
Objective:
This project aims to teach 4th graders about the principles of engineering, focusing on strength and structure. By designing and building a bridge out of paper, students will learn how engineering involves problem-solving and creativity to build structures that are both strong and efficient.
Materials:
- Sheets of paper (standard printer paper or construction paper)
- Books or blocks to use as supports for the bridge
- Coins or small weights
- Tape or glue (optional, to reinforce the bridge)
- A ruler (for measuring)
Procedure:
- Designing the Bridge: Encourage students to think about how they can fold, roll, or layer the paper to make it strong enough to span a gap and hold weight.
- Building Supports: Place two books or blocks parallel to each other on a table, creating a gap between them that will serve as the span for the bridge.
- Constructing the Bridge: Using the paper, construct a bridge that spans the gap between the two supports. The bridge can be a simple flat strip, a folded piece, a rolled tube, or any other design the student comes up with.
- Testing the Bridge: Gently place coins or small weights on the bridge, one at a time, to test its strength.
- Observation and Modification: Observe how much weight the bridge can hold before collapsing and where it fails. Encourage students to modify their designs to improve the bridge’s strength.
Observations:
Students should observe which designs hold the most weight and how the structure of the paper contributes to the bridge’s strength. They may notice that certain shapes, like tubes or folded triangles, offer more support.
This project demonstrates basic principles of engineering and physics, particularly in understanding how different shapes and structures distribute and support weight. Students learn that the strength of a material is not just about what it’s made of, but also how it’s used. This activity encourages creative thinking, problem-solving, and practical application of scientific concepts, providing a foundation for understanding more complex engineering principles in the future.
4. DIY Catapult – Studying Force and Trajectory
Objective:
This project aims to teach 4th graders the basic principles of physics, specifically force and trajectory, through the construction and use of a DIY catapult. Students will learn how manipulating the angle and force of a catapult affects the distance and trajectory of a projectile.
Materials:
- 7-10 Popsicle sticks
- Rubber bands
- A plastic spoon or a bottle cap (for launching projectiles)
- Small objects to use as projectiles (like marshmallows, cotton balls, or paper balls)
- Tape (if using a bottle cap)
- A ruler or measuring tape (for measuring distance)
- A protractor (optional, for measuring angles)
Procedure:
- Building the Catapult Base: Stack 5-7 Popsicle sticks and secure them at both ends with rubber bands to create a base.
- Creating the Lever Arm: Take 2-3 Popsicle sticks, stack them, and secure one end with a rubber band. This will be the lever arm.
- Assembling the Catapult: Wedge the lever arm between the base sticks, attaching it to the base with a rubber band at the fulcrum (the point where the lever arm and base meet).
- Attaching the Spoon or Cap: Attach the spoon or bottle cap to the end of the lever arm using tape. This will hold the projectiles.
- Launching and Measuring: Place a projectile in the spoon or cap, press down on the other end of the lever arm, and release to launch the projectile. Measure the distance it travels.
- Experimenting with Variables: Experiment by changing the number of sticks in the lever arm, the angle of launch, and the force applied to see how these changes affect the projectile’s trajectory and distance.
Observations:
Students should observe how changes in the catapult’s design and launch angle affect the distance and trajectory of the projectile. They may notice that more force and higher angles typically result in farther launches.
This project introduces students to the concepts of force, energy, and trajectory in a fun and interactive way. Through experimentation, they learn how different variables affect the motion and path of an object in flight. The activity not only teaches fundamental principles of physics but also encourages critical thinking and hands-on learning, inspiring an interest in science and engineering.
5. Water Clock Making – Understanding Time Measurement and Ancient Technologies
Objective:
The goal of this project is to teach 4th graders about ancient timekeeping methods and the concept of measuring time using a water clock, or clepsydra. This activity helps students understand how people in ancient civilizations measured time and the evolution of technology.
Materials:
- Two large clear plastic bottles
- A sharp tool for making holes (like a nail or drill, to be used by an adult)
- Water
- Food coloring (optional, for visibility)
- A marker
- A stopwatch or a regular clock
- A ruler
Procedure:
- Preparing the Bottles: Make a small hole near the bottom of one of the plastic bottles. This will be the water clock bottle. The hole size determines the flow rate, so start with a small hole.
- Marking Time Intervals: Fill the water clock bottle with water and use the marker to mark the water level on the bottle. Start the stopwatch as you begin to let the water flow into the second bottle. Mark the level every one minute or another chosen interval.
- Calibrating the Clock: Once you’ve marked several intervals, empty both bottles.
- Using the Water Clock: Refill the water clock bottle and use your markings to measure time as the water level drops from one mark to the next.
Observations:
Students should observe how the water level drops consistently over time. They may also notice the impact of the hole size on the flow rate of the water.
Through this experiment, students learn about an ancient method of time measurement, understanding how water clocks were used before the invention of mechanical clocks. They gain insights into the challenges of timekeeping in ancient civilizations and the ingenuity required to measure time accurately. This project not only teaches historical and technological concepts but also encourages students to think about the passage of time and how it can be measured in different ways.
Art in Science
1. Chromatography with Markers – Separating Colors and Exploring Pigments
Objective:
This project aims to introduce 4th graders to the concept of chromatography, a method used to separate mixtures. By using markers and chromatography, students will explore how different colors are made up of various pigments.
Materials:
- White coffee filters or chromatography paper
- Washable markers (various colors)
- Cups or small jars
- Water
- Scissors
- Ruler
- Pencils
- Paper towels or a drying rack
Procedure:
- Preparing the Paper: Cut the coffee filters into strips approximately two inches wide.
- Drawing the Line: With a pencil, draw a line about one inch from the bottom of each strip.
- Applying Marker Ink: Using the washable markers, place a small dot of color on the line on each strip. It’s best to use different strips for different colors.
- Chromatography Setup: Fill the cups with a small amount of water (just enough to cover the bottom). Hang the strips over the edge of the cup so that the very bottom of the paper touches the water, but the marker ink does not. You may need to secure the strips with a pencil laid across the top of the cup.
- Observation: As the water travels up the paper, watch the colors from the markers spread and separate.
- Drying: Once the water has moved up most of the paper, remove the strips and lay them out to dry.
Observations:
Students should observe the different pigments making up each color as they separate and travel up the paper. They may notice that some colors separate into many different pigments while others may only show a few.
Through this experiment, students learn about the concept of chromatography and how it can be used to separate mixtures into individual components. They gain an understanding of how different pigments combine to create various colors. This activity not only demonstrates an important scientific technique but also provides an intersection between science and art, showing the complexity and beauty of colors in a tangible and engaging way.
2. Crystal Art – Growing Crystals in Artistic Patterns
Objective:
This project aims to combine art with science by teaching 4th graders how to grow crystals in specific patterns or designs, illustrating the beauty and structure of crystal formation. Students will learn about supersaturation and nucleation in a creative and visually appealing way.
Materials:
- Borax (sodium borate) or sugar
- Hot water
- Petri dishes, shallow bowls, or plates
- Pipe cleaners, thread, or paper (to create designs)
- Food coloring (optional, for colored crystals)
- A spoon for stirring
- A magnifying glass (for observing the crystal growth)
- Gloves and safety goggles (for protection while handling hot water and borax)
Procedure:
- Creating Designs: Shape pipe cleaners, thread, or cut paper into different patterns or designs. These will serve as the base for crystal growth.
- Preparing the Solution: Dissolve Borax or sugar in hot water to create a supersaturated solution. For every cup of water, use about 3 tablespoons of Borax or sugar. Add food coloring if desired.
- Setting Up the Experiment: Place the designs in the petri dishes or shallow bowls. Carefully pour the hot supersaturated solution over the designs until they are fully submerged.
- Observation and Waiting: Leave the setup undisturbed overnight or for a few days, allowing time for the crystals to form on the designs.
- Examining the Crystals: Once the crystals have formed, remove the designs from the solution and let them dry. Observe the crystals with a magnifying glass.
Observations:
Students should observe the formation of crystals on their designs. They might notice differences in crystal size and shape based on the material used for the design or the concentration of the solution.
This project demonstrates the process of crystal growth and the factors that influence it, such as the concentration of the solution and the presence of a nucleation site. Students learn about supersaturation and nucleation in a hands-on and artistic manner. This activity not only teaches scientific concepts but also encourages creativity, as students create unique crystal art pieces while learning about the principles of chemistry and physics behind crystal formation.
3. Musical Instruments from Recycled Materials – Physics of Sound and Creativity
Objective:
This project aims to teach 4th graders about the physics of sound through the creation of musical instruments using recycled materials. Students will explore how different materials produce various sounds and learn about sound waves, vibration, and pitch.
Materials:
- Recycled materials such as cardboard tubes, plastic bottles, rubber bands, tin cans, and bottle caps
- Beads, dried beans, or rice (for shakers)
- String or yarn
- Scissors, tape, and glue
- Decorative materials (like markers, stickers, or paint) for customization
Procedure:
- Planning the Instruments: Decide on the types of instruments to make, such as drums, shakers, or string instruments.
- Drum Construction: Use a tin can or a cardboard tube as the base. Stretch rubber bands or balloons over one end to create a membrane that vibrates to produce sound.
- Shaker Creation: Fill a plastic bottle with beads, dried beans, or rice. Secure the lid tightly for a simple shaker.
- String Instrument Making: Create a simple guitar using a cardboard box with a hole cut in the top. Stretch rubber bands of different lengths and thicknesses across the hole for the strings.
- Decoration: Decorate the instruments using markers, paint, or stickers.
- Playing and Experimenting: Experiment with playing the instruments. Observe the different sounds each one makes.
Observations:
Students should observe how the size, shape, and material of each instrument affect the sound it produces. They might notice that tighter membranes on drums produce higher-pitched sounds and that the thickness and length of rubber bands on string instruments affect the pitch.
This project demonstrates the basic principles of sound and vibration in a hands-on and creative way. Students learn how different materials can be used to create various sounds and how alterations in design can change the pitch and quality of the sound. This activity not only teaches important concepts in physics but also promotes environmental awareness by using recycled materials and encourages creativity in designing and decorating the instruments.
4. Shadow Art – Exploring Light and Shadows in Art
Objective:
This project is designed to teach 4th graders about the properties of light and shadows through the creation of shadow art. Students will explore how light can be manipulated to create different shadow effects and integrate this understanding into artistic expression.
Materials:
- A strong light source (like a lamp or a flashlight)
- Objects of various shapes (toys, cutouts, household items)
- A white screen or wall (as a backdrop for the shadows)
- Plain paper and pencils or markers (for tracing or drawing)
- A camera (optional, to capture the shadow images)
Procedure:
- Setting Up the Light Source: Position the light source so it shines onto the white screen or wall.
- Arranging Objects: Place objects between the light source and the screen. Experiment with their distance from the light to see how it affects the size and clarity of the shadows.
- Observing Shadows: Observe the shadows cast by the objects. Notice the shapes, sizes, and any distortions.
- Creating Art: Trace the shadows onto plain paper to create an outline, or draw a scene or pattern around the shadows. Alternatively, capture the shadow images with a camera.
- Experimenting with Angles: Change the angle of the light and rearrange the objects to see how it affects the shadows.
Observations:
Students should observe how the distance and angle of the light source change the appearance of the shadows. They might notice that shadows elongate or become distorted with changes in light position.
Through this activity, students learn about the properties of light and how it interacts with objects to create shadows. They explore the relationship between light, objects, and shadows and how these elements can be used in artistic expression. This project not only teaches basic principles of physics related to light but also encourages creativity, as students use shadow effects to create unique pieces of art. It’s a practical demonstration of how science can intersect with art, stimulating imagination and exploration.
5. Nature Collages – Combining Art with Natural Elements
Objective:
This project aims to teach 4th graders about the beauty and diversity of nature by creating art with natural elements. Students will explore their environment to collect materials and learn how to incorporate these elements into a collage, fostering an appreciation for the natural world and its connection to art.
Materials:
- Natural materials (leaves, flowers, twigs, seeds, grass, etc.)
- A sturdy base for the collage (cardboard, construction paper, or canvas)
- Glue or a glue stick
- Scissors (for trimming or shaping materials)
- Optional: Paints, markers, or crayons for additional decoration
Procedure:
- Collecting Materials: Take a nature walk to collect various natural materials that can be used in the collage. Encourage students to look for a variety of colors, textures, and sizes.
- Planning the Design: Have students plan their collage by arranging their natural materials on the chosen base without gluing them down first.
- Creating the Collage: Once the design is planned, students can begin gluing their materials onto the base.
- Adding Details: Students can add details or backgrounds using paints, markers, or crayons if desired.
- Discussing the Work: After completing the collage, students can discuss their pieces, explaining their choice of materials and what they represent.
Observations:
Students should observe the different properties of the natural materials they use, such as texture, color, and form. They might notice how these elements can be combined to create different artistic effects.
Through this project, students learn about the diversity and beauty of nature and how it can be incorporated into art. They develop an understanding of how different textures, colors, and shapes in nature can be used creatively. This activity not only encourages artistic expression but also promotes environmental awareness and appreciation for the natural world, fostering a connection between art and science.
Conclusion
These 40 innovative science projects for 4th graders offer a dynamic and engaging way to explore a wide range of scientific concepts. From understanding the principles of physics and chemistry to exploring the intricacies of biology and ecology, these activities are designed to spark curiosity and foster a deeper understanding of the world around us.
Each project combines hands-on learning with educational insights, making science both fun and informative. As we’ve seen, blending creativity with scientific exploration can lead to a more profound appreciation and interest in the wonders of science.
If you found these projects helpful and enjoyable, please consider sharing this article with others who might also benefit from these educational activities. Also, don’t forget to subscribe to our newsletter for more helpful content like this. Stay curious and keep exploring the fascinating world of science!