
Welcome to the exciting world of 5th grade science fair projects! If you’re a curious fifth grader or a supportive parent, this is your go-to guide for diving into the fascinating realms of physics, chemistry, biology, and more. We know that finding the perfect project can sometimes be a bit overwhelming. That’s why we’ve put together an amazing collection of activities that are not just fun, but also packed with educational value.
Have you ever wondered how to make a LEGO zip-line, or what makes a homemade lava lamp work? From building solar ovens to launching bottle rockets, these projects will take you on an adventurous journey through science. We’ll explore the secrets behind glow sticks, the strength of eggshells, and even how to model constellations. And that’s just the beginning!
Each project is designed to ignite your curiosity and deepen your understanding of the world around you. So, get ready to experiment, discover, and learn. You’re about to embark on an unforgettable scientific exploration that will show you just how exciting and important science can be. Let’s dive in and see what amazing discoveries await!
5th Grade Science Fair Projects
Physics and Engineering Projects
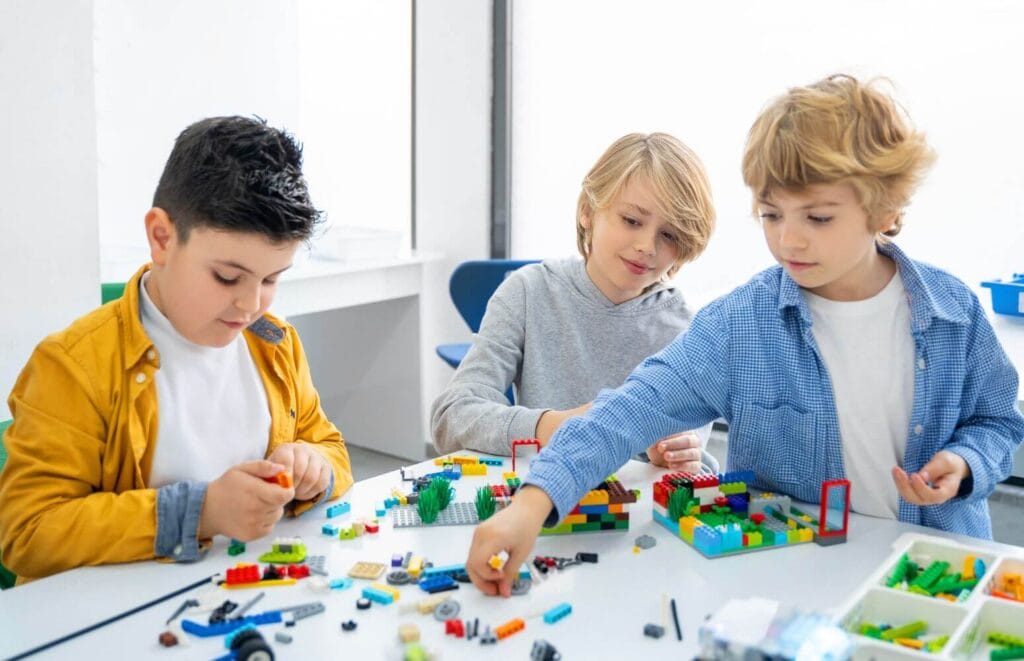
1. Race Down a LEGO Zip-line: Understanding Principles of Gravity and Friction
Objective:
To explore and understand the principles of gravity and friction through the construction and operation of a LEGO zip-line.
Materials:
- A selection of LEGO pieces for building the zip-line rider (e.g., a LEGO figurine or a small LEGO-built car).
- A long piece of string or thin rope (about 2-3 meters).
- A small pulley (optional, but it can make the zip-line smoother).
- Two points of elevation (like chairs, doorknobs, or hooks) to tie the ends of the string.
- Measuring tape.
- Stopwatch.
Procedure:
- Setup: Secure one end of the string to a higher point and the other end to a lower point, ensuring the string is taut. If you have a pulley, attach it to the string; this will serve as your zip-line. The difference in height should be noticeable but safe.
- Build Your Rider: Construct a small LEGO rider or vehicle. This will travel down your zip-line.
- Test Run: Place your LEGO rider at the higher end of the zip-line and let it go. Ensure it slides down to the lower end without any interventions.
- Experiment Variations: Experiment with different weights on your rider, or adjust the slope of your zip-line to see how these changes affect the speed and smoothness of the descent.
- Time Trials: Use a stopwatch to time how long it takes for the rider to reach the bottom. Record the times for different variations.
Observations:
- Record how the speed of the LEGO rider changes with different slopes or weights.
- Observe if the rider gets stuck at any point and note what might be causing this (friction points).
- Notice if the rider moves faster or slower on different sections of the zip-line.
This experiment demonstrates the basic principles of gravity and friction. Gravity pulls the LEGO rider down the zip-line, while friction between the rider and the string resists this motion. By adjusting the slope, you can see how gravity’s influence changes. Adding weight to the rider or altering its shape can also show how friction and air resistance impact movement. Through this fun and interactive project, students can gain a practical understanding of these fundamental physical forces.
2. Fly Clothespin Airplanes: Exploring Aerodynamics and Flight Mechanics
Objective:
To understand the basics of aerodynamics and flight mechanics by constructing and flying simple clothespin airplanes.
Materials:
- Wooden clothespins.
- Sturdy paper or light cardboard (for wings and tail).
- Scissors.
- Glue or tape.
- Ruler.
- Markers or paint for decoration (optional).
Procedure:
- Build the Airplane: Cut out wings and a tail from the paper or cardboard. The wings should be longer than the clothespin, and the tail should be a small triangle.
- Assemble the Airplane: Attach the wings to the top of the clothespin using glue or tape. The wings should be centered for balance. Attach the tail at the end of the clothespin.
- Decorate: Optionally, decorate your airplane with markers or paint for a personalized touch.
- Test Flights: Hold the airplane by the clothespin and gently throw it forward in an open space. Observe how it glides.
- Experiment: Adjust the size and position of the wings and tail, and try throwing the airplane with different strengths and angles.
Observations:
- Record how the airplane’s flight changes with different wing sizes and positions.
- Note the stability of the flight – does it glide smoothly, or does it tumble?
- Observe how the throwing angle and strength affect the distance and flight path.
This experiment allows students to explore the basic principles of aerodynamics and flight. The size and position of the wings affect how the air supports the airplane, demonstrating lift. The tail helps stabilize the flight, showing the importance of balance in aerodynamic design. By adjusting these elements and observing the results, students learn how aircraft control and stability are crucial for successful flight. This project not only teaches the fundamentals of aerodynamics but also encourages creativity and problem-solving through hands-on experimentation.
3. Demonstrate the “Magic” Leakproof Bag: Investigating Properties of Polymers
Objective:
To explore the properties of polymers and their reaction to puncturing, by demonstrating a “magic” leakproof bag.
Materials:
- Zip-lock plastic bags (preferably made of polyethylene).
- Sharpened pencils (several).
- Water.
- Food coloring (optional, for visual effect).
- A large bowl or a sink (to catch any spills).
Procedure:
- Prepare the Bag: Fill the plastic bag about halfway with water. If using, add a few drops of food coloring for better visibility. Seal the bag.
- Pencil Puncture: Carefully and swiftly, push a sharpened pencil through one side of the bag and out the other. Ensure the pencil goes in one side and out the opposite side of the bag.
- Add More Pencils: Continue to add more pencils through different areas of the bag. Do this with a steady hand to avoid tearing the plastic around the holes.
- Observe: Notice if any water leaks from the bag where the pencils have been inserted.
Observations:
- Observe whether the bag leaks around the pencils and, if so, where and why it might be happening.
- Note the number of pencils the bag can hold before leaking.
- Pay attention to the behavior of the plastic around the pencil holes.
This experiment demonstrates the unique properties of polymers, which are long, repeating chains of molecules. In the plastic bag, these polymer chains are flexible and stretchy, allowing them to form a seal around the pencil, preventing water from leaking. This shows how the structure of polymers can make materials behave in unexpected ways, like creating a seemingly “magic” leakproof bag. Through this experiment, students learn about the properties of polymers and get a glimpse into the fascinating world of materials science.
4. Spin a Candle Carousel: Learning about Heat Energy and Air Currents
Objective:
To understand the principles of heat energy and air currents by constructing and observing a simple candle-powered carousel.
Materials:
- Thin metal wire or a metal coat hanger.
- Small candles (tea lights work well).
- Lightweight cardboard or stiff paper.
- Scissors.
- Needle or pin.
- A base to hold the candles (like a small plate or tray).
- Matches or a lighter.
Procedure:
- Construct the Carousel: Cut out shapes (like triangles or birds) from the cardboard or stiff paper. These will be the blades of your carousel.
- Attach Blades to Wire: Carefully attach the cardboard shapes to the metal wire. Ensure they are evenly spaced and balanced around the wire. This is your carousel’s rotor.
- Assemble the Carousel: Bend the wire so that it forms a horizontal circle with the blades hanging down. Attach a hook or loop in the center of the wire circle for the needle or pin.
- Prepare the Base: Place the candles on the base, evenly spaced, so the carousel can sit above them. The candles should be close enough to heat the air beneath the carousel.
- Mount and Light the Candles: Carefully mount the carousel on the needle or pin above the candles. Light the candles and observe the carousel.
Observations:
- Watch how the carousel begins to spin once the candles are lit.
- Notice the speed of the carousel and how it relates to the heat of the candles.
- Observe the direction of the carousel’s rotation and how the rising heat affects it.
This experiment demonstrates how heat energy can be converted into mechanical energy. The heat from the candles warms the air, causing it to rise. This rising air moves past the blades of the carousel, causing it to spin. It’s a simple yet effective demonstration of how heat energy can create air currents, and how these currents can be harnessed to do work. This project not only teaches fundamental principles of physics but also provides a visual and tangible example of energy transformation.
5. Play Catch with a Catapult: Studying Projectile Motion and Energy Transfer
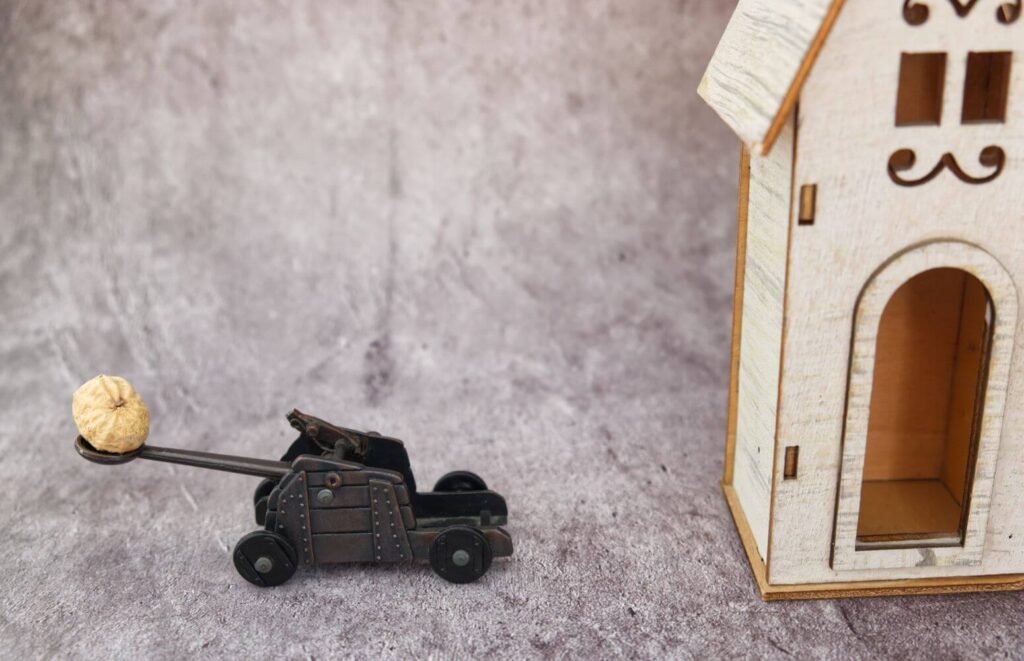
Objective:
To understand the concepts of projectile motion and energy transfer by building and using a simple catapult.
Materials:
- A sturdy wooden or plastic spoon.
- Rubber bands.
- Craft sticks or popsicle sticks.
- A small, lightweight ball (like a ping pong ball).
- Tape.
- Ruler or measuring tape.
- Protractor (for measuring angles, optional).
Procedure:
- Build the Catapult: Stack several craft sticks and secure them with rubber bands on both ends to make a base. Attach the spoon to the end of another craft stick using tape or rubber bands. Join this lever to the base in a way that allows it to pivot easily.
- Prepare for Launch: Place the ball in the spoon. Pull down the spoon to load the catapult.
- Launch: Release the spoon to launch the ball. Experiment with different amounts of force and angles.
- Measure and Record: Use the ruler to measure how far the ball travels. If using, adjust the angle of launch with a protractor and note the differences in the projectile’s path.
- Repeat and Experiment: Conduct multiple launches, varying the force and angle each time. Record the results for each trial.
Observations:
- Record the distance traveled by the projectile (ball) at different angles and force levels.
- Observe the trajectory of the ball and how it changes with different launch parameters.
- Note the relationship between the angle of launch, the force applied, and the distance the ball travels.
This experiment illustrates the basic principles of projectile motion and energy transfer. The catapult converts stored energy (in the stretched rubber bands) into kinetic energy, propelling the ball forward. By adjusting the launch angle and force, students can see how these factors affect the distance and trajectory of the projectile. This hands-on activity not only reinforces concepts of physics but also encourages analytical thinking and problem-solving as students work to optimize their catapult’s performance.
6. Build a Solar Oven: Harnessing Solar Energy for Practical Use
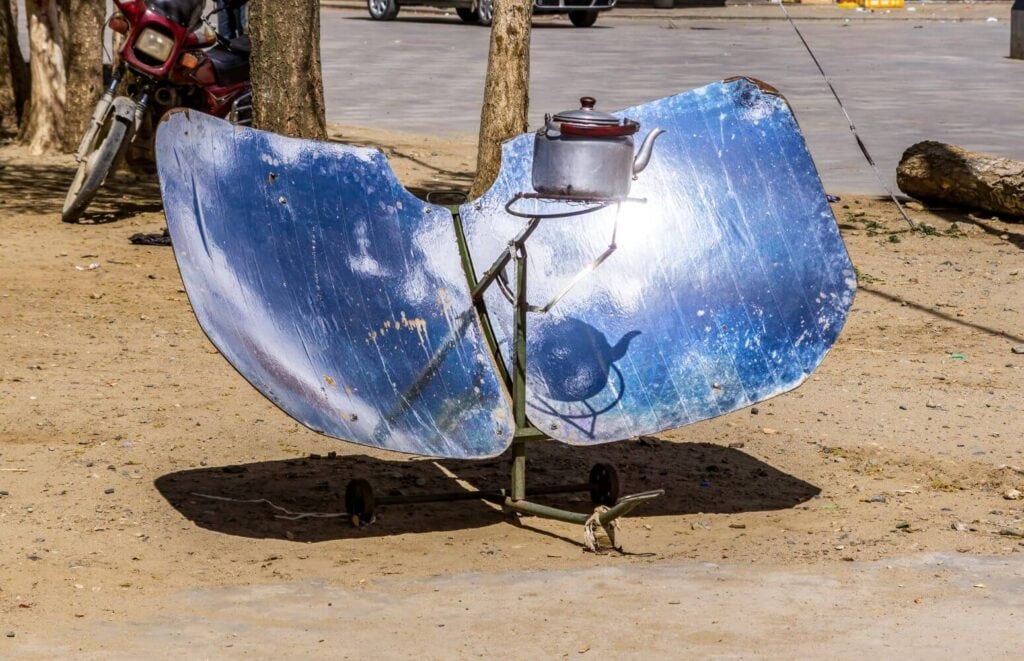
Objective:
To understand and demonstrate the principles of solar energy and heat transfer by building and using a simple solar oven.
Materials:
- A pizza box or a similar sized cardboard box.
- Aluminum foil.
- Clear plastic wrap.
- Black construction paper.
- Tape or glue.
- Scissors or a box cutter.
- A stick or straw to prop open the flap.
- Thermometer (optional, for measuring temperature).
- Food items for cooking (such as s’mores ingredients: marshmallows, chocolate, graham crackers).
Procedure:
- Prepare the Box: Cut a flap in the lid of the box, leaving at least an inch border around the three sides.
- Line with Foil: Cover the inner side of the flap and the inside bottom of the box with aluminum foil, shiny side out. Secure with tape or glue.
- Create an Absorption Surface: Place black construction paper inside the box, covering the bottom to absorb heat.
- Seal with Plastic Wrap: Tape a double layer of clear plastic wrap over the opening created by the flap in the lid. This creates an airtight window that allows sunlight in and retains heat.
- Assemble the Oven: Prop open the flap using a stick or straw to reflect sunlight into the box.
- Cook: Place food items inside the oven and position it in direct sunlight. Monitor the temperature (if a thermometer is used) and observe the cooking process.
Observations:
- Record the temperature inside the oven at intervals, if a thermometer is used.
- Note the time taken for the food to cook or melt.
- Observe the effectiveness of the oven in different weather conditions and at different times of the day.
This experiment demonstrates how solar energy can be harnessed and converted into thermal energy for cooking. The aluminum foil reflects sunlight into the box, while the black paper absorbs this light and converts it to heat. The plastic wrap helps retain this heat, creating an effective cooking environment. This solar oven project not only teaches about renewable energy and sustainability but also provides a practical demonstration of how solar energy can be used in everyday life.
7. Launch Your Own Bottle Rocket: Experimenting with Propulsion and Newton’s Laws
Objective:
To understand the principles of propulsion and Newton’s laws of motion by building and launching a water-powered bottle rocket.
Materials:
- An empty plastic soda bottle (2-liter bottles work well).
- Water.
- A bicycle pump with a needle attachment.
- Cork or stopper that fits tightly in the bottle’s opening.
- Cardboard or construction paper (for fins).
- Tape.
- A launch pad (like a wooden board or flat surface).
- Safety goggles.
Procedure:
- Construct the Rocket: Attach fins made of cardboard or construction paper to the sides of the bottle for stability. The fins should be evenly spaced.
- Prepare for Launch: Fill the bottle one-third with water. Fit the cork or stopper tightly into the bottle’s opening. Attach the bicycle pump needle through the cork.
- Set Up Launch Area: Place the bottle rocket on the launch pad. Make sure the area is clear and secure, and that the rocket is pointing upwards, away from people or fragile objects.
- Pump and Launch: Put on safety goggles. Pump air into the bottle until the pressure forces the cork out and launches the rocket.
- Observe: Watch the trajectory of the rocket and how high and far it goes.
Observations:
- Note how the amount of water affects the rocket’s flight.
- Observe the rocket’s stability and how the fins influence its flight path.
- Record the height and distance achieved in different trials.
This project illustrates the principles of propulsion and Newton’s laws of motion, particularly the third law: for every action, there is an equal and opposite reaction. The water forced out of the bottle (action) propels the rocket upwards (reaction). Adjusting the amount of water can show how the mass of the reaction mass (water) affects the rocket’s performance. The fins help demonstrate the importance of aerodynamics in flight stability. This experiment not only provides a practical application of physics principles but also offers an exciting and visual demonstration of how rockets work.
8. Assemble Archimedes’ Screw: Discovering Ancient Engineering Principles
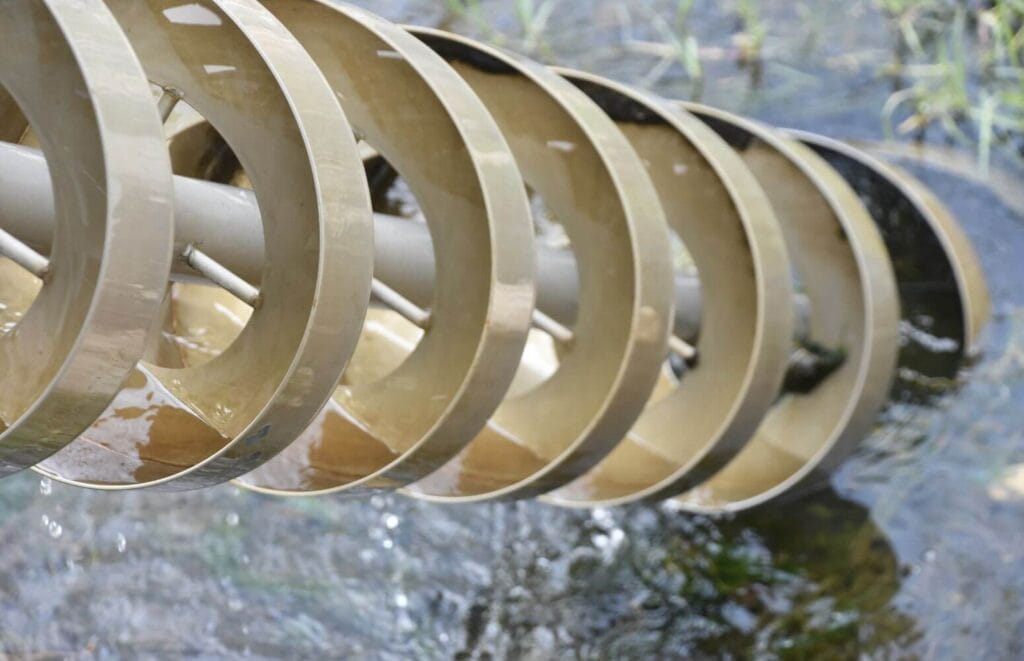
Objective:
To explore ancient engineering principles by constructing and operating a model of Archimedes’ screw, an innovative device for lifting water.
Materials:
- A long, transparent plastic tube (like a flexible aquarium tubing).
- A thin, flexible plastic or rubber tube that can fit inside the larger tube (a garden hose works well).
- A large container or bucket (for water).
- Water.
- Food coloring (optional, to make the water more visible).
- A crank handle (can be made from a wire hanger or similar material).
- Duct tape or strong adhesive.
- Scissors.
Procedure:
- Prepare the Tubes: Cut the thin tube to a length slightly longer than the transparent tube.
- Create the Screw: Coil the thin tube around a rod or similar object to form a spiral, then carefully insert this spiral into the transparent tube.
- Secure the Ends: Use tape or adhesive to seal one end of the transparent tube, ensuring the spiral tube is also sealed within. Leave the other end open.
- Attach the Crank: Attach the crank handle to one end of the spiral tube, allowing for manual rotation.
- Test the Device: Place the open end of the tube in the water container. Turn the crank handle to start lifting water through the spiral and out of the top of the transparent tube.
Observations:
- Observe the movement of water through the screw when the crank is turned.
- Note the efficiency of the screw at different speeds of turning.
- If using food coloring, watch how the colored water moves through the screw, providing a visual representation of the lifting process.
Archimedes’ screw demonstrates an early method of lifting water, showcasing the ingenuity of ancient engineering. The screw works by encasing a helical surface inside a cylinder; when this helix is turned, water is lifted along the spiral to the top. This experiment not only illustrates a principle of moving fluids but also connects students to historical technological advancements. It provides an understanding of how ancient civilizations solved practical problems, highlighting the continuity of human ingenuity in engineering.
9. Construct a Homemade Lava Lamp: Observing Fluid Density and Solubility
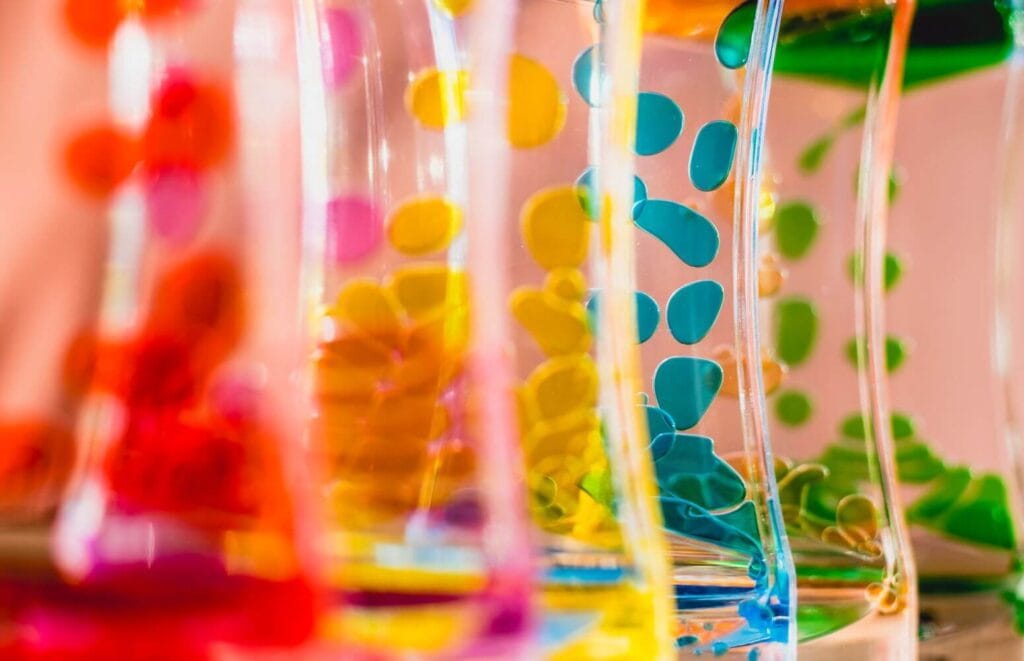
Objective:
To understand the concepts of fluid density and solubility by creating a homemade lava lamp.
Materials:
- A clear plastic or glass bottle (like a soda or water bottle).
- Vegetable oil.
- Water.
- Food coloring.
- Alka-Seltzer tablets (or similar effervescent tablets).
- A flashlight or lamp (optional, for illumination).
Procedure:
- Prepare the Bottle: Fill the bottle about three-quarters full with vegetable oil.
- Add Water: Pour water into the bottle until it’s nearly full, leaving some space at the top. Observe how water and oil do not mix and form two separate layers.
- Color the Water: Add a few drops of food coloring. The drops will pass through the oil and mix with the water.
- Create the Lava: Break an Alka-Seltzer tablet into a few small pieces and drop them into the bottle. Watch as the tablet reacts with the water, creating bubbles that rise and fall.
- Illuminate: Shine a flashlight or lamp through the bottom of the bottle for a more dramatic lava lamp effect.
Observations:
- Notice how the oil and water layers separate due to differences in density.
- Observe the reaction when the Alka-Seltzer is added – how it creates bubbles and causes the colored water to move through the oil.
- Watch how the bubbles rise and fall, and how the movement slows down as the reaction subsides.
This experiment illustrates the principles of fluid density and solubility. Oil is less dense than water, which is why it floats on top. The food coloring dissolves in water but not in oil, highlighting solubility differences. The effervescent reaction of Alka-Seltzer with water creates carbon dioxide gas bubbles. These bubbles attach to the colored water, bringing them to the surface. As the gas escapes, the water droplets sink back down due to gravity and their higher density compared to oil. This simple but captivating homemade lava lamp not only demonstrates scientific principles but also creates an engaging visual experience.
10. Construct a Sturdy Bridge: Learning about Structural Engineering and Stability
Objective:
To understand the basics of structural engineering and the principles of stability by designing and constructing a model bridge.
Materials:
- Craft sticks or popsicle sticks.
- Glue or a hot glue gun.
- String or yarn (optional, for suspension bridges).
- Small weights (like coins or washers) for testing.
- Ruler or measuring tape.
- Cardboard or foam board (for the base and testing platform).
Procedure:
- Design the Bridge: Plan out a design for your bridge. It can be a simple beam bridge, a truss bridge, or even a suspension bridge.
- Build the Foundation: If using, cut out a base from the cardboard or foam board. This will be where your bridge will stand.
- Construct the Bridge: Using craft sticks and glue, construct your bridge according to your design. Make sure all joints are secure and allow enough time for the glue to dry.
- Reinforce Structure: If needed, add additional craft sticks for support, especially in areas that will bear more weight.
- Test the Bridge: Once the bridge is dry and stable, gently place it over a gap (like between two tables or stacks of books). Gradually add weights to the bridge and observe how it holds up.
Observations:
- Note how the design affects the bridge’s ability to hold weight.
- Observe the points at which the bridge starts to bend or break.
- Record the maximum weight your bridge can hold before collapsing.
This project provides a hands-on experience in understanding structural engineering and stability. The design and construction process demonstrates how different shapes and structures distribute and bear loads. For instance, a truss bridge uses triangular units for strength, while a suspension bridge distributes weight through cables. By testing the bridge with weights, students learn about tension, compression, and the importance of proper weight distribution in construction. This activity not only educates about engineering principles but also encourages creativity, planning, and problem-solving skills.
Chemistry and Material Science Projects
11. Explore the science of glow sticks: Understand chemical luminescence
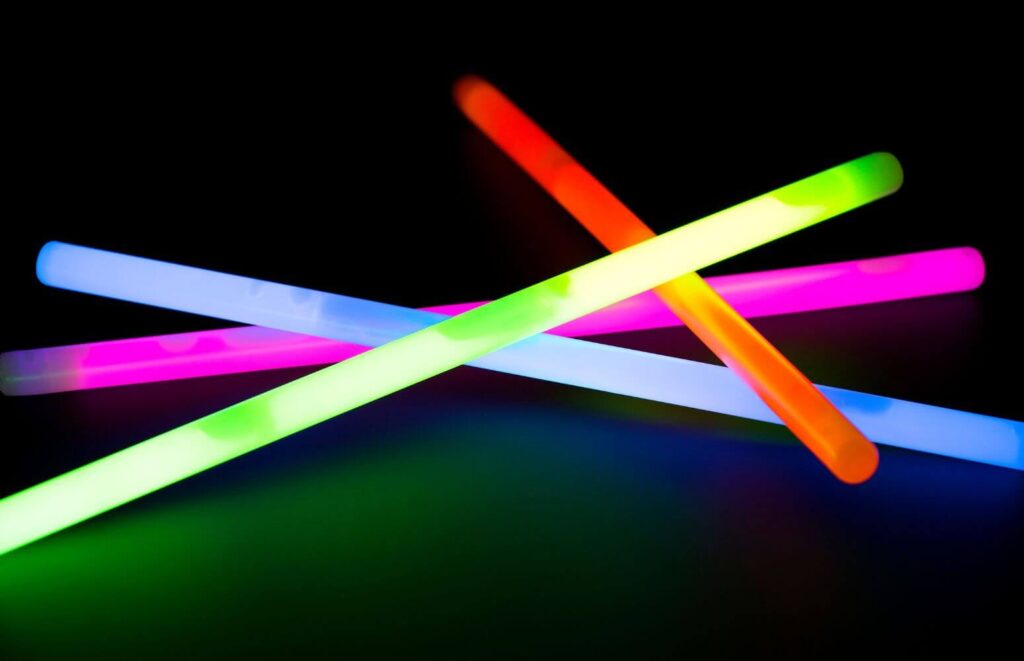
Objective:
To explore the concept of chemical luminescence by investigating how glow sticks work.
Materials:
- Glow sticks (various colors, if available).
- A few glasses or clear containers.
- Hot water (not boiling).
- Cold water (ice water works well).
- A timer or stopwatch.
Procedure:
- Activate Glow Sticks: Bend the glow sticks to break the inner tube, then shake them to mix the chemicals and initiate the luminescent reaction.
- Prepare Water Baths: Fill one container with hot water and another with cold water.
- Observe Temperature Effects: Place one activated glow stick in hot water and another in cold water. Keep one at room temperature as a control.
- Monitor the Reaction: Observe the intensity and duration of the glow in each of the glow sticks over time. Use a timer to track the changes.
Observations:
- Note the difference in brightness between the glow sticks in hot and cold water.
- Record how long the glow lasts in each environment.
- Observe any differences in color intensity or glow duration.
This experiment demonstrates the principles of chemical luminescence, a process where chemical energy is converted into light energy. The brightness and longevity of the glow sticks’ light are affected by temperature. In hot water, the chemical reaction speeds up, making the glow stick brighter but shortening its lifespan. In contrast, the cold water slows down the reaction, resulting in a dimmer light that lasts longer. This activity not only provides insight into chemiluminescence but also illustrates how temperature can affect chemical reactions, offering a practical application of basic chemistry concepts.
12. Discover the Strength of Eggshells: Investigating Composition and Structure
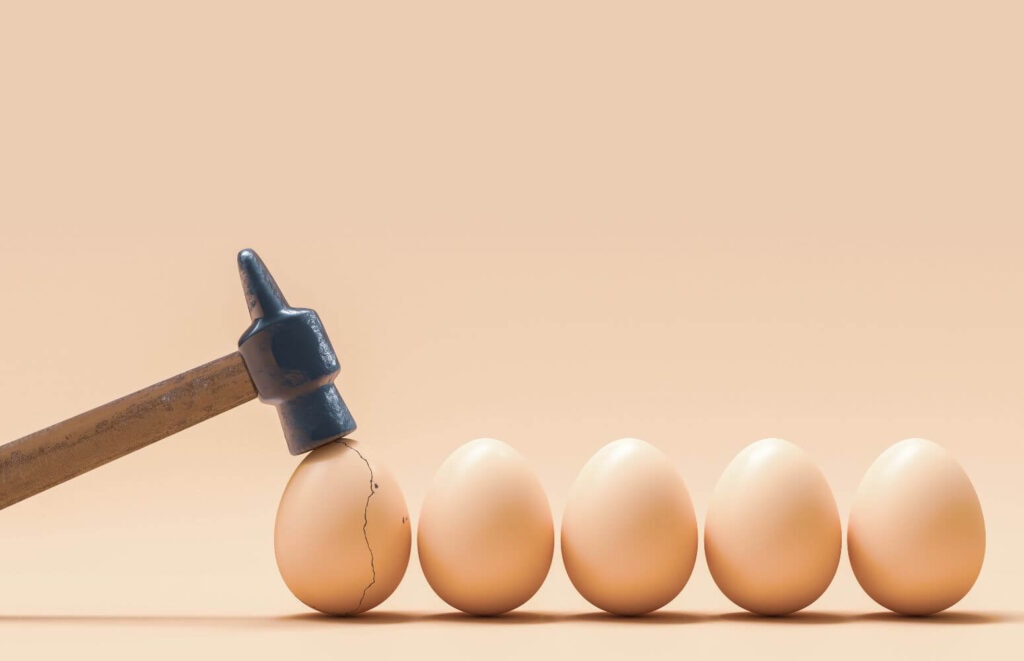
Objective:
To explore the composition and structural strength of eggshells, demonstrating how their unique properties allow them to withstand pressure.
Materials:
- Raw eggs.
- A bowl or container (for holding the egg contents).
- Measuring tape or ruler.
- Weights (like small bags of sugar or flour, or a steadily applied force).
- A flat, sturdy surface.
- Protective sheet or newspaper (for easy cleanup).
Procedure:
- Eggshell Preparation: Carefully crack each egg so that you split it in half. Pour out the contents into the bowl. Clean the inside of the eggshell halves gently with water.
- Measure and Inspect: Use the measuring tape or ruler to measure the dimensions of each eggshell half. Examine and note any visible differences in thickness or structure.
- Weight Test: Place an eggshell half, dome side up, on the flat surface covered with the protective sheet. Gradually add weight on top of the eggshell, either by placing bags of sugar/flour or applying force steadily.
- Observe the Results: Note how much weight each eggshell can support before cracking. Repeat the experiment with different eggshell halves to test for consistency.
Observations:
- Record the amount of weight each eggshell half withstands before breaking.
- Observe the manner in which the eggshells break under pressure.
- Note any correlations between the eggshell’s dimensions and its strength.
This experiment highlights the remarkable strength and structural efficiency of eggshells, despite their apparent fragility. The dome shape of the eggshell distributes weight and pressure evenly, demonstrating an efficient natural design for withstanding force. The composition of the eggshell, primarily made of calcium carbonate, also plays a crucial role in its strength. This simple yet effective demonstration provides insight into biomechanical engineering and the study of natural materials, showing how nature often presents sophisticated solutions to structural challenges.
13. Fill a Bubble with Dry Ice Vapor: Learning about Sublimation and Gas Expansion
Objective:
To understand the process of sublimation and gas expansion by observing the reaction of dry ice in water and capturing the resulting vapor in a soap bubble.
Materials:
- Dry ice (handle with gloves to avoid frostbite).
- A large bowl or container.
- Warm water.
- Liquid dish soap.
- A small piece of cloth or a towel.
- Safety goggles.
- Gloves for handling dry ice.
Procedure:
- Prepare the Setup: Put on safety goggles and gloves. Place a large piece of dry ice in the bowl.
- Add Water: Carefully pour warm water over the dry ice. This will cause the dry ice to sublimate and produce a thick vapor.
- Create Soap Solution: Mix some liquid dish soap with a small amount of water.
- Form a Bubble Film: Dip the cloth in the soap solution and then stretch it across the rim of the bowl, creating a film.
- Observe the Formation of a Bubble: The dry ice vapor will begin to fill the soap film, creating a large bubble.
- Watch the Bubble Grow: Continue to observe as the bubble expands and eventually bursts.
Observations:
- Note the rate at which the dry ice sublimates when it comes into contact with warm water.
- Observe the volume of gas produced and how it fills and expands the soap bubble.
- Pay attention to the size of the bubble before it bursts.
This experiment demonstrates the process of sublimation, where a solid (dry ice, which is solid carbon dioxide) turns directly into a gas without passing through a liquid phase. It also showcases how gases expand when heated, as the warm water accelerates the sublimation of dry ice, producing a large volume of CO2 gas. The soap bubble provides a visible way to observe this gas expansion. This activity not only offers a dramatic visual representation of physical changes and gas laws but also highlights the fascinating properties of carbon dioxide in its solid form.
14. Make Your Own Bouncy Balls: Exploring Polymer Chemistry
Objective:
To understand the principles of polymer chemistry by creating homemade bouncy balls.
Materials:
- Borax laundry booster (sodium borate).
- Warm water.
- White glue (PVA, polyvinyl acetate).
- Cornstarch.
- Food coloring (optional).
- Measuring spoons.
- Small mixing bowls or cups.
- Spoon or stirrer.
Procedure:
- Prepare the Borax Solution: In one bowl, mix a teaspoon of Borax with half a cup of warm water. Stir until mostly dissolved.
- Create the Glue Mixture: In another bowl, mix two tablespoons of white glue with one tablespoon of cornstarch. Add a few drops of food coloring if desired.
- Combine the Mixtures: Slowly add the Borax solution to the glue mixture, stirring continuously. The mixture should begin to harden and form a ball.
- Form the Bouncy Balls: Once the mixture becomes difficult to stir, take it out and knead it with your hands until it’s less sticky and more ball-shaped.
- Test the Bouncy Balls: Try bouncing the balls on different surfaces to see how well they bounce.
Observations:
- Observe how the consistency of the mixture changes as the Borax solution is added to the glue.
- Note the elasticity and bounciness of the finished balls.
- Record any differences in bounciness due to variations in the mixture or the surface on which they’re bounced.
This experiment illustrates the creation of a polymer, which is a long chain of molecules that gives materials their stretchy and bouncy properties. When Borax is added to the glue (PVA), it acts as a cross-linker, binding the glue’s molecules together to form a squishy, elastic solid. This is an example of a chemical reaction forming a new substance with unique properties, in this case, a bouncy ball. This simple yet engaging project not only brings to light concepts of polymer chemistry but also demonstrates the practical application of these principles in everyday materials.
15. Light(ning) It Up Indoors: Demonstrating Static Electricity and Conductivity
Objective:
To explore the concepts of static electricity and conductivity by creating indoor lightning using simple materials.
Materials:
- A balloon.
- A wool or synthetic fabric (like a sweater or scarf).
- Aluminum can or a small metal object.
- A dark room.
- A fluorescent light tube (optional, for a more dramatic effect).
Procedure:
- Generate Static Electricity: Inflate the balloon and tie it off. Rub the balloon vigorously against the fabric for about a minute to build up static electricity.
- Experiment with the Can: Place the aluminum can on a flat surface and slowly bring the charged balloon near it. Observe how the can starts to roll towards the balloon without direct contact.
- Create Indoor Lightning: In a dark room, hold the fluorescent tube in one hand and the charged balloon in the other. Bring the balloon close to the tube but without touching it. Observe any light emission from the tube.
- Enhance the Effect: Try rubbing the balloon again to increase the static charge and repeat the experiment.
Observations:
- Note how the can moves towards the balloon, demonstrating static electricity’s ability to attract objects.
- Observe any glow in the fluorescent tube when brought near the charged balloon, indicating the presence of an electric field.
- Record the distance at which the balloon affects the can and the light tube.
This experiment demonstrates static electricity, an electrical charge built up on the surface of an object (in this case, the balloon). Rubbing the balloon with fabric transfers electrons from the fabric to the balloon, giving it a negative charge. This charge can attract neutral objects (like the can) and can even excite the gases inside a fluorescent tube, causing it to emit light. This simple activity not only illustrates basic principles of electricity and conductivity but also provides a visual and interactive way to understand these concepts.
16. Mix Up Some Magic Sand: Understanding Hydrophobic Materials
Objective:
To explore the properties of hydrophobic materials by creating and experimenting with homemade “magic” sand.
Materials:
- Clean, dry sand (fine playground sand works well).
- Waterproof spray (like a silicone-based spray).
- A baking sheet or tray.
- A bowl or container of water.
- Gloves (for handling the spray).
- Spoons or scoops.
Procedure:
- Prepare the Sand: Spread the sand evenly on the baking sheet.
- Apply Waterproof Spray: Wearing gloves, spray the waterproofing agent over the sand. Ensure you cover the sand evenly. Let it dry for a few minutes.
- Test the Sand: After the sand has dried, scoop some into your hands and then into the bowl of water.
- Observe the Behavior: Gently pour the sand into the water and observe how it behaves. Scoop it out and observe again.
Observations:
- Note how the sand behaves when it is placed in the water. Does it clump together, float, or sink?
- Observe the condition of the sand when it is removed from the water. Is it still dry or has it become wet?
- Experiment with shaping the sand underwater and then removing it to see how it holds its shape.
This experiment demonstrates the concept of hydrophobicity, where a substance repels water. The waterproof spray coats the sand grains with a hydrophobic layer, preventing water from wetting the sand. When submerged, the sand remains dry, and when removed, it returns to its original dry state. This activity not only illustrates an interesting physical property but also provides a hands-on way to understand how hydrophobic coatings work, showcasing their applications in various technologies and everyday materials.
17. Study Water Filtration: Experimenting with Methods of Purifying Water
Objective:
To understand the process of water filtration and purification by constructing a simple water filtration system.
Materials:
- A clear plastic bottle or a large funnel.
- Scissors or a knife (for cutting the bottle).
- Gravel or small stones.
- Clean sand (preferably fine and coarse).
- Activated charcoal (available at pet stores or aquarium supplies).
- Cotton balls or a piece of cloth.
- Dirty water (can be made by mixing tap water with dirt, leaves, and small debris).
- A clean container to catch the filtered water.
- Coffee filters (optional, for extra filtration).
Procedure:
- Prepare the Bottle: Cut the bottom off the plastic bottle. Turn it upside down (the cap side should now be at the bottom). If using a funnel, place it over the container.
- Layer the Filtration Materials: Place cotton balls or cloth at the bottom (cap side). Add a layer of activated charcoal, then layers of fine and coarse sand, and finally a layer of gravel. If using, place a coffee filter between each layer.
- Filter the Water: Slowly pour the dirty water into the top of your filtration system and let it drip into the clean container below.
- Observe the Filtration Process: Watch as the water passes through each layer and comes out clearer from the bottom.
Observations:
- Note the clarity of the water before and after filtration.
- Observe which layers seem to be most effective in removing debris and discoloration.
- Record any differences in filtration speed and efficiency.
This experiment demonstrates the basic principles of water filtration. Each layer in the filtration system serves a purpose: the cotton or cloth catches large particles, the charcoal helps remove odors and impurities, and the sand layers further filter out smaller particles. The gravel prevents the sand from getting out of the filter. While this system can significantly improve the clarity and quality of the water, it’s important to note that it does not make the water safe for drinking, as it does not remove bacteria or viruses. This project not only educates about the importance and methods of water filtration but also raises awareness of water purification challenges in various parts of the world.
18. Replicate a Sunset: Simulating Atmospheric Scattering of Light
Objective:
To understand the phenomenon of atmospheric scattering of light, which causes the colors of a sunset, by simulating it in a controlled experiment.
Materials:
- A clear, large glass or plastic container (like an aquarium or a big jar).
- Water.
- Milk (as a light-scattering particle).
- A flashlight or a small lamp (preferably with a white light).
- A dark room for observation.
Procedure:
- Prepare the Container: Fill the glass or plastic container with water.
- Add Milk: Add a small amount of milk to the water and stir gently. The water should become slightly cloudy but not opaque.
- Create the Sunset Effect: In a dark room, position the flashlight or lamp at one end of the container, shining the light through the water-milk mixture.
- Observe the Colors: Look at the light from different angles — from the side of the container, the other end, and directly above.
- Adjust the Effect: Experiment with different amounts of milk and distances of the light source to see how it affects the color and intensity of the “sunset.”
Observations:
- Note the color changes in the water as you change your viewing angle.
- Observe the effect of adding more or less milk to the water.
- Record how the position of the light source alters the appearance of the light and colors.
This experiment simulates the scattering of light, similar to what happens in Earth’s atmosphere during sunset. The milk particles in the water scatter the light from the flashlight or lamp. Shorter wavelengths (blue and violet) scatter more than longer wavelengths (red and orange), but since our eyes are more sensitive to blue, we see a blue sky during the day. During sunset, the light path through the atmosphere is longer, so more blue and violet light is scattered out of the line of sight, leaving the reds and oranges that we associate with sunset. This simple experiment not only explains a beautiful natural phenomenon but also demonstrates important principles of light and color in our world.
19. Chill with the Fresh Taste of Mint: Exploring Endothermic Reactions
Objective:
To explore the concept of endothermic reactions by experiencing the cooling sensation of mint and understanding the chemistry behind it.
Materials:
- Fresh mint leaves or mint extract.
- Water.
- Sugar (optional, for taste).
- Ice cubes.
- A thermometer (optional, to measure temperature change).
- Small cups or glasses.
- Spoon for stirring.
Procedure:
- Prepare Mint Water: If using fresh mint leaves, crush them slightly to release their oils. Place the leaves or a few drops of mint extract in a cup of water. Add sugar if desired for taste.
- Stir and Observe: Stir the mixture and, if using, place the thermometer in the cup to observe any temperature change.
- Add Ice and Observe Further: Add a few ice cubes to the mint water. Observe the cooling sensation in your mouth when drinking the mixture and watch if there is any further temperature change on the thermometer.
Observations:
- Note any initial temperature change when the mint is added to the water.
- Observe the sensory experience of drinking the mint-infused water, especially any cooling sensation.
- Record any additional temperature change after adding ice.
This experiment demonstrates an endothermic reaction, where a substance (in this case, mint) absorbs heat, producing a cooling sensation. The menthol in mint triggers cold-sensitive receptors in the skin and mucous membranes, giving a feeling of coolness even without an actual temperature decrease. The addition of ice further demonstrates physical cooling. This simple yet engaging activity not only illustrates an interesting chemical reaction but also provides a sensory experience that highlights the connection between chemistry and everyday phenomena.
Biology and Environmental Science Projects
20. Watch the Heart Beat with Marshmallows: Modeling Circulatory System Dynamics
Objective:
To create a simple model to demonstrate the dynamics of the circulatory system and how the heart functions to pump blood throughout the body.
Materials:
- Large marshmallows (to represent the heart).
- Long, flexible straws (for blood vessels).
- Red and blue food coloring (to represent oxygenated and deoxygenated blood).
- Water.
- Two small bowls or cups.
- Scissors.
- Tape.
Procedure:
- Prepare the “Blood”: Mix water with red food coloring in one bowl and blue food coloring in another. These will represent oxygenated and deoxygenated blood, respectively.
- Construct the Heart and Vessels: Use the marshmallows to represent the heart. Cut the straws into different lengths to represent arteries and veins. Connect these straws to the marshmallow using tape. Ensure there are two distinct pathways – one for red and one for blue.
- Simulate Blood Flow: Dip the end of the ‘artery’ straw (red) into the red water and suck the liquid up to the marshmallow heart, but don’t ingest it. Then switch to the ‘vein’ straw (blue) and do the same with the blue water.
- Observe the Model: Watch how the marshmallow (heart) fills and empties as you simulate the heart pumping blood.
Observations:
- Observe how the marshmallow expands and contracts, mimicking a heartbeat.
- Note the direction in which the blood (colored water) moves.
- Pay attention to the difference in colors as they pass through the heart model.
This experiment models how the heart functions in the circulatory system. The marshmallow represents the heart, while the colored water in the straws represents blood moving through the body. The expansion and contraction of the marshmallow simulate how the heart pumps blood: receiving deoxygenated blood (blue) and pumping out oxygenated blood (red). This simple model provides a visual and interactive way to understand the basic principles of the circulatory system and heart dynamics.
21. Find Out if a Dog’s Mouth is Cleaner Than a Human’s: Learning about Microbiology
Objective:
To explore the concept of microbiology by comparing the bacterial content in a dog’s mouth to that in a human’s mouth.
Materials:
- Sterile cotton swabs.
- Petri dishes with agar (pre-prepared agar plates can be purchased).
- Labels and a marker.
- Gloves.
- Incubator or a warm place to store the Petri dishes.
- Hand sanitizer or soap for hygiene after sample collection.
Procedure:
- Sample Collection: Wear gloves for hygiene. Gently swab the inside of a dog’s mouth with one sterile cotton swab. Use another swab to take a sample from a human’s mouth. It’s important to be gentle and cautious, especially with the dog.
- Prepare Petri Dishes: Label the Petri dishes for the dog and human samples. Carefully streak the swabs on the surface of the agar in the corresponding dishes.
- Incubate the Samples: Place the Petri dishes in an incubator or a warm area for bacterial growth. Generally, 24-48 hours is sufficient for visible growth.
- Observe Bacterial Growth: After the incubation period, observe the Petri dishes for bacterial colonies.
Observations:
- Note the number and appearance of bacterial colonies in each Petri dish.
- Compare the differences in growth between the dog’s sample and the human’s sample.
- Observe any distinct colors, shapes, or sizes of bacterial colonies.
This experiment helps understand the basics of microbiology and the presence of bacteria in living organisms. By comparing bacterial growth from a dog’s mouth and a human’s mouth, one can learn about the different types of bacteria present in each. The results can dispel or confirm the common belief about the cleanliness of a dog’s mouth compared to a human’s. It’s important to note that the presence of bacteria doesn’t necessarily correlate with health risk, as most mouth bacteria are harmless and some are even beneficial. This project not only provides a practical experience in microbiological techniques but also offers insights into the diverse world of bacteria that exists in everyday life.
22. Discover the Delights of Decomposition: Observing Organic Matter Breakdown
Objective:
To explore the process of decomposition by observing how organic matter breaks down over time, and understanding the role of decomposition in the ecosystem.
Materials:
- Clear jars or containers with lids.
- Organic matter (such as fruit and vegetable scraps, bread, leaves).
- Soil.
- Water.
- A notebook and pen for recording observations.
- Gloves for handling organic materials.
Procedure:
- Prepare the Containers: Fill each jar with a layer of soil.
- Add Organic Matter: Place different types of organic matter on top of the soil in each jar. Use a variety of materials for comparison.
- Moisten the Soil: Lightly water the soil to create a moist environment, conducive to decomposition. Be careful not to overwater.
- Seal and Store: Close the jars and store them in a safe place where they can be left undisturbed but observed regularly.
- Observe and Record: Over several weeks, observe the changes in the organic matter. Record observations regarding smell, appearance, and any visible signs of decomposition or mold growth.
Observations:
- Note the rate at which different types of organic matter decompose.
- Observe changes in color, texture, and form of the materials over time.
- Record any presence of mold or fungi and their effects on the decomposition process.
This experiment provides insight into the natural process of decomposition, a crucial part of the ecosystem that recycles nutrients back into the soil. Different types of organic matter decompose at different rates depending on their composition. Factors like moisture, temperature, and the presence of decomposers (like bacteria and fungi) play significant roles in how quickly materials break down. This project not only illustrates an essential biological process but also highlights the importance of decomposition in maintaining soil health and supporting plant growth.
23. Explore Basic Genetics: Understanding Heredity and DNA
Objective:
To introduce basic concepts of genetics, including heredity and DNA, by engaging in simple, illustrative exercises that demonstrate how traits are passed from one generation to the next.
Materials:
- Colored beads (representing different genetic traits).
- Small bags or containers (representing cells).
- Paper and pen for recording data and observations.
- A basic genetics chart or guide (to explain dominant and recessive traits).
- Pictures or descriptions of traits for a hypothetical organism (e.g., a creature with traits like eye color, wing shape, etc.).
Procedure:
- Understand Genetic Traits: Use the genetics chart to understand dominant and recessive traits. Assign each color bead a specific trait (e.g., blue for blue eyes, green for green eyes).
- Create Parent Genotypes: Randomly pick beads to create a set of ‘genes’ for two parent organisms. Place these beads in separate bags, representing each parent’s genotype.
- Simulate Reproduction: Combine beads from each parent into a new bag to represent their offspring. Ensure that the combination reflects basic genetic principles (like dominant and recessive traits).
- Determine Offspring Traits: Based on the combination of beads, determine the traits of the offspring. Record these traits.
- Repeat for Variation: Create multiple offspring to observe variations in traits.
Observations:
- Note the traits of the parents and how they are passed to the offspring.
- Observe how dominant and recessive traits affect the offspring’s characteristics.
- Record any patterns or variations in the traits of multiple offspring.
This experiment provides a basic understanding of genetics, heredity, and the role of DNA in passing traits from parents to offspring. It demonstrates how genetic information is carried and can vary, resulting in different traits in the offspring. The activity highlights the concept of dominant and recessive genes and how they play a crucial role in determining the characteristics of an organism. Through this simple model, students can grasp the fundamental principles of genetics and the complexity of heredity.
24. Design a Biosphere: Creating a Self-Sustaining Ecosystem
Objective:
To understand the principles of ecology and sustainability by designing and building a miniature biosphere, a self-contained and self-sustaining ecosystem.
Materials:
- A large, clear, sealable jar or aquarium.
- Soil.
- Small plants (such as mosses or small ferns).
- Water.
- Small rocks or pebbles.
- Optional: small aquatic or land organisms (like snails or small insects).
- Charcoal (to help with filtration and odor control).
- A small shovel or spoon for planting.
Procedure:
- Layer the Jar: Start by placing a layer of small rocks or pebbles at the bottom of the jar. This will serve as drainage for excess water. Over this, add a thin layer of charcoal.
- Add Soil: Place a layer of soil on top of the charcoal. The thickness of the soil layer should be enough to support the plants’ roots.
- Plant: Plant the small plants into the soil. Choose a variety of plants to mimic natural diversity. If including organisms, introduce them carefully into the environment.
- Water the Ecosystem: Add enough water to moisten the soil but avoid making it overly soggy.
- Seal the Biosphere: Once everything is in place, seal the jar. Place your biosphere in a location where it will receive indirect sunlight.
- Observe: Over the following days and weeks, observe changes in the biosphere. Look for signs of plant growth, moisture condensation, and the behavior of any organisms.
Observations:
- Note the health and growth of the plants over time.
- Observe the water cycle within the jar, including condensation and any changes in soil moisture.
- If organisms are included, monitor their activities and any changes in their population.
- Record any changes in the overall ecosystem, such as plant growth, decay, or moisture levels.
Creating a biosphere is an excellent way to understand the complexity and interdependence of ecosystems. This project demonstrates the delicate balance required to maintain a self-sustaining environment. It illustrates key ecological concepts like the water cycle, the role of producers and decomposers, and the importance of biodiversity. Through observation and maintenance of the biosphere, students gain a deeper appreciation for ecological balance and the fragility of ecosystems.
25. Investigate Osmosis with Gummy Bears: Learning about Cell Membranes and Osmosis
Objective:
To demonstrate the process of osmosis, the movement of water across a semi-permeable membrane, using gummy bears as a fun and engaging model.
Materials:
- Gummy bears (preferably of different colors for variation).
- Water.
- Salt.
- Sugar.
- Several clear containers or cups.
- A ruler or measuring tape.
- A notebook and pen for recording observations.
Procedure:
- Prepare Solutions: In one container, dissolve a significant amount of salt in water to create a salty solution. In another, dissolve sugar in water to make a sugary solution. Have a third container with plain water.
- Measure Gummy Bears: Before placing them in the solutions, measure and record the size of each gummy bear.
- Soak Gummy Bears: Place gummy bears in each solution – one in saltwater, one in sugar water, and one in plain water. Ensure they are fully submerged.
- Wait and Observe: Leave the gummy bears in the solutions for several hours or overnight.
- Measure Again: After the waiting period, remove the gummy bears and measure them again. Note any changes in size or texture.
Observations:
- Record the initial and final measurements of the gummy bears.
- Note any changes in their appearance or texture.
- Observe the differences in swelling or shrinking in different solutions.
This experiment illustrates the concept of osmosis. The gummy bear acts like a cell with a semi-permeable membrane, allowing water to move in and out. In plain water, water moves into the gummy bear, causing it to swell. In the saltwater solution, water moves out of the gummy bear to the more concentrated solution, causing the bear to shrink. The sugar water’s effect can vary depending on its concentration compared to the gummy bear’s. This simple experiment provides a visual and tangible example of osmosis, an important process in cell biology.
26. Employ a Rescue Mission with LEGO: Simulating Environmental Disaster Response
Objective:
To simulate an environmental disaster response scenario using LEGO, aiming to teach problem-solving, the importance of quick response during disasters, and the impact of such events on communities and environments.
Materials:
- LEGO bricks and figures.
- A large tray or a sectioned-off area to create a disaster scenario (e.g., an area designated as a flood zone, earthquake-hit area, etc.).
- Optional: materials to simulate natural elements (such as water, sand, or small pebbles).
- Timer or stopwatch.
- A notebook and pen for planning and recording observations.
Procedure:
- Set Up the Scenario: Create a disaster scene using the LEGO bricks and figures. This could be a flood, earthquake, wildfire, or any other environmental disaster. Use additional materials to enhance the realism (e.g., water for floods, sand for earthquakes).
- Plan the Response: Decide what the primary objectives are in the response (e.g., rescuing LEGO figures, rebuilding structures, preventing further damage).
- Execute the Mission: Using additional LEGO pieces or figures, simulate a disaster response. This could involve moving figures to safety, rebuilding structures, or creating barriers against further damage.
- Time the Response: Use a timer to add urgency to the scenario. Challenge yourself or others to complete the objectives within a set time.
- Observe and Adapt: If the first response doesn’t work as planned, try different strategies and observe what methods are most effective.
Observations:
- Note the strategies used in the disaster response and their effectiveness.
- Observe how quickly and efficiently the objectives are met.
- Record any challenges faced during the simulation and how they were overcome.
This activity provides a hands-on experience in understanding the complexities of environmental disaster response. It highlights the importance of quick thinking, strategic planning, and resource management in crisis situations. Through this simulation, participants can gain a greater appreciation of the challenges faced by disaster response teams and the critical role they play in mitigating the effects of environmental disasters on communities. Additionally, it underscores the importance of preparedness and the impact of environmental events on both human populations and ecosystems.
Earth Science and Astronomy Projects
27. Peel an Orange to Understand Plate Tectonics: Modeling Earth’s Geological Processes
Objective:
To use an orange as a model to demonstrate the concepts of plate tectonics, including the structure of Earth’s surface and the movement of tectonic plates.
Materials:
- A large, round orange with a thick peel.
- A knife or other tool for safely cutting the orange.
- A marker or pen (optional, to label the tectonic plates).
- Paper and pen for recording observations.
Procedure:
- Prepare the Orange: The orange represents Earth. Begin by carefully cutting the peel into sections without cutting the orange itself. These sections will represent Earth’s tectonic plates.
- Peel the Orange: Gently peel off each section of the orange peel. Try to keep the peel sections as large as possible.
- Examine the Inside: Observe the surface of the orange once the peel is removed. This represents the mantle, the layer beneath Earth’s crust.
- Reassemble the Peel: Put the peel sections back together around the orange. Observe how they fit together and how some sections overlap or have gaps between them.
- Simulate Plate Movement: Slowly move the peel sections against each other, demonstrating how tectonic plates shift over Earth’s mantle.
Observations:
- Note how the peel sections don’t perfectly fit together once they are removed and then reassembled, simulating the dynamic nature of Earth’s tectonic plates.
- Observe the overlapping and gaps, representing plate boundaries where geological events like earthquakes and volcanic eruptions occur.
- Record how the movement of the peel pieces over the surface of the orange can model continental drift and plate tectonics.
This experiment offers a tangible way to understand the basics of plate tectonics. The orange peel acts as a simple model for Earth’s crust, divided into plates that float over the mantle. By manipulating the peel, students can visualize how the movement of these plates shapes Earth’s surface, leading to geological phenomena such as earthquakes, volcanoes, and the formation of mountain ranges. This model also provides insight into how the continents have drifted and changed position over millions of years, illustrating the dynamic nature of our planet’s surface.
28. Erupt a Salt Dough Volcano: Demonstrating Volcanic Eruptions
Objective:
To create a model volcano using salt dough and demonstrate a simulated volcanic eruption, providing a hands-on experience to understand the mechanics of volcanoes and the chemical reaction behind eruptions.
Materials:
- For the Salt Dough: 2 cups of flour, 1 cup of salt, 1 cup of water, mixing bowl.
- Paint and brushes for decoration (optional).
- A small bottle or a plastic cup (to act as the volcano’s vent).
- Baking soda.
- Vinegar.
- Red food coloring (to simulate lava).
- Dish soap (to create a more explosive reaction).
- Tray or a large pan (to contain the eruption).
Procedure:
- Make the Salt Dough: Mix flour, salt, and water in a bowl to create a moldable dough. Add more water or flour as needed to get the right consistency.
- Build the Volcano: Place the small bottle or cup in the center of the tray. Mold the salt dough around it to form a volcano shape, ensuring the top of the bottle/cup is open. Allow the dough to dry, and optionally paint it for a more realistic look.
- Prepare the Eruption Mixture: In the bottle/cup, mix a few tablespoons of baking soda, a squirt of dish soap, and red food coloring.
- Erupt the Volcano: When ready to demonstrate, pour vinegar into the bottle/cup and watch as the volcano erupts!
Observations:
- Note the reaction when the vinegar (acid) mixes with the baking soda (base).
- Observe the height and duration of the eruption.
- Watch how the mixture flows down the volcano, simulating lava flow.
This experiment models a volcanic eruption, demonstrating both the geological structure of a volcano and the chemical reaction that simulates an eruption. The vinegar and baking soda reaction creates a foamy, explosive mixture, representing how pressure builds up in real volcanoes and leads to eruptions. This activity not only provides a visual and dynamic representation of volcanic activity but also introduces basic chemical reactions, offering an engaging way to learn about Earth sciences and geology.
29. Stop Soil Erosion with Plants: Studying Environmental Conservation
Objective:
To demonstrate the effectiveness of plants in preventing soil erosion, thereby highlighting the importance of vegetation in environmental conservation and land management.
Materials:
- Two large, shallow trays or containers.
- Soil to fill the trays.
- A variety of small plants or grass seeds.
- Watering can or spray bottle.
- A fan or hairdryer (to simulate wind).
- A pitcher of water (to simulate rain).
- Ruler (to create an incline).
Procedure:
- Prepare the Trays: Fill both trays with an equal amount of soil, leveled to the same height.
- Plant Vegetation in One Tray: In one tray, plant the small plants or sow the grass seeds evenly across the soil. Leave the other tray with just soil as a control.
- Water the Plants: Water the planted tray regularly to ensure the plants or seeds grow. Keep the soil tray moist but not overly wet.
- Simulate Erosion: Once the plants have grown a bit (or after a couple of weeks if using seeds), simulate wind erosion using the fan or hairdryer on both trays. Then, gently tilt the trays using a ruler and simulate rain erosion by pouring water over the top of both trays.
- Observe and Compare: Watch how the soil behaves in both trays. Pay particular attention to the amount of soil that gets washed or blown away.
Observations:
- Note the difference in soil erosion between the tray with plants and the one without.
- Observe how well the plant roots hold the soil together.
- Record any visible changes in the soil level or condition in each tray.
This experiment demonstrates the crucial role of vegetation in preventing soil erosion. The roots of the plants in the vegetated tray help to hold the soil together, making it more resistant to the forces of wind and water. In contrast, the tray without plants is likely to experience significant soil displacement. This simple yet effective demonstration underscores the importance of plant cover in protecting soil resources, reducing erosion, and maintaining ecological balance. It highlights an essential aspect of environmental conservation and the need for sustainable land management practices.
30. Model Constellations: Learning about Stars and Celestial Navigation
Objective:
To create models of various constellations to understand their patterns and significance, and to introduce the basics of celestial navigation and astronomy.
Materials:
- Black construction paper or cardboard.
- A pencil or chalk for drawing constellations.
- A pushpin or small nail.
- A flashlight or small light source.
- Star maps or constellation guides.
- Optional: a compass for orientation.
Procedure:
- Choose Constellations: Using star maps or constellation guides, choose several constellations to model. These could include well-known ones like Orion, Ursa Major (the Big Dipper), or Cassiopeia.
- Draw Constellations: On the black construction paper or cardboard, use a pencil or chalk to draw the chosen constellations. Represent the stars with dots.
- Puncture the Paper: Use a pushpin or small nail to puncture the paper at each star point. Make the holes large enough for light to pass through.
- Illuminate the Constellations: In a dark room, hold the constellation model up and shine a flashlight from behind. This will project the constellation onto the wall or ceiling.
- Learn and Navigate: Discuss the stories or myths associated with each constellation. If a compass is available, relate the constellations to their direction and discuss how they can be used for navigation.
Observations:
- Observe the patterns formed by different constellations and their relative sizes.
- Note the brightness of different stars in the constellation based on the size of the holes.
- If using a compass, observe the orientation of each constellation.
This project provides a hands-on way to learn about constellations, their patterns, and their significance in celestial navigation and astronomy. By creating and observing these models, students gain a better understanding of how constellations have been used historically for navigation and the stories and myths associated with them. This activity not only teaches about the stars and constellations but also fosters an appreciation for the night sky and its role in different cultures and societies.
31. Defy Gravity with Floating Water: Experimenting with Surface Tension
Objective:
To explore the concept of surface tension by creating an experiment that demonstrates how water can seemingly defy gravity through cohesion and adhesion properties.
Materials:
- A clean glass or clear plastic cup.
- Water.
- A piece of cardboard or thick paper.
- A sink or basin (for potential spills).
- Food coloring (optional, for visual effect).
Procedure:
- Fill the Cup: Fill the glass or cup to the brim with water. Add a drop of food coloring if desired for better visibility.
- Prepare the Cardboard: Place the piece of cardboard over the top of the cup, ensuring it covers the entire opening.
- Flip the Cup: With one hand firmly holding the cardboard in place, quickly and carefully invert the cup. Do this over a sink or basin to catch any spills.
- Observe Gravity Defiance: Once the cup is inverted, slowly remove your hand from the cardboard. If done correctly, the water should stay in the cup, with the cardboard appearing to ‘stick’ to it.
- Experiment Further: Try tilting the cup slightly to observe how the water remains in place.
Observations:
- Note the behavior of the water and the cardboard during and after flipping the cup.
- Observe the angle at which the water starts to spill when the cup is tilted.
- Record any factors (like the smoothness of the cardboard and the speed of flipping the cup) that affect the outcome of the experiment.
This experiment demonstrates the principle of surface tension, where the cohesion of water molecules creates a ‘skin’ at the surface strong enough to hold the cardboard and water in place against gravity. The adhesion between the water molecules and the cardboard also contributes to this effect. This simple yet surprising demonstration not only illustrates an important physical property of water but also provides a tangible example of how seemingly everyday materials and actions can defy expectations, encouraging curiosity and further exploration into the principles of physics and chemistry.
Fun and Interactive Projects
32. Set Off a Chain Reaction: Learning about Cause and Effect
Objective:
To understand the concept of cause and effect by creating a chain reaction using everyday objects. This project aims to demonstrate how one action can trigger a series of events.
Materials:
- Dominoes or similar stackable objects (like books or playing cards).
- Marbles or small balls.
- Ramps created from cardboard or books.
- Other creative elements (like toy cars, paper tubes, etc.).
- A large, flat surface (like a floor or a long table).
Procedure:
- Plan the Chain Reaction: Start by envisioning how you want your chain reaction to unfold. Plan the order of events and how each element will trigger the next.
- Set Up the First Segment: Begin by setting up your first chain reaction element, such as a line of dominoes.
- Add Complexity: Continue adding elements to your chain reaction. For instance, the last domino could hit a marble that rolls down a ramp, which then hits a toy car, and so on.
- Test and Adjust: Once your setup is complete, test it by initiating the first action (like tipping the first domino). Observe what happens and make adjustments as needed for smooth operation.
- Observe the Final Outcome: After successful testing and adjustments, observe the final run and note the sequence of events.
Observations:
- Record how each element in the chain reaction affects the next.
- Note any points where the chain reaction stops or doesn’t proceed as expected, and how modifications can rectify these issues.
- Observe the complexity of the reactions and the effectiveness of different elements in transferring motion or energy.
This project demonstrates the fundamental concept of cause and effect, showing how one action can lead to a sequence of events. It encourages problem-solving and critical thinking, as adjustments and creativity are required to keep the chain reaction flowing smoothly. Additionally, it provides insight into basic physics principles such as momentum, energy transfer, and domino effect. This fun and interactive experiment not only educates about scientific principles but also fosters creativity and hands-on learning.
33. Find Out if Water Conducts Electricity: Conducting Safe Electrical Experiments
Objective:
To explore the concept of electrical conductivity by testing whether water can conduct electricity in a safe and controlled environment.
Materials:
- A small light bulb (like a Christmas light bulb) or a small LED.
- Two wires with alligator clips at the ends.
- A battery or a small battery pack (suitable for the bulb).
- A glass of water.
- Table salt.
- A plastic or wooden spoon for stirring.
- Safety goggles.
Procedure:
- Set Up the Circuit: Connect one wire to the negative end of the battery and the other to the positive end. Attach the free end of one wire to the base of the bulb and leave the other wire free for now.
- Test the Bulb: Briefly touch the free wire to the base of the bulb to ensure it lights up, indicating a complete circuit.
- Prepare the Water: Fill the glass with water. Stir in a small amount of table salt to create a saltwater solution.
- Conduct the Experiment: Dip the free ends of both wires into the water, but do not let them touch each other. Observe whether the bulb lights up.
- Observe the Reaction: If the bulb doesn’t light up, gradually add more salt to the water and observe any changes.
Observations:
- Record whether the bulb lights up when the wires are in plain water and in saltwater.
- Note the brightness of the bulb in different solutions.
- Observe how adding salt to the water affects the bulb’s ability to light up.
This experiment demonstrates the concept of electrical conductivity in water. Pure water is a poor conductor of electricity, but when salt (an electrolyte) is added, it dissociates into ions which facilitate the conduction of electricity, allowing the circuit to complete and the bulb to light up. This safe and simple experiment not only illustrates basic principles of electricity and conductivity but also emphasizes the importance of ions in conducting electricity in solutions. It provides a practical understanding of why saltwater is a better conductor than pure water, linking to broader concepts in chemistry and physics.
34. Float a Marker Man: Understanding Principles of Buoyancy
Objective:
To explore the principles of buoyancy by creating a simple floating figure, often referred to as a “marker man,” and observing how it behaves in water.
Materials:
- Dry-erase markers.
- A smooth, flat surface made of a non-porous material (like a whiteboard or a ceramic plate).
- A large, clear container filled with water (like a glass bowl or an aquarium).
- Paper towels for cleanup.
Procedure:
- Draw the Figure: Use a dry-erase marker to draw a simple stick figure on the flat, non-porous surface. The figure should be drawn with a solid line without any breaks.
- Prepare the Water Container: Fill the container with water, ensuring there’s enough room for the figure to float without touching the sides.
- Release the Figure: Carefully and slowly, pour water onto the surface to gently lift the marker figure off the surface and into the water.
- Observe the Figure: Watch as the figure floats on the surface of the water. Observe its movements and how it interacts with the container’s edges or other objects.
Observations:
- Note how the figure detaches from the surface and floats.
- Observe the buoyancy of the figure – whether it sinks, floats, or changes its form.
- Record any changes in the figure’s shape or position over time.
This experiment demonstrates the principles of buoyancy and surface tension. The marker ink, containing certain oils and pigments, is less dense than water and, combined with the cohesive properties of the ink, allows the figure to float. Additionally, the surface tension of water helps to keep the figure on the surface. This simple yet engaging activity provides a visual and interactive way to understand these fundamental physics concepts and offers insight into how different materials interact with water.
35. Make a Foil Bug Walk on Water: Exploring Surface Tension and Water Properties
Objective:
To demonstrate the concept of surface tension in water by creating a small aluminum foil “bug” and observing how it can seemingly walk or float on the surface of water without sinking.
Materials:
- Thin aluminum foil.
- Scissors.
- A bowl or dish filled with water.
- Dish soap or pepper (optional, to further demonstrate surface tension properties).
- Toothpick or small stick (if using dish soap).
Procedure:
- Create the Foil Bug: Cut a small piece of aluminum foil and shape it into a flat, lightweight bug-like figure. The size should be small enough to fit easily on the surface of the water in your bowl or dish.
- Prepare the Water Surface: Fill the bowl or dish with water, making sure it’s still and undisturbed.
- Place the Foil Bug on Water: Gently place the foil bug on the surface of the water. Be careful not to break the water’s surface tension.
- Observe the Foil Bug: Watch how the foil bug stays afloat and moves slightly on the water surface.
- Experiment with Surface Tension: Optionally, you can demonstrate the effect of surfactants on surface tension. If using pepper, sprinkle some on the water’s surface and then touch it with a toothpick with a small amount of dish soap on the tip.
Observations:
- Note how the foil bug is able to stay afloat due to surface tension.
- Observe the movement of the bug and any ripples in the water.
- If using the dish soap method, observe how the soap affects the surface tension and the movement of the foil bug or pepper.
This experiment demonstrates the concept of surface tension, a property of water where the surface acts like a thin elastic sheet. The lightweight foil bug, due to its small size and weight, is supported by this surface tension, allowing it to float and move on the water’s surface. The addition of dish soap reduces the water’s surface tension, illustrating how surfactants can alter the water’s properties. This simple yet effective demonstration not only provides insight into a fundamental property of water but also illustrates how delicate the balance of forces in nature can be.
36. Blow Up a Balloon—Without Blowing: Chemical Reactions Producing Gas
Objective:
To demonstrate a chemical reaction that produces gas, which can inflate a balloon without the need for blowing air into it, thereby illustrating basic principles of chemistry and gas expansion.
Materials:
- A small bottle or a narrow-necked flask.
- Baking soda (sodium bicarbonate).
- Vinegar (acetic acid).
- A balloon.
- A funnel (optional, for ease of adding baking soda to the balloon).
Procedure:
- Prepare the Bottle: Fill the bottle about one-third full with vinegar.
- Attach the Balloon: Stretch the opening of the balloon and carefully fit the funnel into it. Pour two to three tablespoons of baking soda into the balloon (remove the funnel afterwards).
- Attach the Balloon to the Bottle: Carefully stretch the open end of the balloon over the mouth of the bottle, making sure not to let any baking soda fall into the bottle yet.
- Start the Reaction: Lift the balloon, allowing the baking soda to fall into the vinegar in the bottle.
- Observe the Reaction: Watch as the balloon begins to inflate. Observe the reaction between the baking soda and vinegar in the bottle.
Observations:
- Note the immediate reaction when baking soda mixes with vinegar, producing carbon dioxide gas.
- Observe the rate at which the balloon inflates.
- Record the size to which the balloon inflates and how long it takes to reach that size.
This experiment illustrates a chemical reaction between an acid (vinegar) and a base (baking soda) that produces a gas (carbon dioxide). The reaction between these two substances creates enough gas to inflate the balloon. This demonstrates not only the production of gases in chemical reactions but also how gases occupy space, expanding to fill the available volume. This fun and interactive experiment provides a clear and tangible example of chemical reactions and gas laws, making it an excellent educational tool for introducing students to basic chemistry concepts.
37. Use Rubber Bands to Sound Out Acoustics: Studying Sound Waves and Vibrations
Objective:
To explore the principles of sound, waves, and vibrations by using rubber bands to create a simple musical instrument. This experiment aims to demonstrate how variations in tension and thickness of rubber bands affect sound production.
Materials:
- A sturdy box (like a shoebox or a small cardboard box).
- Rubber bands of various sizes and thicknesses.
- Scissors (to modify the box, if needed).
- A ruler or measuring tape (optional, for precision in rubber band placement).
- Paper and pen for recording observations.
Procedure:
- Prepare the Box: If necessary, cut a hole in the center of the shoebox lid or the top of the box to enhance sound resonance.
- Attach the Rubber Bands: Stretch the rubber bands around the box, placing them over the hole. Ensure the bands are of different thicknesses and tensions for varied sound.
- Pluck the Bands: Gently pluck each rubber band and listen to the sound it produces. Note the pitch and volume of each band.
- Experiment with Variables: Adjust the tension of the bands by stretching them more or less and observe how this changes the sound. Experiment with different configurations and numbers of bands.
- Record Observations: Make note of how each rubber band’s characteristics (thickness, tension, length) affect the sound it produces.
Observations:
- Record the differences in pitch between thicker and thinner rubber bands.
- Note how the tension of each band affects the sound’s pitch and volume.
- Observe the change in sound when multiple bands are plucked together or when their arrangement is altered.
This experiment demonstrates how sound is produced through vibrations and how various factors like tension, thickness, and length of the rubber bands influence these vibrations. Thicker bands generally produce lower pitches, while tighter bands yield higher pitches. This activity provides a basic understanding of acoustics, sound waves, and the physics of musical instruments, illustrating the relationship between physical properties and sound production. Additionally, it encourages experimental thinking and hands-on interaction with fundamental principles of physics and music.
38. Whip Up a Tornado in a Bottle: Creating a Vortex and Learning About Weather Patterns
Objective:
To create a water vortex that simulates a tornado’s behavior in a bottle, thereby providing a visual and interactive way to understand the dynamics of a tornado and general weather patterns.
Materials:
- Two 2-liter clear plastic bottles.
- Water.
- A washer or a specially designed tornado tube connector.
- Glitter or food coloring (optional, for visual effect).
- Duct tape.
Procedure:
- Fill One Bottle: Fill one of the 2-liter bottles about three-quarters full with water. Add a few drops of food coloring or some glitter for visual effect if desired.
- Connect the Bottles: Place the washer over the mouth of the bottle with water. If using a tornado tube connector, screw it onto the bottle. Then, invert the second bottle and screw its mouth onto the other side of the washer or connector. Secure the connection with duct tape to prevent leaks.
- Create the Tornado: Turn the bottles so that the one with water is on top. Swirl the top bottle in a circular motion and then set it down. Watch as a vortex forms in the bottom bottle.
- Observe the Vortex: Observe the formation and shape of the vortex as the water drains into the lower bottle.
Observations:
- Note how the swirling motion creates a vortex, simulating a tornado’s funnel.
- Observe the shape and speed of the vortex.
- Record the time it takes for all the water to transfer from the top bottle to the bottom.
This experiment demonstrates how a vortex forms, simulating the natural behavior of tornadoes. Swirling the bottle creates angular momentum, causing the water to spin rapidly around the center of the vortex due to centripetal force. This activity provides a visual representation of how tornadoes form, with air spinning around a low-pressure center. It also illustrates basic principles of fluid dynamics and weather patterns, offering an engaging and educational exploration into meteorological phenomena.
39. Munch on Statistical M&Ms: Teaching Probability and Statistics Through Candy
Objective:
To use M&Ms (or any multi-colored candy) as a fun and tasty way to introduce basic concepts of probability and statistics, including data collection, analysis, and interpretation.
Materials:
- A large bag of M&Ms or any similar candy with multiple colors.
- Paper and pen for recording data.
- Bowls or containers for sorting candy.
- A calculator (optional, for more complex calculations).
Procedure:
- Sort the Candy: Pour a handful of M&Ms into a bowl. Sort the candies by color into different containers.
- Record the Data: Count the number of M&Ms in each group and the total number of candies. Record these numbers.
- Calculate Probabilities: Calculate the probability of randomly picking a candy of each color from the bowl. Use the formula: Probability = (Number of a certain color M&M) / (Total number of M&Ms).
- Predict Outcomes: Based on the probabilities, make predictions. For example, predict which color will most likely be picked first.
- Test Predictions: Without looking, pick candies from the bowl one at a time to see if the outcomes match the predictions.
- Analyze Results: Compare the actual outcomes with the predicted probabilities. Discuss any variations.
Observations:
- Note the distribution of colors and how it affects the probability of picking a certain color.
- Observe how closely the experimental results (random picking) match the theoretical probabilities.
- Record the variations in each trial, if repeated multiple times.
This activity provides a practical and enjoyable way to understand and apply the principles of probability and statistics. Sorting and counting the candies aid in data collection and analysis, while calculating probabilities and making predictions introduce basic statistical concepts. The hands-on experience of testing these probabilities with actual candies helps in comprehending abstract concepts, making statistics more accessible and interesting. This experiment not only teaches fundamental math skills but also demonstrates the real-world application of these concepts in a fun and engaging manner.
Conclusion
As we wrap up this exciting journey through the world of 5th-grade science projects, we hope you’ve found inspiration and knowledge in each activity. From constructing LEGO zip-lines to observing the delicate balance of a self-sustaining biosphere, these projects are more than just fun activities; they are gateways to understanding the fundamental principles of science and engineering.
We encourage you, students and parents alike, to dive into these experiments. Explore the wonders of physics, unravel the mysteries of chemistry, and delve into the intriguing realms of biology and earth sciences. Each project is a step towards nurturing curiosity and a love for learning.
Don’t forget to share your experiences and successes with these projects! We’d love to hear how your homemade lava lamp turned out or how your foil bug fared on water. Your stories can inspire and encourage others in their scientific endeavors.
If you’ve enjoyed this article and are eager for more engaging and educational content, consider subscribing to our newsletter. You’ll get regular updates on similar helpful resources, ensuring you’re always equipped with great ideas for your next scientific exploration. Happy experimenting!