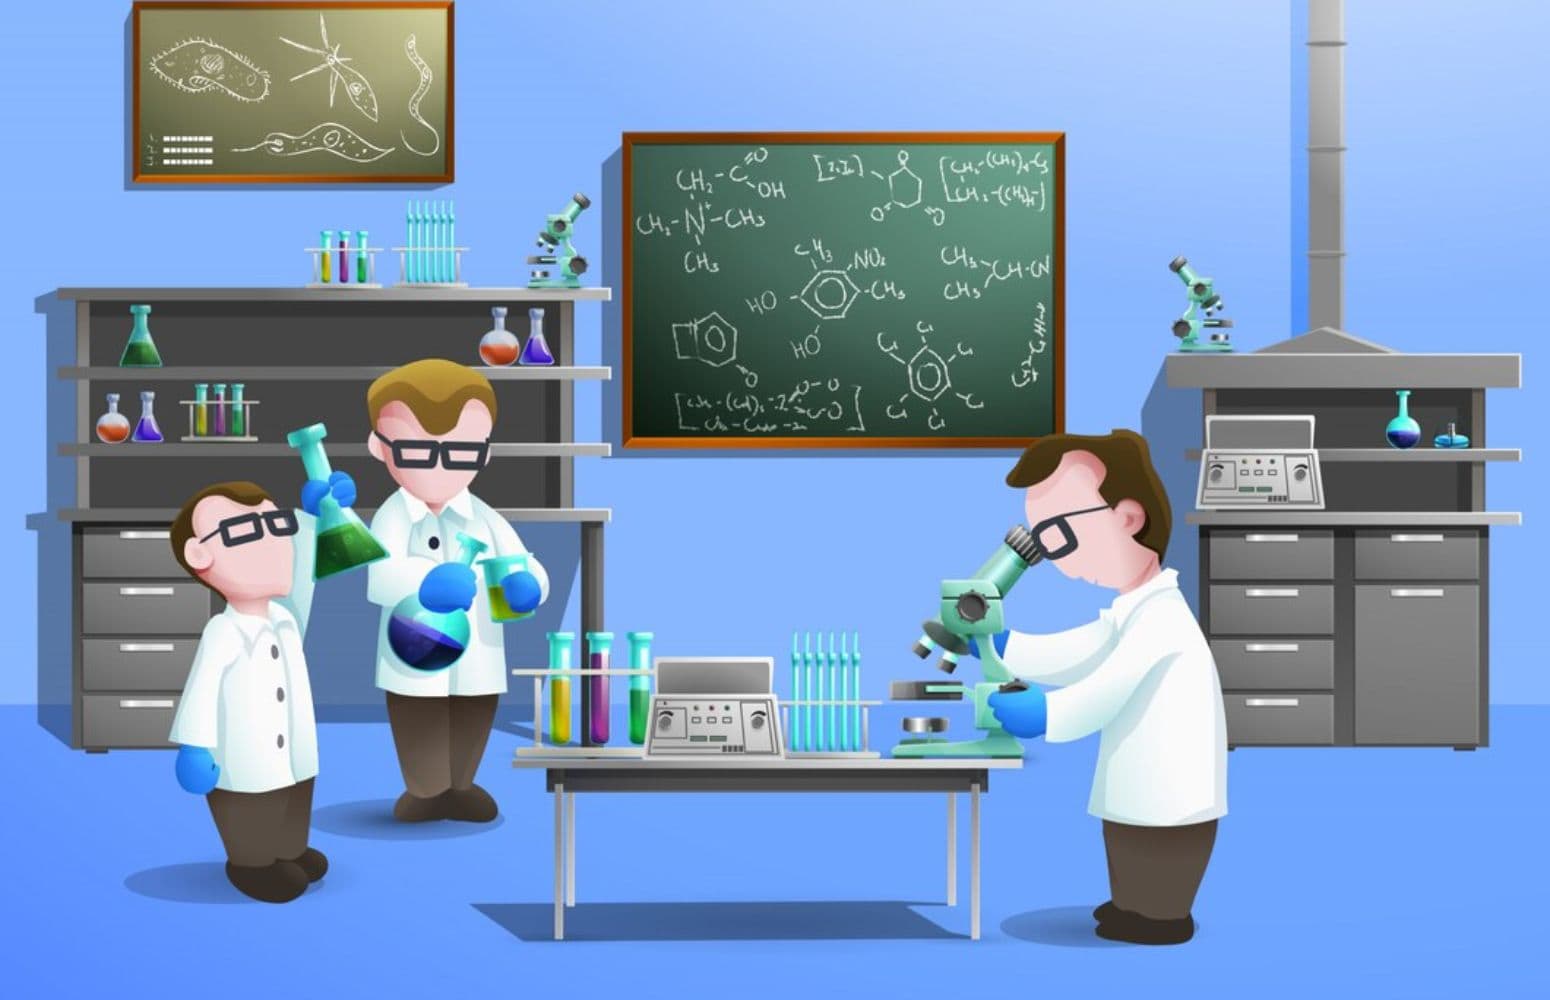
Are you ready to dive into the fascinating world of science? Whether you’re a budding scientist or just curious about the world around you, our guide on “6th grade science fair projects” is the perfect place to start. We’ve compiled a diverse list of experiments that are not only fun but also packed with educational value. From transforming milk into plastic to building a structure that can withstand an earthquake, these activities are designed to spark your creativity and quench your thirst for knowledge.
Many students worry about finding the right project for their science fair. We’ve got you covered! Our list includes projects across various fields like chemistry, biology, physics, and environmental science. These experiments are not only interesting but also easy to understand and execute, making them ideal for students, teachers, and parents alike. Get ready to explore the magic of science through hands-on experiments that promise to make learning an adventure!
Chemistry and Chemical Reactions
1. Crystal Magic: Growing Geodes in Eggshells
Objective: Discover how to create crystal geodes using eggshells and a few simple ingredients.
Materials:
- Eggshells
- Warm water
- Epsom salts
- Food coloring (optional)
- A small container
Procedure:
- Break your eggs near the narrow end and empty the contents.
- Clean the eggshells and dry them.
- In the container, mix warm water with Epsom salts until no more salts can dissolve.
- Add a few drops of food coloring if you want colored crystals.
- Submerge the eggshells in the solution, narrow end up.
- Leave the eggshells undisturbed for a few days.
Observation and Results: Watch as the Epsom salts crystallize inside the eggshells, forming geode-like structures.
Conclusion: This experiment shows how crystals form from saturated solutions and illustrates the beauty of geology on a miniature scale.
Safety Note: Be gentle with the eggshells to avoid breakage and handle the Epsom salt solution with care.
2. Colorful Chemistry: Speeding Up and Slowing Down Reactions
Objective: Explore how temperature affects the rate of a color-changing chemical reaction.
Materials:
- Thermochromic pigment (color-changing pigment)
- Hot and cold water
- Two clear glasses
- Spoon
Procedure:
- Place an equal amount of thermochromic pigment into each glass.
- Pour hot water into one glass and cold water into the other.
- Stir both mixtures with a spoon.
- Observe the color change in each glass.
Observation and Results: Notice how the color changes more rapidly in the glass with hot water compared to the one with cold water.
Conclusion: This experiment demonstrates that temperature can significantly affect the rate of a chemical reaction, with heat generally speeding up the process.
Safety Note: Be careful when handling hot water to prevent burns. Always have adult supervision.
3. Milky Magic: Transforming Milk into Plastic
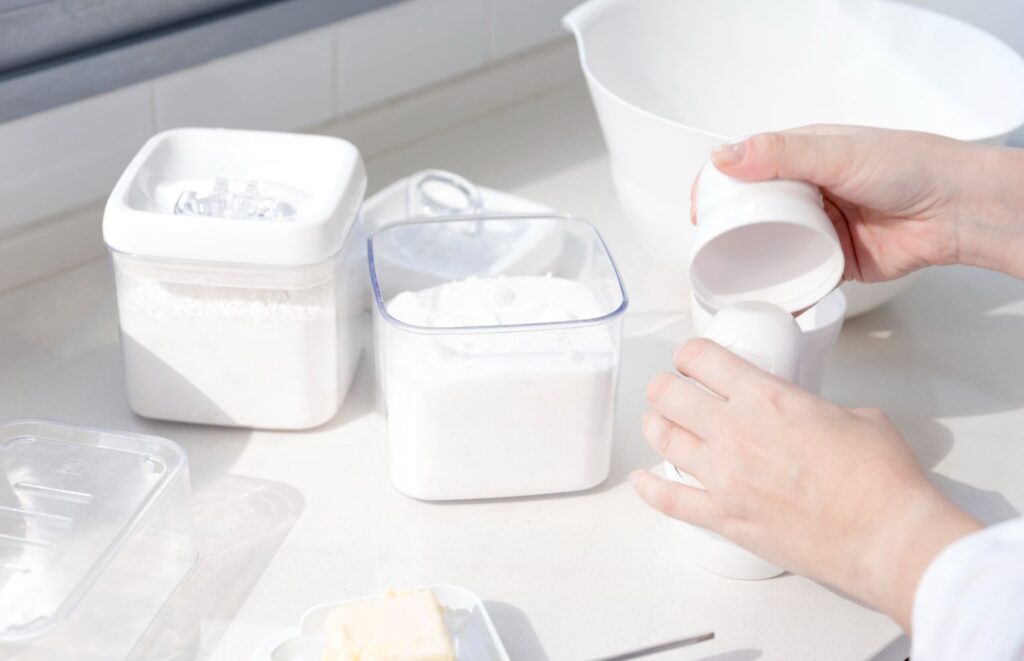
Objective: Demonstrate how to make a plastic-like substance from milk, showcasing a chemical reaction.
Materials:
- 1 cup of milk
- 4 teaspoons of white vinegar
- A pan and a stove
- A strainer
- A spoon
- Paper towels
Procedure:
- Heat the milk in a pan until it’s hot but not boiling.
- Add the vinegar and stir for a minute as the milk curdles.
- Pour the mixture through a strainer to separate the curds (solid) from the whey (liquid).
- Press the curds with a spoon to remove excess liquid.
- Mold the curds into a shape on a paper towel and let it dry for a couple of days.
Observation and Results: Observe the transformation of liquid milk into solid curds, which can be molded and dried into a hard plastic-like material.
Conclusion: This experiment illustrates a chemical reaction where an acid (vinegar) changes milk into a solid substance, demonstrating an unconventional method of creating a biodegradable plastic.
Safety Note: Be careful when handling hot milk and use the stove with adult supervision.
4. Colorful Taste Test: Does Color Influence Flavor?
Objective: Investigate whether changing the color of food affects its perceived taste.
Materials:
- A clear, flavorless drink (like water or seltzer)
- Different food coloring options
- Identical cups
- Blindfold (optional)
- Notepad and pen for recording
Procedure:
- Pour the drink into several cups.
- Add a different food coloring to each cup, leaving one as a control without color.
- Mix them well.
- Blindfold the taster or have them close their eyes.
- Let them taste each colored drink and describe the flavor.
- Record their responses.
Observation and Results: Note any differences in the taster’s description of the flavor based on the color of the drink.
Conclusion: This experiment helps to understand if and how visual cues like color influence our perception of taste, revealing the psychological aspects of flavor.
Safety Note: Ensure that the food coloring used is safe for consumption and avoid any allergens.
5. The Magic Serpent: Creating a Carbon Sugar Snake
Objective: Observe the fascinating chemical reaction that forms a growing carbon snake from sugar and baking soda.
Materials:
- 4 tablespoons of sugar
- 1 tablespoon of baking soda
- Sand
- Rubbing alcohol
- A heat-proof container or surface
- A lighter or matches
- Safety goggles
Procedure:
- Mix the sugar and baking soda together in a bowl.
- Fill the container with sand and pour rubbing alcohol over it until the sand is moist.
- Place the sugar and baking soda mixture in the center of the sand.
- Carefully light the mixture with a lighter or matches.
- Stand back and watch the reaction.
Observation and Results: Observe how the mixture expands and creates a snake-like structure as it burns.
Conclusion: This experiment demonstrates a chemical reaction involving carbon dioxide gas expansion, showcasing an exciting visual effect while teaching basic principles of chemistry.
Safety Note: Conduct this experiment in a well-ventilated area or outdoors. Always wear safety goggles and have an adult present. Do not touch the snake until it has completely cooled down.
6. Instant Illusion: Instantly Changing Liquid Colors
Objective: Discover how to change the color of a liquid instantly using a simple chemical reaction.
Materials:
- Purple cabbage
- Hot water
- Clear glasses
- Lemon juice or vinegar
- Baking soda
Procedure:
- Chop the purple cabbage and boil it in water to create a purple liquid.
- Pour the cabbage liquid into several clear glasses.
- To one glass, add a few drops of lemon juice or vinegar and observe the color change.
- To another glass, add a small amount of baking soda and observe.
Observation and Results: Notice how the cabbage liquid changes color immediately upon adding an acid (lemon juice/vinegar) or a base (baking soda).
Conclusion: This experiment demonstrates the concept of pH indicators, showing how certain substances can change color based on the acidity or basicity of the solution they are in.
Safety Note: Handle hot liquids with care and under adult supervision. Avoid ingesting the substances used in the experiment.
7. Veggie Power: Crafting a pH Indicator from Red Cabbage
Objective: Learn how to make a natural pH indicator using red cabbage to test the acidity or basicity of various substances.
Materials:
- Red cabbage
- Water
- A blender or a knife and a pot
- Strainer
- Clear cups or test tubes
- Various household liquids (like vinegar, baking soda solution, lemon juice, soap water)
Procedure:
- Chop the red cabbage and blend it with a bit of water to make a juice. Alternatively, boil the chopped cabbage in water.
- Strain the cabbage juice into a container, collecting the liquid.
- Pour the cabbage juice into several clear cups or test tubes.
- Add different household liquids to each cup of cabbage juice.
- Observe the color change in each cup.
Observation and Results: Note how the color of the cabbage juice changes, indicating the pH level of the substances added.
Conclusion: This experiment showcases how red cabbage can act as a pH indicator, changing colors in response to acidic or basic solutions.
Safety Note: Ensure all substances used are safe and non-toxic. Adult supervision is recommended, especially when handling hot liquids or blenders.
8. Sparking Science: Exploring Triboluminescence
Objective: Investigate triboluminescence, the phenomenon of generating light through friction or breaking of certain materials.
Materials:
- Sugar cubes
- A pair of pliers
- A dark room
Procedure:
- Go into a dark room and allow your eyes to adjust to the darkness.
- Hold a sugar cube with the pliers.
- Use force to break or crush the sugar cube with the pliers.
Observation and Results: Observe and record any flashes of light emitted when the sugar cube is crushed. These flashes are due to triboluminescence.
Conclusion: This experiment demonstrates triboluminescence, showcasing how mechanical action can produce visible light in certain materials.
Safety Note: Ensure that the room is safe to move around in when dark. Use the pliers carefully to avoid pinching fingers.
9. Fizz and Pop: The Science Behind Popping Candy
Objective: Explore the reaction of popping candy in different conditions to understand what triggers its famous popping sensation.
Materials:
- Popping candy
- Water
- Soda
- Vinegar
- Small cups or bowls
- Spoon
Procedure:
- Place a small amount of popping candy into separate cups or bowls.
- Add a different liquid to each cup (water, soda, vinegar) just enough to cover the candy.
- Observe the reaction of the candy with each liquid.
Observation and Results: Notice how the candy reacts differently with each liquid, observing the intensity of the popping sound and the duration of the reaction.
Conclusion: This experiment helps understand how popping candy reacts with various liquids, demonstrating the release of carbon dioxide gas when the candy dissolves.
Safety Note: Be cautious when handling vinegar and avoid close proximity to the ear to prevent discomfort from the popping sounds.
10. Hot Hues: Creating a Heat-Sensitive Color-Changing Display
Objective: Explore how temperature can affect certain materials to change color.
Materials:
- Thermochromic pigment (available online or at craft stores)
- Clear glue or craft glue
- Warm and cold water
- Small containers
- Brushes or stir sticks
Procedure:
- Mix the thermochromic pigment with clear glue in a small container.
- Apply this mixture onto a surface like paper or cardboard.
- Allow it to dry completely.
- Once dry, expose the surface to different temperatures by placing it in warm water and then cold water.
Observation and Results: Observe how the color of the pigment changes when exposed to different temperatures.
Conclusion: This experiment demonstrates how thermochromic materials can change color with temperature, showcasing a fascinating aspect of material science.
Safety Note: Make sure the water temperature is not too extreme to avoid burns or damage to the material. Always supervise children during the experiment.
11. Crystal Wonders: Crafting Your Own Crystal Landscapes
Objective: Learn to grow crystals at home, creating a unique and colorful crystal landscape.
Materials:
- Epsom salts
- Hot water
- Food coloring (optional)
- A wide, shallow dish or plate
- A spoon
Procedure:
- Dissolve Epsom salts in hot water in a ratio of 1:1 (e.g., 1 cup of salt to 1 cup of water) until no more salts can dissolve.
- Add food coloring if desired for colored crystals.
- Pour the solution into a wide, shallow dish or plate.
- Allow the solution to cool and evaporate over several days in a safe place.
Observation and Results: Observe the formation of crystal structures as the water evaporates.
Conclusion: This experiment demonstrates the process of crystallization and how substances can form structured crystals as a solution becomes super-saturated and then evaporates.
Safety Note: Be cautious when handling hot water and ensure that the dish is placed in a safe area where it won’t be disturbed.
12. Rock Feast: The Impact of Acid on Limestone
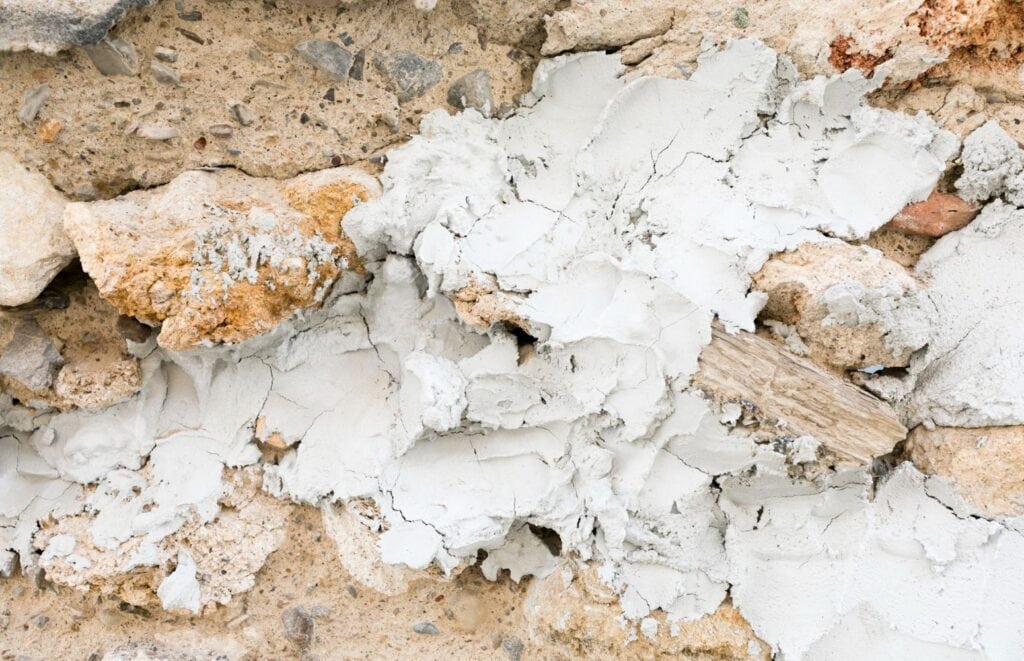
Objective: Demonstrate how acidic solutions can dissolve certain types of rocks, like limestone.
Materials:
- Limestone rock or chalk (calcium carbonate)
- White vinegar
- Water
- Two clear jars or cups
- Measuring cup or spoon
Procedure:
- Place a piece of limestone or chalk in each jar.
- Pour an equal amount of water into one jar and vinegar into the other.
- Observe the reaction of the limestone with the two different liquids over several days.
Observation and Results: Notice any bubbling or dissolving of the limestone in the vinegar, compared to no reaction in water.
Conclusion: This experiment shows how acidic solutions, like vinegar, can react with calcium carbonate in rocks, simulating natural processes like acid rain’s impact on limestone formations.
Safety Note: Handle vinegar carefully, avoiding direct contact with eyes or skin. Ensure the experiment is set up in a well-ventilated area.
13. The Truth Behind the Five-Second Rule
Objective: Test the popular “five-second rule” to see if food really picks up fewer germs if picked up quickly after falling on the floor.
Materials:
- Sliced bread or similar food items
- Clean plate
- Timer or stopwatch
- Floor surface (clean and another area that’s less clean)
- Magnifying glass (optional)
Procedure:
- Drop a piece of food on a clean surface and pick it up immediately.
- Drop another piece on the same surface and wait five seconds before picking it up.
- Repeat the steps on a less clean surface.
- Place the food pieces on separate plates, labeling them based on the time and surface they were dropped on.
- Observe any visible differences.
Observation and Results: Look for any visible dirt or particles on the food pieces. Use a magnifying glass for a closer inspection.
Conclusion: This experiment helps determine whether the duration a food item remains on the floor affects the amount of contamination it receives.
Safety Note: Do not consume the food used in the experiment. Wash hands thoroughly after handling food and surfaces.
14. Electric Flavor: Creating Circuits with Saltwater
Objective: Demonstrate how saltwater can conduct electricity by creating a simple circuit.
Materials:
- Table salt
- Water
- 9V battery
- Two wires
- Small light bulb or LED
- Spoon
- Shallow dish
Procedure:
- Dissolve a few spoons of salt in water in the shallow dish to make saltwater.
- Attach one end of each wire to the terminals of the 9V battery.
- Submerge the other ends of the wires into the saltwater, but make sure they don’t touch each other.
- Connect the light bulb or LED to the wires outside the water.
Observation and Results: Observe if the light bulb or LED lights up when the wires are in the saltwater.
Conclusion: This experiment shows that saltwater can conduct electricity, illustrating the concept of ionic conduction in solutions.
Safety Note: Be careful when handling the battery and ensure the wires are properly insulated. Do not let the wire ends touch each other in the water to prevent short-circuiting.
Physics and Engineering
15. Shake It Up: Engineering an Earthquake-Resistant Structure
Objective: To understand and demonstrate the principles of earthquake-resistant engineering by building a small model structure.
Materials:
- Toothpicks or small sticks
- Marshmallows or clay
- A large tray or flat surface
- Weights (like small coins or washers)
- Ruler or measuring tape
Procedure:
- Using toothpicks and marshmallows, construct a small structure. It could be a tower, a bridge, or any other design.
- Place your structure on the tray.
- Simulate an earthquake by gently shaking the tray in different directions.
- Gradually increase the intensity of your shaking to test the structure’s stability.
- Add weights to the structure to test its strength under load.
Observation and Results: Observe at what point the structure begins to wobble or collapse and how the design affects its stability.
Conclusion: This experiment highlights the importance of structural design in earthquake resistance, showing how certain shapes and constructions can withstand shaking better than others.
Safety Note: Ensure that the experiment is performed on a stable surface and that any heavy weights are handled carefully to avoid injury.
16. Brick Codes: Programming a LEGO Room
Objective: Learn basic coding concepts by designing a room layout using LEGO bricks to represent code elements.
Materials:
- LEGO bricks of various sizes and colors
- A large flat LEGO base plate
- Paper and pencil for planning
- Basic coding guideline sheet (explaining what each color or size of brick represents)
Procedure:
- Decide on a simple coding task or pattern (like making a square or a pattern sequence).
- Using the coding guideline sheet, assign different LEGO bricks to represent different coding elements or commands.
- Plan your code on paper first, using the brick assignments.
- Build the code on the LEGO base plate, placing bricks in order according to your plan.
- Once complete, “read” the code to ensure it follows the intended pattern or task.
Observation and Results: Observe if the final LEGO construction accurately represents the planned code.
Conclusion: This project introduces the basics of coding logic and sequencing in a tactile and visual way, using LEGO bricks as physical stand-ins for digital code elements.
Safety Note: Ensure a clean workspace to avoid tripping over LEGO bricks. Keep small pieces away from young children and pets.
17. Mini Wheel of Wonder: Building a Model Ferris Wheel
Objective: Understand the principles of circular motion and balance by constructing a model Ferris wheel.
Materials:
- Cardboard
- Drinking straws or skewers
- Scissors or craft knife
- Glue or tape
- Paper clips or small weights
- Ruler
Procedure:
- Cut two large circles from the cardboard for the wheel.
- Cut several straws or skewers to act as the spokes of the wheel and attach them evenly around each circle.
- Secure the two circles parallel to each other with a straw or skewer axle through the center.
- Add small baskets or seats at the end of each spoke, balancing them with paper clips or weights.
- Test the Ferris wheel by spinning it on its axle.
Observation and Results: Observe how the wheel rotates, and how balance is maintained or disrupted by the baskets and weights.
Conclusion: This experiment helps understand the mechanics behind Ferris wheels, particularly how balance and rotational motion are crucial in its design and function.
Safety Note: Be careful when using scissors or craft knives. Ensure all sharp edges are covered or smoothed out.
18. Soar High: Crafting a Paper-Plane Launcher
Objective: Understand the principles of aerodynamics and force by building a launcher to propel paper planes.
Materials:
- Rubber bands
- Popsicle sticks or sturdy straws
- Paper for making planes
- Tape or glue
- Scissors
Procedure:
- Construct a base frame using popsicle sticks or straws, securing them with tape or glue.
- Create a launching mechanism by attaching rubber bands to the frame.
- Fold a paper plane using a basic or advanced design.
- Hook the paper plane onto the rubber band on the launcher.
- Pull back the plane, stretching the rubber band, and then release to launch.
Observation and Results: Observe how far and fast the plane flies when launched from the device compared to being thrown by hand.
Conclusion: This project demonstrates how tools like launchers can increase force and speed, resulting in improved flight distance and duration for paper planes.
Safety Note: Ensure that the launching area is clear of people and fragile objects. Be cautious when stretching rubber bands to prevent snapping.
19. Dance Revolution: Creating Motorized Tiny Dancers
Objective: Explore the basics of motor function and kinetic energy by making tiny motorized dancers.
Materials:
- Small DC motor
- AA batteries and battery holder
- Electrical tape
- Paper clips
- Cardstock or stiff paper
- Markers or paint for decoration
- Wire cutters or scissors
Procedure:
- Attach the battery holder to the DC motor using electrical tape.
- Insert batteries into the holder.
- Straighten out two paper clips and attach them to the motor’s shaft as arms.
- Cut out small figures from cardstock and attach them to the ends of the paper clips.
- Turn on the motor and watch your tiny dancers spin.
Observation and Results: Observe how the balance and weight of the paper figures affect the movement and speed of the dancers.
Conclusion: This project demonstrates how motors convert electrical energy into kinetic energy, and how balance and weight distribution affect motion.
Safety Note: Be cautious when handling the motor and battery. Ensure all connections are secure and that wires are not exposed. Always turn off the motor when not in use.
20. Spin Magic: Building Your Own Simple Motor
Objective: Understand the basic principles of electromagnetism by assembling a simple electric motor.
Materials:
- AA battery
- Two small magnets
- Copper wire
- Paper clips
- Electrical tape
- Wire cutters
Procedure:
- Cut a piece of copper wire and shape it into a coil with two loose ends for connection.
- Strip the ends of the wire for conductivity.
- Attach the magnets to each end of the battery.
- Bend the paper clips to form a stand and attach them to the battery using electrical tape, ensuring they can conduct electricity.
- Place the coil between the paper clip stands and adjust until it balances and spins freely.
Observation and Results: Observe the coil spinning when it’s placed in the magnetic field created by the battery and magnets.
Conclusion: This experiment demonstrates how electric current and magnetic fields can interact to create motion, illustrating the basic operation of an electric motor.
Safety Note: Be careful when stripping and cutting the wire. Ensure all connections are secure and handle the battery responsibly. Disconnect the battery when not in use to avoid overheating.
21. Skyward Bound: Building a Two-Stage Rocket
Objective: Explore the principles of rocket propulsion and staging by creating a simple two-stage rocket.
Materials:
- Two small plastic bottles
- Baking soda
- Vinegar
- Cork or stopper
- Cardboard
- Duct tape
- Scissors
Procedure:
- Fill one bottle halfway with vinegar. This is the first stage.
- Wrap baking soda in a small piece of tissue paper to make a packet.
- Insert the baking soda packet into the bottle and quickly seal it with a cork or stopper.
- Tape the second bottle (second stage) on top of the first, making sure it’s secure but can separate easily.
- Add fins and a nose cone to the second bottle using cardboard.
- Place the rocket outside, upright, and stand back.
Observation and Results: Observe the reaction in the first stage and the launch of the second stage.
Conclusion: This experiment demonstrates the basic concepts of a multi-stage rocket, where each stage ignites sequentially for efficient propulsion.
Safety Note: Conduct this experiment outdoors and stand at a safe distance. Always have adult supervision. Do not point the rocket at people or animals.
22. The Wobble Wire: Crafting a Steady-Hand Game
Objective: Understand the principles of circuits and steady hand coordination by building a wire maze game.
Materials:
- A long, flexible wire (like a coat hanger)
- A small tube or loop of wire
- Battery-operated buzzer
- AA battery and holder
- Electrical wire
- Tape or glue
- A baseboard (like cardboard or wood)
Procedure:
- Shape the long wire into a challenging path and attach it to the baseboard.
- Connect one end of the wire to the battery holder.
- Attach the other end of the wire to the buzzer.
- Connect the buzzer to the battery holder, completing the circuit.
- Create a small wire loop, ensuring it can slide over the long wire path without touching.
- Attach the loop to the other end of the electrical wire, connecting it to the battery holder.
Observation and Results: Attempt to move the loop along the wire path without touching it and triggering the buzzer.
Conclusion: This game demonstrates basic electrical circuit concepts and requires steady hand-eye coordination to avoid completing the circuit and sounding the buzzer.
Safety Note: Ensure all electrical connections are secure. Use low-voltage batteries to avoid any risk of electric shock.
23. Floating Magic: Levitating a Ping-Pong Ball
Objective: Demonstrate the principles of air pressure and aerodynamics by levitating a ping-pong ball.
Materials:
- A ping-pong ball
- A hair dryer
- Electrical tape (optional)
Procedure:
- Plug in the hair dryer and turn it on to a low or medium setting.
- Hold the hair dryer with the nozzle pointing upwards.
- Place the ping-pong ball in the stream of air from the hair dryer.
- Carefully adjust the angle and power of the air stream to keep the ball floating steadily.
Observation and Results: Observe how the ping-pong ball floats in the air and how different angles and air speeds affect its stability.
Conclusion: This experiment demonstrates how the principles of air pressure and the Bernoulli principle allow the ball to float in the air stream, providing insights into basic aerodynamic concepts.
Safety Note: Ensure the hair dryer is used in a safe area away from water. Do not cover the air intake of the hair dryer. Always supervise children when using electrical appliances.
24. Spin Science: Exploring Inertia with a Fidget Spinner
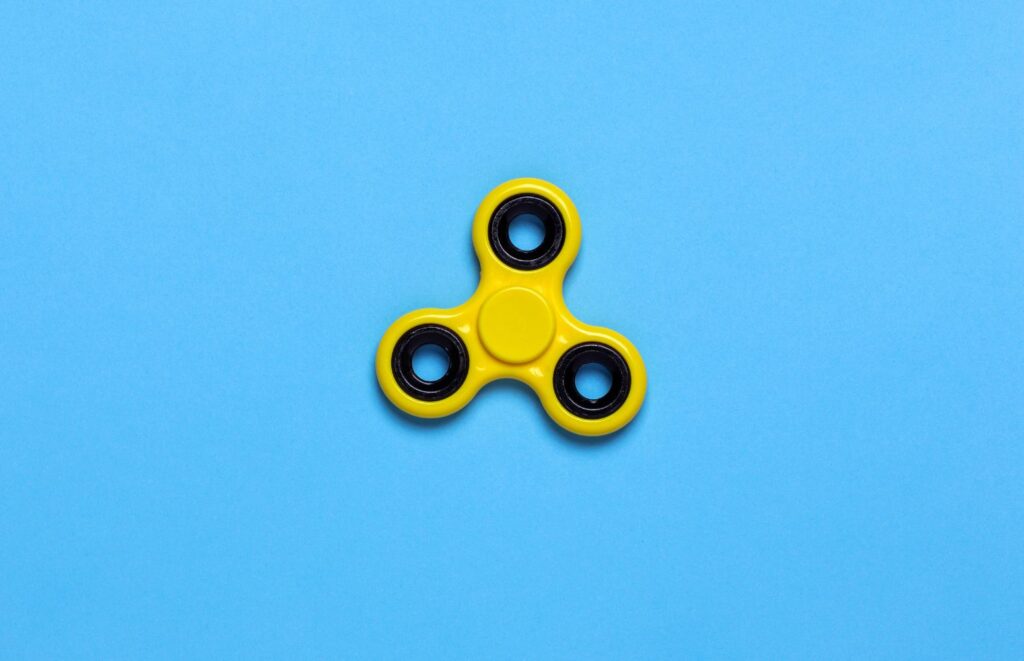
Objective: Understand the concept of inertia through hands-on experimentation with a fidget spinner.
Materials:
- A fidget spinner
- A flat surface (like a table)
Procedure:
- Place the fidget spinner on the flat surface.
- Spin the fidget spinner as fast as you can.
- Observe how long it spins without external forces.
- Gently tap the spinner and observe its reaction.
- Repeat the experiment by spinning it in different directions.
Observation and Results: Notice how the spinner continues to move until an external force (like your tap) acts on it, and how it resists changes in its motion or direction.
Conclusion: This simple experiment demonstrates the principle of inertia, showing how an object in motion tends to stay in motion, and an object at rest stays at rest unless acted upon by an external force.
Safety Note: Ensure the spinner is used on a stable surface and be cautious not to spin it near the edge where it could fall off and break or cause injury.
25. Catapult Physics: Exploring Trajectories
Objective: Understand the principles of trajectory and force by building and firing a simple catapult.
Materials:
- Popsicle sticks
- Rubber bands
- Plastic spoon
- Small, soft projectiles (like marshmallows or pom-poms)
- Tape measure
Procedure:
- Stack several popsicle sticks and secure them together with rubber bands at both ends to form the base of your catapult.
- Attach a plastic spoon to the end of one additional stick using rubber bands. This will be the arm of the catapult.
- Attach the arm to the base with a rubber band in a way that allows it to bend and snap forward.
- Place a projectile in the spoon, pull down on the spoon, then release to launch.
- Measure the distance each projectile travels.
Observation and Results: Notice how changes in the force applied and the angle of the spoon affect the trajectory and distance traveled by the projectile.
Conclusion: This experiment demonstrates the basic concepts of physics, including force, angle, and trajectory, in a fun and interactive way.
Safety Note: Ensure that the projectiles used are soft and light to prevent injury or damage. Conduct the experiment in an open area where there’s no risk of hitting others or breaking objects.
26. Sound Vibration Exploration: The Spoon Experiment
Objective: Investigate how sound waves travel and create vibrations using a simple spoon.
Materials:
- A metal spoon
- A piece of string (about 2 feet long)
- A quiet room
Procedure:
- Tie one end of the string tightly around the spoon’s handle.
- Hold the other end of the string between your teeth – do not use your hands.
- Lean forward so the spoon hangs freely and tap it gently against a hard surface.
- Observe the sound you hear.
Observation and Results: Notice the difference in sound when the spoon is tapped with the string in your teeth versus when it is tapped without using the string.
Conclusion: This experiment demonstrates how sound waves travel. When the string is held in your teeth, sound waves travel up the string and directly to your ears, making the sound seem louder and clearer.
Safety Note: Be gentle when tapping the spoon to avoid damaging your teeth. Ensure the string is securely tied to avoid the spoon flying off.
27. Bridging the Gap: Constructing a Craft Stick Bridge
Objective: Learn about engineering and structural stability by building a bridge from craft sticks.
Materials:
- Craft sticks (popsicle sticks)
- Glue or hot glue gun
- Books or blocks to test the bridge
Procedure:
- Plan your bridge design. You can choose a simple beam bridge, a truss bridge, or an arch bridge.
- Begin by creating the base of the bridge with two parallel lines of sticks.
- Connect these lines with sticks laid perpendicularly, creating the bridge’s roadbed.
- Strengthen your bridge by adding side supports. For a truss bridge, create triangular patterns on the sides.
- Allow the glue to dry completely.
- Test the strength of your bridge by placing it between two supports (like books) and gradually adding weight on top.
Observation and Results: Observe how much weight your bridge can hold and where it starts to bend or break.
Conclusion: This project demonstrates the principles of engineering, showing how different designs and structures distribute weight and provide stability.
Safety Note: If using a hot glue gun, be cautious of the hot tip and glue. Always have adult supervision.
28. CO2 to the Rescue: Quenching Fire with Carbon Dioxide
Objective: Demonstrate how carbon dioxide can extinguish a flame, highlighting a chemical reaction that deprives fire of oxygen.
Materials:
- A small candle
- Matches or a lighter
- A large bowl
- Baking soda
- Vinegar
- A smaller container or cup
Procedure:
- Place the candle in the large bowl and light it.
- In the smaller container, mix a spoonful of baking soda with a splash of vinegar to create carbon dioxide.
- Carefully pour the gas (not the liquid) from the smaller container onto the candle flame.
- Observe what happens to the flame.
Observation and Results: Watch how the flame is extinguished when the carbon dioxide gas is poured over it.
Conclusion: This experiment demonstrates how carbon dioxide, being heavier than air, can smother a flame by displacing oxygen, which is essential for combustion.
Safety Note: Ensure adult supervision is present. Be cautious with the flame and handle the candle safely. Perform the experiment in a well-ventilated area.
29. Shifting Plates: Simulating Plate Tectonics
Objective: Create a model to demonstrate the movement of Earth’s tectonic plates and how they cause natural phenomena like earthquakes and volcanoes.
Materials:
- A large, shallow pan
- Sand or soil
- Water
- Several large sponges
- Scissors
Procedure:
- Fill the pan with a thin layer of sand or soil, simulating the Earth’s crust.
- Cut the sponges into shapes resembling tectonic plates.
- Place the sponge ‘plates’ on the sand, leaving some gaps between them.
- Slowly add water to the pan until the sand is moist and the sponges begin to float slightly.
- Gently push and move the sponges to mimic plate movements.
Observation and Results: Observe how the movement of sponges causes changes in the sand, like ridges or cracks, representing geological features and activities.
Conclusion: This project illustrates the dynamics of plate tectonics, showing how the movement of plates can lead to significant geological changes and events on Earth’s surface.
Safety Note: Be gentle when handling water near sand or soil to prevent messy spills. Use scissors with care under adult supervision.
30. Mini Tsunami: Creating Ocean Waves in a Pan
Objective: Demonstrate the formation and movement of tsunami waves in a controlled, small-scale environment.
Materials:
- Large, shallow tray or baking pan
- Water
- Small, rectangular block (like a toy block)
- Food coloring (optional)
- Ruler
Procedure:
- Fill the tray with 2-3 cm of water.
- Place the block at one end of the tray.
- Lift and drop the block quickly to create a wave.
- Add a few drops of food coloring to visualize the wave.
- Use the ruler to create smaller waves.
Observation and Results:
Observe the wave created by the block, noting its speed, height, and interaction with the tray’s edges. The food coloring can help track the wave’s path. Smaller waves from the ruler simulate aftershocks, showing varied wave behaviors.
Conclusion: This experiment models how tsunamis form and travel, highlighting the energy transfer in water during such events.
Safety Note: Conduct this experiment on a stable surface to prevent spills and handle water and coloring carefully.
31. Ice Magic: Exploring Regelation
Objective: Discover how pressure can melt ice and then refreeze it, a process known as regelation.
Materials:
- A block of ice
- Thin wire
- Two supports (like chairs or stacks of books)
- Weights (like heavy books)
Procedure:
- Place the ice block on the supports so it’s suspended between them.
- Lay the wire across the top of the ice block.
- Hang weights from the wire.
- Wait and observe.
Observation and Results: Watch as the wire slowly cuts through the ice, not by slicing but by melting the ice beneath it due to pressure. After the wire passes through, notice how the ice refreezes, leaving no cut mark.
Conclusion: The experiment illustrates regelation, demonstrating how pressure causes ice to melt and then refreeze, a fundamental concept in glaciology.
Safety Note: Handle weights carefully to avoid injury. The ice and water can be slippery, so ensure the experiment is set up on a surface where spills are safe and manageable.
32. Wheel Wars: Testing Skateboard Wheels
Objective: Investigate how different skateboard wheels affect speed and maneuverability.
Materials:
- Two skateboards (identical in every aspect except the wheels)
- Two sets of skateboard wheels (varying in size and hardness)
- Tape measure
- Stopwatch
- Helmet and safety gear
Procedure:
- Replace the wheels on one skateboard with the first set, and the other with the second set.
- Select a flat, smooth surface for testing.
- Time how long it takes for each skateboard to roll a set distance without a rider.
- Repeat with a rider performing simple maneuvers.
Observation and Results: Record the time taken for each skateboard to travel the set distance. Observe the ease of maneuvering with each set of wheels. Note differences in speed and control.
Conclusion: This experiment demonstrates how wheel size and hardness impact the performance of a skateboard, emphasizing the importance of wheel selection based on usage.
Safety Note: Always wear a helmet and appropriate safety gear while riding. Ensure the testing area is safe and free from traffic or hazards.
33. Fizzy Floaters: The Baking Soda Boat Experiment
Objective: Explore the reaction between baking soda and vinegar to power a small boat.
Materials:
- A small plastic bottle (like a used water bottle)
- Baking soda
- Vinegar
- Cork or small stopper
- Small plastic tub or pool
- Water
- Measuring spoons
Procedure:
- Fill the plastic tub or pool with water.
- Fill the plastic bottle halfway with vinegar.
- Attach the cork loosely to the bottle’s opening.
- Add a spoonful of baking soda into the bottle.
- Quickly seal the bottle with the cork and place it in the water.
Observation and Results: Observe the reaction between baking soda and vinegar creating gas, which propels the boat forward. Record the distance and speed of the boat, and notice the duration of the reaction.
Conclusion: This experiment shows how a chemical reaction can produce gas, demonstrating a basic principle of propulsion used in various technologies.
Safety Note: Conduct the experiment in a well-ventilated area. Avoid direct contact with vinegar and baking soda mixture to prevent skin irritation. Wear safety goggles for eye protection.
34. Dual Thrust: Building a Two-Stage Balloon Rocket
Objective: Understand the concept of multi-stage rockets by creating a two-stage balloon rocket.
Materials:
- Two balloons
- String (about 10 meters long)
- Straw
- Tape
- Scissors
- Two chairs or hooks to anchor the string
Procedure:
- Stretch the string between two chairs or hooks, ensuring it’s taut.
- Thread the string through the straw.
- Inflate one balloon (first stage) and tape it to one end of the straw without tying it.
- Inflate the second balloon (second stage), leaving it untied, and tape it alongside the first.
- Simultaneously release both balloons.
Observation and Results: Observe how the first balloon propels the straw initially, and as it deflates, the second balloon continues the propulsion. Record the distance covered by the straw and the time taken for each stage.
Conclusion: The experiment demonstrates the principle of multi-stage rockets, where each stage provides thrust for a specific duration, optimizing the overall travel distance.
Safety Note: Ensure the area is clear of obstacles and bystanders to avoid accidental collisions. Handle scissors with care.
35. Buzzing Bots: Crafting Motorized Mini Characters
Objective: Create simple motorized characters to understand basic principles of electric motors and motion.
Materials:
- Small DC motors
- AA batteries and battery holders
- Switches
- Wires
- Glue
- Small plastic cups or bottle caps
- Pipe cleaners
- Googly eyes
- Markers or paint
Procedure:
- Connect the motor to a battery holder and switch using wires.
- Glue the motor onto a plastic cup or bottle cap, ensuring stability.
- Decorate the cup or cap to resemble a character using markers, pipe cleaners, and googly eyes.
- Attach an off-center weight (like a small clay piece) to the motor’s shaft to create vibration.
- Turn on the switch to activate the motor.
Observation and Results: Observe how the vibration from the motor causes the character to move. Note the differences in movement patterns based on the weight’s position and the character’s design.
Conclusion: This project demonstrates the basic workings of an electric motor and how it can be used to create motion in simple objects.
Safety Note: Be careful when handling the motor and wires to avoid short circuits. Use glue safely and under adult supervision. Ensure the battery is correctly installed to prevent overheating.
36. Spin-O-Matic Pens: The Science of Balancing
Objective: Discover the principles of balance and rotation by creating a spinning pen.
Materials:
- A pen or marker
- Strong adhesive tape
- Small coins
- A flat, smooth surface
Procedure:
- Place a small piece of tape on the middle of the pen.
- Stick a coin on each side of the tape, ensuring they are exactly opposite each other.
- Test the balance by balancing the pen on your finger.
- Adjust the coins until the pen is balanced.
- Once balanced, spin the pen on a flat surface.
Observation and Results: Observe how the placement of coins affects the pen’s ability to balance and spin. Notice how the pen’s spin duration and stability change with different coin positions and amounts.
Conclusion: This experiment shows how balance and weight distribution affect an object’s rotational stability, demonstrating basic principles of physics related to motion and balance.
Safety Note: Ensure the coins are securely taped to avoid them flying off during spinning. Conduct the experiment in a space where the pen won’t cause damage or injury if it flies off the surface.
37. WiggleBot Wonders: Crafting a Simple Robot
Objective: Build a basic robot (WiggleBot) to explore concepts of motion and energy transfer.
Materials:
- Small DC motor
- AA battery and battery holder
- Switch
- Wires
- Plastic cup
- Markers or paint for decoration
- Rubber bands
- Paper clips
- Tape
- Off-center weight (like a small bolt or washer)
Procedure:
- Connect the motor to the battery holder and switch using wires.
- Secure the motor to the plastic cup using tape or rubber bands.
- Attach the off-center weight to the motor’s shaft.
- Decorate the cup with markers or paint.
- Place the WiggleBot on a flat surface and turn it on.
Observation and Results: Observe how the WiggleBot moves and changes direction randomly due to the off-center weight on the motor. Note how different weights and their positions affect the movement.
Conclusion: This project demonstrates how vibration and off-center weight can create motion, offering a basic understanding of robot mobility.
Safety Note: Be careful when handling the motor and wires. Ensure all electrical connections are secure and insulated to prevent short circuits. Supervision is recommended when assembling and operating the WiggleBot.
38. Magnetic Express: Constructing an Electro-Magnetic Train
Objective: Understand electromagnetism by building a simple magnetic train.
Materials:
- Copper coil (thin tube shape)
- AA batteries
- Neodymium magnets
- Tape
- A ruler or straight track to guide the coil
Procedure:
- Tape neodymium magnets to both ends of a battery.
- Slide the battery-magnet combination inside the copper coil.
- Place the coil on a straight, flat surface.
- Insert the battery-magnet inside one end of the coil.
Observation and Results: Watch as the battery-magnet setup travels through the coil, propelled by electromagnetic forces. Observe the speed and distance traveled within the coil. Experiment with different numbers of magnets or battery sizes to see how they affect the train’s movement.
Conclusion: This experiment demonstrates the principles of electromagnetism and how magnetic fields can be used to propel objects, providing a basic understanding of how some modern trains operate.
Safety Note: Handle neodymium magnets with care as they are very strong. Ensure that the battery does not overheat. Do not leave the battery inside the coil unattended.
39. Ice Slice: The Science of Cutting Ice with Wire
Objective: Demonstrate the concept of pressure-induced melting by cutting ice with a wire.
Materials:
- Ice block or large ice cube
- Thin wire
- Two supports (like books or cans)
- Weights (like heavy books or cans)
Procedure:
- Place the ice block on the supports so there is a gap beneath it.
- Lay the wire over the top of the ice block.
- Attach weights to each end of the wire, applying pressure.
- Observe the wire as it moves through the ice.
Observation and Results: Notice how the wire gradually sinks into the ice, melting its way through due to the pressure applied. After the wire passes, observe the ice re-freezing, leaving no visible cut or seam.
Conclusion: This experiment illustrates the concept of pressure melting point, demonstrating how increasing pressure on ice lowers its melting point, allowing the wire to cut through it.
Safety Note: Handle the weights carefully to avoid dropping them on your feet. Ensure the setup is stable to prevent the ice or weights from falling.
40. Green Thumb Box: Crafting a Homemade Grow Box
Objective: Create a DIY grow box to understand the importance of controlled environments for plant growth.
Materials:
- A large cardboard box or plastic container
- Plastic wrap or glass pane (for the lid)
- Small pots or planting containers
- Potting soil
- Seeds (herbs or small plants)
- A lamp with a grow light bulb
- A ruler or measuring tape
- Scissors or a box cutter
- Tape
Procedure:
- Cut out a large window on the top of the box, leaving a border for structural integrity.
- Cover the window with plastic wrap or place a glass pane to create a lid.
- Place pots with soil inside the box.
- Plant seeds in the pots according to packet instructions.
- Position the lamp with the grow light above the box.
- Water the plants as needed, ensuring the soil stays moist.
Observation and Results: Observe the germination and growth of the plants over several weeks. Record the growth rate and health of the plants, noting any changes in color or size.
Conclusion: This project demonstrates how a controlled environment like a grow box can effectively support plant growth, highlighting the importance of light, warmth, and humidity in horticulture.
Safety Note: Be careful when cutting the box. Ensure the grow light is securely positioned and not a fire hazard. Always handle water carefully around electrical equipment.
41. Weather Watcher: Homemade Barometer
Objective: Construct a simple barometer to understand how atmospheric pressure can be measured and used to predict weather changes.
Materials:
- A glass jar
- A balloon
- A rubber band
- A straw
- A ruler
- Tape
- Paper to make a scale
Procedure:
- Cut the balloon and stretch it over the opening of the jar, securing it with a rubber band.
- Tape one end of the straw to the center of the stretched balloon.
- Place the ruler next to the jar, with the straw pointing at it.
- Tape the paper scale behind the ruler for easy reading.
Observation and Results: Observe the straw’s movement as air pressure changes. The straw will move up when the pressure decreases and down when it increases. Record the straw’s position at the same time each day to track changes.
Conclusion: This experiment shows how changes in air pressure affect weather, demonstrating a basic principle used in meteorology to predict weather patterns.
Safety Note: Handle the glass jar with care to avoid breakage. Ensure all components are securely attached to prevent them from falling or being a hazard.
42. Ocean in Motion: Crafting a Wave Machine
Objective: Construct a wave machine to visualize and understand the properties of wave motion and interference.
Materials:
- A long, narrow, clear plastic tub (like a storage container)
- Duct tape
- Skewers or thin dowel rods
- Gummy candies or small foam pieces
- Water
- Food coloring (optional)
Procedure:
- Fill the tub with water, adding food coloring if desired.
- Place the skewers across the width of the tub, spacing them evenly.
- Attach the gummy candies or foam pieces to the top of each skewer.
- Secure everything with duct tape to ensure the skewers remain upright.
- Gently tap one end of the tub to create waves.
Observation and Results: Observe how the waves travel along the tub, noting how the candies or foam pieces move. Watch for patterns of wave peaks and troughs and how they interact.
Conclusion: This project demonstrates the basic principles of wave motion, including how waves travel and interact with each other, providing a visual representation of wave dynamics.
Safety Note: Ensure the tub is placed on a stable, water-resistant surface to avoid spills. Handle skewers and duct tape carefully to avoid injury.
43. Sunny Side Up: Crafting a Solar Oven
Objective: Build a simple solar oven to demonstrate how solar energy can be harnessed for cooking.
Materials:
- A pizza box (or any cardboard box)
- Aluminum foil
- Clear plastic wrap
- Black construction paper
- Tape
- Scissors
- A stick or straw to prop the lid
- Thermometer (optional)
- Food items for cooking (like marshmallows or chocolate)
Procedure:
- Cut a flap in the lid of the pizza box, leaving one side attached.
- Cover the inner side of the flap with aluminum foil, shiny side out.
- Tape clear plastic wrap across the opening created by the flap in the lid.
- Line the bottom of the box with black construction paper.
- Prop the lid open with the stick or straw.
- Place food inside the box and monitor.
Observation and Results: Observe the temperature inside the box (if using a thermometer) and how effectively the solar oven melts or cooks the food. Note the time it takes and the conditions (like weather and sun intensity).
Conclusion: This experiment showcases the power of solar energy and its potential use in everyday cooking, emphasizing renewable energy’s importance.
Safety Note: Be careful when using scissors. Monitor the solar oven to ensure it doesn’t overheat or cause a fire hazard, especially on very sunny days. Always handle food safely.
44. Whirlwind Power: Building a Mini Windmill
Objective: Construct a miniature windmill to understand how wind energy can be converted into mechanical energy.
Materials:
- Cardboard or thick paper
- A pencil with an eraser
- A pushpin or small nail
- Scissors
- A ruler
- A small electric fan (for testing)
- Tape or glue
Procedure:
- Cut two cardboard strips (15cm x 2cm each) for the windmill blades.
- Cross and glue the strips to form an “X” shape.
- Push the pushpin through the center of the “X” and into the eraser of the pencil, allowing it to rotate freely.
- Stand the pencil upright, securing it if necessary.
- Use the electric fan to create wind and observe the windmill’s rotation.
Observation and Results: Watch how the windmill blades catch the wind from the fan, causing the pencil to rotate. Note the speed of rotation in relation to the fan’s speed.
Conclusion: This project demonstrates the basic principles of wind energy conversion, showing how wind power can be harnessed for useful work.
Safety Note: Be careful when using the scissors and pushpin. Ensure the fan is on a stable surface and used under adult supervision to prevent accidents.
45. Robo-Coders: Introduction to Programming with Robots
Objective: Engage in basic coding exercises using simple robots to understand the fundamentals of programming and robotics.
Materials:
- Programmable robot kits (like LEGO Mindstorms, Ozobot, or Bee-Bot)
- Computer or tablet with compatible coding software
- Obstacle course materials (like cardboard, tape, and markers)
Procedure:
- Assemble the robot following the kit’s instructions.
- Install the coding software on the computer or tablet.
- Learn basic coding commands and how they control the robot.
- Create a simple obstacle course.
- Write a code to navigate the robot through the course.
- Test the code, observe the robot’s performance, and make necessary adjustments.
Observation and Results: Monitor how accurately the robot follows the programmed instructions. Observe how changes in the code affect the robot’s behavior and ability to navigate the obstacle course.
Conclusion: This project demonstrates the basics of coding and robotics, showing how digital commands can control physical actions in a robot.
Safety Note: Follow all safety guidelines provided with the robot kit. Ensure the robot is used in a safe area where it won’t cause damage or injury. Supervise the use of computers or tablets.
46. Magnetic Mysteries: Exploring Magnetism
Objective: Investigate the properties of magnets and how they interact with various materials.
Materials:
- A variety of magnets (different shapes and sizes)
- Metal objects (paper clips, nails, coins)
- Non-metal objects (wooden sticks, plastic toys)
- Iron filings
- Paper
- A shallow tray
Procedure:
- Place a magnet under the shallow tray.
- Spread a sheet of paper over the tray.
- Gently sprinkle iron filings on the paper.
- Observe the pattern formed by the filings.
- Experiment with attracting and repelling metal objects using the magnets.
- Test which non-metal objects are affected or unaffected by the magnets.
Observation and Results: Notice the patterns created by the iron filings, showing the magnetic field lines. Observe how the magnets attract or repel certain metal objects and have no effect on non-metal objects.
Conclusion: This project helps understand the basics of magnetism, including magnetic fields, attraction and repulsion, and how magnets interact with different materials.
Safety Note: Keep magnets away from electronic devices. Be careful with small magnets and iron filings around younger children. Ensure all materials are cleaned up properly after the experiment.
47. Miniature Sparks: Building a Small Tesla Coil
Objective: Construct a simple version of a Tesla coil to explore the basics of electromagnetic fields and high-voltage electricity.
Materials:
- A small PVC pipe
- Copper wire (thin, insulated)
- A battery (9-volt)
- A small light bulb (like an LED)
- Electrical tape
- Wire strippers
Procedure:
- Wrap the copper wire tightly around the PVC pipe, leaving some wire free at both ends.
- Strip the ends of the wire using wire strippers.
- Attach one end of the wire to the positive terminal of the battery.
- Tape the other end to the side of the light bulb.
- Connect the negative terminal of the battery to the metal part of the light bulb.
Observation and Results: Observe the light bulb lighting up without direct contact. Notice the creation of a small electromagnetic field around the coil.
Conclusion: This project demonstrates the principles of a Tesla coil, showing how electromagnetic fields can wirelessly transmit electricity.
Safety Note: Do not touch the coil while the battery is connected. Disconnect the battery when not in use. Handle the battery and wires with care to prevent short circuits. Supervision is recommended during assembly and testing.
48. Aqua Jet: Crafting a Homemade Water Fountain
Objective: Build a basic water fountain to explore principles of hydraulic pressure and water flow.
Materials:
- A small submersible water pump
- Plastic tubing (compatible with the pump)
- A large bowl or small basin
- Decorative stones or pebbles
- Water
- A waterproof container (to house the pump)
- Optional: waterproof LED lights
Procedure:
- Place the submersible pump inside the waterproof container and set it in the bowl or basin.
- Fill the bowl or basin with water, ensuring the pump is fully submerged.
- Attach one end of the plastic tubing to the pump.
- Arrange the tubing so that it loops above the water surface and back into the bowl.
- Decorate with stones or pebbles, and add LED lights if desired.
- Turn on the pump and adjust the water flow as needed.
Observation and Results: Watch how the water travels through the tubing and creates a jet or stream, simulating a fountain. Observe how adjusting the pump’s power changes the water flow.
Conclusion: This project demonstrates the mechanics of a water fountain, illustrating how pumps can be used to create water movement and circulation in an enclosed system.
Safety Note: Always ensure electrical components are waterproof and safe for use in water. Handle the pump and any electrical connections with dry hands and follow the manufacturer’s safety instructions. Supervision is recommended during the assembly and operation of the fountain.
Biology and Life Sciences
49. Leaf Chromatography: Unveiling Nature’s Colors
Objective: To investigate and reveal the different pigments present in leaves, demonstrating the diversity of plant chemistry.
Materials:
- A variety of leaves (green, yellow, red)
- Rubbing alcohol
- Glass jars
- Coffee filters or chromatography paper
- Scissors
- Pencils
- Tape
Procedure:
- Cut the leaves into small pieces and place each type in a separate jar.
- Pour rubbing alcohol over the leaves until they are just covered.
- Cut the coffee filters into long strips.
- Attach the top of a strip to a pencil using tape and suspend it in the jar, ensuring it doesn’t touch the leaves.
- Seal the jar and leave it in a sunny spot until the liquid travels up the strip, showing different color bands.
- Remove the strips and let them dry.
Observation and Results: Observe the different color bands on the strips. Each band represents a different pigment found in the leaves. Record the colors and their order on the strip.
Conclusion: The experiment reveals the variety of pigments in leaves, beyond just green chlorophyll, showing how plants absorb and use different wavelengths of light.
Safety Note: Use rubbing alcohol in a well-ventilated area and avoid direct skin contact. Adult supervision is recommended for handling alcohol and cutting leaves.
50. Magnetic Meals: Discovering Iron in Cereal
Objective: To explore and demonstrate the presence of iron in fortified breakfast cereals.
Materials:
- A box of iron-fortified breakfast cereal
- A strong magnet
- A clear plastic bag
- A rolling pin
Procedure:
- Place a handful of cereal in the plastic bag and seal it.
- Use the rolling pin to crush the cereal into a fine powder.
- Place the magnet on the outside of the bag and gently shake the bag, allowing the magnet to move over the powdered cereal.
- Observe the cereal powder closely as the magnet passes over it.
Observation and Results: Watch for tiny black specks clinging to the plastic bag around the magnet. These specks are particles of iron, which are attracted to the magnet.
Conclusion:The experiment highlights the presence of metallic iron in everyday foods like breakfast cereal, emphasizing the importance of iron in our diet.
Safety Note: Ensure the magnet is not swallowed and avoid tearing the plastic bag. Adult supervision is recommended for young experimenters.
51. DNA Strand Bracelets: Personalized Genetic Art
Objective: To create a unique bracelet representing a strand of DNA, illustrating the concept of genetic coding in a fun, artistic way.
Materials:
- Different colors of beads (representing the DNA bases: Adenine, Thymine, Cytosine, Guanine)
- Elastic string or thread
- Scissors
- DNA sequence chart (optional)
Procedure:
- Choose a short DNA sequence to represent (use a chart for guidance or create a random sequence).
- Assign a color of bead to each DNA base (e.g., red for Adenine, blue for Thymine, etc.).
- Thread the beads onto the string in the order of your chosen DNA sequence.
- Measure the bracelet to fit your wrist and tie off the ends securely.
Observation and Results: Observe how the sequence of colors represents a strand of DNA. Each color pattern is unique, just like an individual’s genetic code.
Conclusion: This creative activity demonstrates the concept of DNA sequencing and the uniqueness of genetic codes in a tangible, personalized manner.
Safety Note: Be cautious with small beads to avoid choking hazards, especially around younger children. Adult supervision is recommended during the bracelet-making process.
52. Egg-citing Osmosis: The Naked Egg Experiment
Objective: To demonstrate osmosis through the eggshell, illustrating how substances can move across membranes.
Materials:
- Raw eggs
- White vinegar
- A jar or bowl
- Measuring cup
- Spoon
Procedure:
- Gently place a raw egg in the jar or bowl.
- Carefully pour enough vinegar into the jar to completely cover the egg.
- Leave the egg in the vinegar for 24-48 hours.
- Carefully remove the egg and rinse it under water.
Observation and Results: Observe the egg before and after soaking in vinegar. Initially, the egg has a hard shell, but after soaking, the shell dissolves, leaving a translucent, rubbery membrane. The egg may also increase in size due to osmosis.
Conclusion: This experiment shows how vinegar (an acid) can dissolve the eggshell, leaving a semi-permeable membrane through which water can pass, demonstrating a basic principle of osmosis.
Safety Note: Handle the egg gently to avoid breaking the membrane. Work in a well-ventilated area to avoid strong vinegar smells. Adult supervision is recommended.
53. Glowing Science: Salt Circuit Creations
Objective: To explore electrical conductivity using salt and create a glowing circuit as a fun science experiment.
Materials:
- Table salt
- Water
- 9V battery
- LED lights (small)
- Wires with alligator clips
- Black paper
- Paintbrush
Procedure:
- Mix salt and water to create a saltwater solution.
- Dip the paintbrush in the saltwater solution and paint a simple circuit design on the black paper.
- Allow the saltwater design to dry completely.
- Connect one wire with an alligator clip to the negative terminal of the battery and another wire to the positive terminal.
- Clip one end of each wire to the ends of the LED light.
- Carefully place the LED’s legs onto the dried saltwater circuit path to complete the circuit.
Observation and Results: Observe if the LED light illuminates when the circuit is completed with the saltwater path.
Conclusion: This experiment demonstrates the conductivity of saltwater and how it can be used to complete an electrical circuit, making the LED light up.
Safety Note: Ensure the saltwater solution does not contact the battery terminals directly. Adult supervision is recommended for handling the battery and connecting the circuit.
54. Vibrant Cell City: Building a 3D Cell Model
Objective: To create a 3D model of a cell, highlighting its various components and functions.
Materials:
- Play dough or clay (various colors)
- Small labels or paper for labeling
- Toothpicks
- A small, round balloon
- A shallow cardboard box or a large plate for the base
Procedure:
- Inflate the balloon to represent the cell’s shape and place it on the base.
- Use different colors of play dough or clay to form cell organelles like the nucleus, mitochondria, endoplasmic reticulum, and others, placing them on and around the balloon.
- Attach labels to toothpicks and use them to identify each organelle.
- Arrange the organelles in a way that represents their actual positions and functions within a cell.
Observation and Results: Observe the different colors and shapes used to represent each part of the cell. Each color and shape choice should represent a different organelle or cell part.
Conclusion: This hands-on project helps in understanding the structure and function of different cell organelles, making the concept of cell biology more tangible and engaging.
Safety Note: Ensure all materials are non-toxic and suitable for children’s use. Adult supervision is advised during the assembly of the model, especially when using toothpicks.
55. Strawberry Genes: DNA Extraction Adventure
Objective: To extract and observe DNA from strawberries, demonstrating the physical presence of genetic material in living organisms.
Materials:
- Fresh strawberries
- Dish soap
- Salt
- Water
- Coffee filters
- Small plastic zipper bags
- Rubbing alcohol (chilled)
- Small glass or clear plastic cups
- Bamboo skewers or toothpicks
Procedure:
- Mix 1/2 cup of water, 1 teaspoon of dish soap, and 1/2 teaspoon of salt to make the extraction solution.
- Place a strawberry in a plastic bag and mash it thoroughly.
- Add 2 tablespoons of the extraction solution to the bag, then mash again.
- Place a coffee filter over a cup and pour the strawberry mixture through it.
- Add an equal amount of cold rubbing alcohol to the filtered liquid.
- Wait a few minutes and observe as a white, cloudy substance forms.
Observation and Results: Observe the formation of a white, stringy substance above the strawberry liquid layer. This is the strawberry’s DNA precipitating out of the solution.
Conclusion: This experiment visually demonstrates DNA extraction, showing that DNA is a tangible substance present in living things, like strawberries.
Safety Note: Use cold rubbing alcohol with care and avoid ingestion or contact with eyes. Adult supervision is recommended for the entire procedure.
56. Cabbage Cloning: Plant Regeneration Experiment
Objective: To demonstrate plant regeneration and cloning by growing new cabbage plants from leftover cabbage leaves.
Materials:
- Leftover cabbage leaves (preferably with a bit of stem)
- Shallow dishes or trays
- Water
- Sunlight or a grow light
- Soil (optional for later stage)
Procedure:
- Place the cabbage leaves in the shallow dishes or trays.
- Add a small amount of water to each dish, just enough to cover the bottom.
- Place the dishes in a sunny spot or under a grow light.
- Keep the water level consistent and wait for roots to start forming at the base of the leaves.
- Once roots appear, optionally transfer the leaves to soil to continue growing.
Observation and Results: Watch for the development of roots and new leaves from the base of the cabbage leaves. This may take several days to a few weeks.
Conclusion: This experiment showcases the ability of plants to regenerate and clone themselves from parts of their structure, highlighting an aspect of plant biology and reproduction.
Safety Note: Ensure the setup is stable to prevent water spillage. Adult supervision is recommended for younger children, especially when transferring the plants to soil.
57. Microbe Explorers: Cultivating Bacteria
Objective: To cultivate and observe bacteria growth from different environments, demonstrating the ubiquity of microbes in our daily life.
Materials:
- Petri dishes with agar (pre-prepared)
- Cotton swabs
- Warm water
- Gloves
- Labels and marker
- Tape
Procedure:
- Wear gloves for safety.
- Moisten a cotton swab with warm water.
- Gently swab a surface of your choice (e.g., a keyboard, doorknob, or toothbrush).
- Swipe the swab across the agar in a zigzag pattern.
- Seal the Petri dish with tape, label it with the source of the sample, and date.
- Store the dishes upside down in a warm, dark place.
- Observe daily for bacterial growth.
Observation and Results: Note the appearance, color, and amount of bacterial colonies that grow in each dish over several days.
Conclusion: This experiment reveals the diverse and abundant presence of bacteria in various environments, emphasizing the importance of hygiene and cleanliness.
Safety Note: Avoid opening the Petri dishes once the bacteria have started growing. Do not touch or inhale the bacterial colonies. Dispose of the dishes properly, as per your school’s safety guidelines. Adult supervision is recommended.
58. Rainbow Dissolve: The Skittles Water Experiment
Objective: To observe the effects of water on the dissolving and diffusion of Skittles’ colors, demonstrating principles of solubility and concentration gradients.
Materials:
- Skittles candy
- White plate
- Warm water
- Room temperature water
- Timer or stopwatch
Procedure:
- Arrange the Skittles in a circle along the edge of the plate, with alternating colors.
- Gently pour room temperature water onto the plate, just enough to cover the bottom.
- Start the timer and observe the colors as they dissolve and spread towards the center.
- Repeat the experiment using warm water and compare the results.
Observation and Results: Notice how the colors dissolve and move through the water, creating a rainbow effect. Observe any differences in the rate of dissolving and diffusion between room temperature and warm water.
Conclusion: This experiment demonstrates how temperature affects the rate at which candy colors dissolve and spread in water, illustrating basic principles of solubility and diffusion.
Safety Note: Ensure the work area is clean and dry to prevent slipping or staining. Keep the candies away from small children and pets.
59. Eggshell Enamel: The Tooth Decay Experiment
Objective: To simulate and observe the effects of different liquids on tooth enamel, using eggshells as a model.
Materials:
- Raw eggs
- Various liquids (soda, fruit juice, water, vinegar)
- Clear cups or jars
- Labels and marker
Procedure:
- Carefully place a whole raw egg in each cup or jar.
- Pour a different liquid into each cup, ensuring the egg is completely submerged.
- Label each cup with the type of liquid used.
- Leave the eggs undisturbed for 24 to 48 hours.
- Gently remove the eggs and observe any changes to the shell.
Observation and Results: Note any discoloration, softening, or erosion of the eggshells. Compare the effects of each liquid on the eggs.
Conclusion: This experiment demonstrates how acidic substances can erode and damage tooth enamel, mimicked by the eggshells, highlighting the importance of dental hygiene.
Safety Note: Handle the raw eggs carefully to avoid breakage and potential mess. Wash hands thoroughly after handling the eggs. Adult supervision is recommended.
60. Decay Diary: Observing Fruit Rot
Objective: To study the process of fruit decay over time, understanding the factors that contribute to spoilage.
Materials:
- Different types of fresh fruit (banana, apple, berry, etc.)
- Clear plastic bags
- Labels and marker
- Notebook for observations
Procedure:
- Place each type of fruit in a separate plastic bag.
- Label each bag with the type of fruit and the date.
- Observe the fruit daily, noting any changes in appearance, texture, and smell.
- Record these observations in the notebook.
- Continue this process for a week or until significant decay is observed.
Observation and Results: Monitor the progression of decay, noting the rate at which each fruit type rots, any presence of mold, and changes in color and texture.
Conclusion: This experiment demonstrates the natural process of fruit decay and highlights the role of environmental factors in the speed of spoilage.
Safety Note: Avoid consuming the fruit after it begins to rot. Wash hands thoroughly after handling rotten or moldy fruit. Dispose of the fruit safely once the experiment is concluded. Adult supervision is recommended.
61. Bug Bait: Investigating Insect Attractions
Objective: To explore what types of substances attract insects, understanding their preferences and behaviors.
Materials:
- Sweet liquid (such as sugar water or fruit juice)
- Salt water
- Plain water
- Vinegar
- Small shallow dishes or caps
- Notebook and pen for observations
- Outdoor space (garden, yard, or park)
Procedure:
- Fill each dish with a different liquid: sweet, salty, plain water, and vinegar.
- Place the dishes in an outdoor area where insects are commonly seen.
- Observe the dishes at regular intervals (e.g., every hour) for a few hours.
- Record the number and type of insects attracted to each dish.
- Repeat the experiment at different times of the day or in different weather conditions, if possible.
Observation and Results: Note which liquids attract the most insects and the type of insects attracted to each kind of liquid.
Conclusion: The experiment helps in understanding insect preferences and their sensory attractions, providing insights into their behavior and ecology.
Safety Note: Be cautious around insects to avoid bites or stings. Avoid disturbing natural habitats. Ensure all experiments are conducted in safe, open, and supervised environments.
62. Sprout Spotter: Homemade Seed Germinator
Objective: To observe and understand the process of seed germination and the factors that affect it.
Materials:
- Various seeds (beans, peas, or sunflower seeds)
- Paper towels
- Clear plastic bags or jars
- Water
- A sunny windowsill or a place with consistent light
- Labels and marker
Procedure:
- Wet the paper towels and wring out excess water.
- Place a few seeds between the layers of the damp paper towel.
- Put the paper towel with seeds into a plastic bag or jar.
- Label the bag or jar with the type of seed and date.
- Place the setup in a sunny spot or under consistent light.
- Observe the seeds daily, keeping the paper towel moist.
Observation and Results: Record the changes in the seeds each day, noting when they start to sprout and the growth progress.
Conclusion: This experiment demonstrates the germination process of seeds, showing how a plant begins its life cycle from a seed under suitable conditions.
Safety Note: Ensure seeds are kept moist but not overly wet to prevent mold growth. Supervise young children to make sure they don’t ingest the seeds.
63. Sunblock Science: Testing Sunscreen Protection
Objective: To investigate the effectiveness of different sunscreens in blocking UV rays.
Materials:
- Several brands of sunscreen with different SPF levels
- UV-sensitive beads or paper
- A sunny outdoor location
- Stopwatch or timer
- Notebook and pen for recording results
Procedure:
- Apply a different sunscreen on separate sections of the UV-sensitive material.
- Expose the material to direct sunlight for a fixed amount of time (e.g., 30 minutes).
- Observe and record any changes in the UV-sensitive beads or paper.
- Compare the effects of different sunscreens based on the changes observed.
Observation and Results: Note the level of color change or lack thereof in the UV-sensitive material, indicating the amount of UV radiation each sunscreen blocks.
Conclusion: The experiment helps to understand the effectiveness of various sunscreens in protecting against UV rays, highlighting the importance of using sunscreen for skin protection.
Safety Note: Ensure that the experiment is conducted in a safe outdoor environment. Avoid looking directly at the sun. Adult supervision is recommended, especially for handling different sunscreen products.
64. Sweet Science: Comparing Sugar Levels in Foods
Objective: To research and compare the sugar content in various food items, promoting awareness of sugar intake in our diets.
Materials:
- A variety of packaged food items (cereal, juice, yogurt, etc.)
- Food nutrition labels
- Notebook and pen
- Calculator (optional)
Procedure:
- Select a range of different packaged food items.
- Read and note the sugar content per serving from the nutrition labels of each item.
- Record these values in a notebook, categorizing them by food type.
- Use a calculator to compare and analyze the sugar content relative to serving sizes.
Observation and Results: Document the amount of sugar in each food item, noting any surprising findings or significant differences between similar products.
Conclusion: This project highlights the varying sugar content in everyday foods, emphasizing the importance of reading nutrition labels for a healthier diet.
Safety Note: Ensure that all food items are handled safely and hygienically. This project is research-based, so there are minimal physical risks involved.
65. Genetic Mirror: Exploring Sibling Traits
Objective: To study and compare physical and behavioral traits among siblings to understand the role of genetics and environment.
Materials:
- A group of siblings or photographs of siblings
- Trait comparison chart (including height, eye color, hair color, etc.)
- Pen and paper for recording observations
- Measuring tape (for height)
Procedure:
- Select a range of physical traits (like height, eye color, hair color) and behavioral traits (like preferences in food, music, hobbies).
- Measure or observe these traits in each sibling.
- Record the data for each sibling on the comparison chart.
- Analyze similarities and differences in traits among the siblings.
Observation and Results: Note patterns of similarities and differences in traits among siblings. Consider how these might reflect genetic inheritance or environmental influences.
Conclusion: This experiment sheds light on the fascinating interplay of genetics and environment in shaping individual traits, particularly in siblings.
Safety Note: Ensure privacy and respect for all participants during the study. If using photographs, obtain consent from individuals or guardians.
Environmental Science
66. Miniature Marine Mess: Simulating an Oil Spill
Objective: To simulate and observe the environmental impact of an oil spill on water and wildlife.
Materials:
- A large clear container or tray
- Water
- Cooking oil
- Blue food coloring (optional)
- Feathers or small toy animals
- Dish soap
- Spoon or stick for stirring
Procedure:
- Fill the container with water and add a few drops of blue food coloring for a more realistic ocean effect.
- Gently pour a small amount of cooking oil on the water surface to simulate an oil spill.
- Place feathers or toy animals in the ‘oil spill’ and observe what happens.
- Add a few drops of dish soap to the water and gently stir, observing the effect on the oil.
Observation and Results: Note how the oil coats the feathers or toy animals, mimicking the effect on wildlife. Observe the change when dish soap is added, representing cleanup efforts.
Conclusion: This experiment demonstrates the damaging effects of oil spills on marine environments and the challenges involved in cleaning them up.
Safety Note: Ensure the experiment is conducted in a well-ventilated area. Adult supervision is recommended, especially when handling dish soap and food coloring. Avoid ingesting any materials used in the experiment.
67. Eco-Explorer: Building Your Own Biodome
Objective: To design and create a small-scale biodome, understanding ecosystems and the balance required to maintain them.
Materials:
- A large clear plastic container with a lid
- Soil
- Small plants (or seeds)
- Small rocks and pebbles
- Water
- Optional: small insects or worms
Procedure:
- Place a layer of rocks and pebbles at the bottom of the container for drainage.
- Add soil on top of the rocks.
- Plant the small plants or sow seeds in the soil.
- Optionally, introduce small insects or worms.
- Water the plants lightly, then seal the container with the lid.
- Place the biodome in a location with natural light but not in direct sunlight.
Observation and Results: Observe the growth of the plants and the interaction with other elements in the biodome over time. Notice any changes in the ecosystem.
Conclusion: Creating a biodome helps understand the delicate balance of ecosystems and the importance of each component in maintaining the health of the environment.
Safety Note: Ensure the biodome is kept in a stable place to prevent spills. If using insects or worms, handle them carefully and ensure they are suitable for the closed environment. Adult supervision is recommended.
68. Tiny Trash Transformations: Cup Composting
Objective: To demonstrate the process of composting and its role in waste reduction and soil enrichment.
Materials:
- Clear plastic cups
- Soil
- Kitchen scraps (vegetable peels, fruit scraps, coffee grounds)
- Dry leaves or shredded paper
- Water
- Spoon or stick for mixing
Procedure:
- Fill a plastic cup halfway with soil.
- Add a layer of kitchen scraps.
- Add a layer of dry leaves or shredded paper.
- Slightly moisten the mixture with water.
- Use the spoon or stick to mix the contents gently.
- Cover the cup with plastic wrap and poke a few small holes for ventilation.
- Place the cup in a warm area and observe the changes over several weeks.
Observation and Results: Note the changes in the cup’s contents, including any decrease in volume and the appearance of new soil-like material as the scraps decompose.
Conclusion: This experiment illustrates how composting can transform organic waste into nutrient-rich soil, showcasing an eco-friendly way to reduce waste.
Safety Note: Ensure to use only plant-based kitchen scraps (no meat or dairy). Handle the compost mixture with care, and wash hands thoroughly after touching it. Adult supervision is recommended.
69. Green Barriers: Plants vs. Tsunami Waves
Objective: To investigate how plant life, especially mangroves, can reduce the impact of tsunami waves.
Materials:
- A large, shallow tray or container
- Sand
- Water
- Small plants or bushes (to simulate mangroves or coastal vegetation)
- A block or object to create waves
- Ruler or measuring tape
Procedure:
- Fill the tray with sand to create a beach-like environment.
- Plant the small plants at one end of the tray to represent coastal vegetation.
- Gradually add water to the tray until it resembles a shallow ocean.
- Use the block to create waves in the water, simulating tsunami waves.
- Observe and measure the impact of the waves on the shore with and without the plants.
Observation and Results: Note the difference in wave impact on the shore area with plants compared to the bare sand area.
Conclusion: This experiment demonstrates the potential of coastal vegetation, like mangroves, in reducing the destructive force of tsunami waves, highlighting the importance of preserving such natural barriers.
Safety Note: Ensure the experiment is conducted in a waterproof area to prevent water damage. Adult supervision is recommended for creating waves and handling plants.
70. Crystal Clear: Water Purification with Charcoal
Objective: To demonstrate how charcoal can filter impurities from water, mimicking natural and man-made water purification processes.
Materials:
- Clear plastic bottles with the bottom cut off
- Coffee filters or cheesecloth
- Activated charcoal (available at pet stores or aquarium supplies)
- Sand
- Gravel or small stones
- Dirty water (create by mixing water with soil or safe household substances)
- Clear containers or glasses to collect filtered water
Procedure:
- Invert the plastic bottle and place a coffee filter or cheesecloth at the neck.
- Layer the materials inside the bottle: start with activated charcoal, then a layer of sand, and top it with gravel.
- Slowly pour the dirty water into the top of the bottle and let it filter into the container below.
- Observe the water that comes out at the bottom.
Observation and Results: Note the clarity of the water before and after passing through the filter. Observe the removal of particles and changes in water color.
Conclusion: This experiment illustrates how layers of natural materials like charcoal, sand, and gravel can purify water, making it clearer and removing some impurities.
Safety Note: Ensure the charcoal used is chemical-free (activated charcoal is recommended). Do not drink the filtered water, as it is not guaranteed to be safe for consumption. Adult supervision is recommended.
71. Simulated Showers: The Acid Rain Experiment
Objective: To simulate the effects of acid rain on plants and materials, showcasing environmental impacts of air pollution.
Materials:
- Two small potted plants (same type)
- Vinegar
- Water
- Two spray bottles
- Measuring cup
- pH testing strips (optional)
- Notebook and pen for recording observations
Procedure:
- Fill one spray bottle with pure water and the other with a mixture of water and vinegar (to simulate acid rain).
- Label each bottle clearly.
- Over a week, regularly spray one plant with pure water and the other with the vinegar solution.
- Observe and note any changes in the plants’ health and appearance.
- (Optional) Use pH testing strips to compare the acidity of the two solutions.
Observation and Results: Record the physical changes in both plants, particularly looking for signs of damage or stress in the plant sprayed with the vinegar solution.
Conclusion: This experiment demonstrates the potentially harmful effects of acid rain on plant life, highlighting environmental concerns related to air pollution and ecosystem health.
Safety Note: Handle vinegar carefully to avoid skin irritation or eye contact. Ensure that the plants are not consumed, especially if using strong vinegar solutions. Adult supervision is recommended.
72. Ancient Apples: Exploring Mummification
Objective: To understand the mummification process by observing how different substances affect the preservation of apple slices.
Materials:
- Apple slices (same size and thickness)
- Salt
- Baking soda
- Vinegar
- Honey
- Several small bowls or containers
- Labels and marker
Procedure:
- Place each apple slice in a separate bowl.
- Cover one slice with salt, another with baking soda, a third with vinegar, and a fourth with honey.
- Label each bowl with the substance used.
- Leave the apple slices undisturbed for several days in a dry, safe place.
- Observe and note changes in appearance, texture, and smell of each apple slice over time.
Observation and Results: Record the effects of each substance on the apple slices, noting which ones prevent decay and which ones do not.
Conclusion: This experiment demonstrates how different substances can preserve organic material, similar to ancient mummification methods.
Safety Note: Ensure that the apple slices and substances used are handled in a clean environment. Do not consume the apple slices after the experiment. Adult supervision is recommended.
Practical Science Applications
73.Sound Surge: DIY Smartphone Speaker
Objective: To amplify a smartphone’s sound using simple materials, exploring basic principles of sound amplification.
Materials:
- A cardboard tube (from a paper towel roll)
- Two plastic cups
- Scissors or a craft knife
- Tape or glue
- A smartphone with music capability
Procedure:
- Cut a slot in the cardboard tube just wide enough to hold your smartphone.
- Cut a hole in the side of each plastic cup, slightly smaller than the diameter of the tube.
- Attach each cup to an end of the tube using tape or glue, aligning the holes.
- Place the smartphone into the slot in the tube with the speaker facing into the tube.
- Play music from the smartphone and observe the sound.
Observation and Results: Notice any increase in volume or changes in sound quality when the smartphone is playing music through this makeshift speaker system.
Conclusion: This project demonstrates how simple materials can be used to enhance the volume and quality of sound from a smartphone, illustrating basic acoustic amplification.
Safety Note: Use scissors or a craft knife carefully when cutting materials. Ensure the smartphone is securely placed to prevent it from falling. Adult supervision is recommended.
74. Crafty Support: Building a DIY Cell Phone Stand
Objective: To design and construct a functional cell phone stand using everyday materials, demonstrating principles of engineering and design.
Materials:
- Cardboard
- Scissors or a craft knife
- Ruler
- Pencil
- Glue or tape
- Decorative materials (markers, paint, stickers, etc.) for customization
Procedure:
- Measure and cut a piece of cardboard into two rectangles, one for the base and one for the back support.
- Cut a small notch in the base piece to hold the phone.
- Glue or tape the back support piece perpendicular to the base at a comfortable viewing angle.
- Allow the glue to dry if used.
- Customize the stand with decorative materials.
Observation and Results: Test the stand with a cell phone to ensure it’s stable and holds the phone at a good angle for viewing.
Conclusion: This project illustrates basic principles of design and stability in creating a functional and personalized cell phone stand.
Safety Note: Handle scissors or a craft knife carefully to avoid injury. Adult supervision is recommended during cutting and assembling the stand.
75. Eureka! The Archimedes Squeeze Experiment
Objective: To demonstrate Archimedes’ principle by observing how squeezing a bottle affects an object’s buoyancy in water.
Materials:
- A clear plastic bottle with a cap (like a soda bottle)
- Water
- A small balloon
- A sink or basin filled with water
Procedure:
- Fill the plastic bottle with water and tightly close the cap.
- Partially inflate the balloon and fit it inside the bottle.
- Ensure the bottle is completely submerged in the sink or basin filled with water.
- Squeeze the bottle and observe the balloon’s behavior.
Observation and Results: Notice how the balloon reacts when the bottle is squeezed and released. Observe changes in the balloon’s size and position within the bottle.
Conclusion: This experiment showcases the principle of buoyancy and how pressure affects it, as demonstrated by Archimedes’ famous discoveries in physics.
Safety Note: Be careful not to overinflate the balloon to avoid bursting. Ensure the experiment is conducted over a sink or waterproof area to manage spills. Adult supervision is recommended.
76. Colorful Smiles: Exploring How Drinks Affect Tooth Color
Objective: To investigate how different beverages can stain teeth by using eggs as a model.
Materials:
- Hard-boiled eggs
- Various drinks (coffee, tea, cola, grape juice)
- Clear cups or bowls
- Water for rinsing
- Notebook for observations
Procedure:
- Place one hard-boiled egg in each cup or bowl.
- Pour a different beverage over each egg until fully submerged.
- Leave the eggs in the drinks for 24 hours.
- Carefully remove the eggs and rinse them with water.
Observation and Results: Record the color changes on the eggshells. Compare the staining effect of each beverage, noting which ones caused more discoloration.
Conclusion: This experiment demonstrates how certain drinks can stain our teeth, similar to how they stain the eggshells, emphasizing the importance of dental hygiene.
Safety Note: Handle the eggs gently to avoid cracking. Supervision is recommended for younger participants. Dispose of the eggs properly after the experiment.
77. Shiny Past: Reviving Coins with Chemistry
Objective: To explore the effectiveness of household chemicals in cleaning and restoring old coins.
Materials:
- Old, tarnished coins
- White vinegar
- Table salt
- Bowl or container
- Water for rinsing
- Soft cloth or towel
- Gloves
Procedure:
- Mix equal parts of white vinegar and water in a bowl.
- Add a teaspoon of salt and stir until dissolved.
- Submerge the coins in the solution for 5 minutes.
- Remove the coins and gently wipe with a soft cloth.
Observation and Results: Observe the before and after appearance of the coins, noting changes in color and brightness. Document the effectiveness of the cleaning solution.
Conclusion: This experiment demonstrates the chemical reaction between vinegar and salt that helps remove tarnish from coins, highlighting the practical use of everyday substances.
Safety Note: Wear gloves to protect your hands from chemicals and avoid using harsher substances like bleach. Supervision is advised.
78. Conductive Creations: Building a Graphite Circuit
Objective: To understand the basics of electrical conductivity by creating a simple circuit using graphite.
Materials:
- Pencil (HB or softer)
- Paper
- 9V battery
- Small light bulb (or LED)
- Wires with alligator clips
Procedure:
- Draw a thick line with the pencil on a piece of paper, creating a path for the circuit.
- Attach one wire to the positive terminal of the battery and clip the other end to the graphite line.
- Connect another wire from the negative terminal of the battery to one terminal of the light bulb.
- Complete the circuit by attaching a wire from the other terminal of the light bulb to the graphite line.
Observation and Results: Observe whether the light bulb lights up when the circuit is completed. Note the conductivity of graphite and how well it allows electricity to pass through.
Conclusion: This experiment demonstrates that graphite can conduct electricity, highlighting an interesting property of a common material.
Safety Note: Do not let the wires or alligator clips touch each other to prevent short circuits. Always have adult supervision when working with batteries and electrical components.
79. Hot Air, Big Balloons: Exploring Temperature and Expansion
Objective: To investigate how temperature affects the maximum size a balloon can inflate.
Materials:
- Balloons (same size and brand)
- Freezer
- Warm water (not boiling)
- Measuring tape
- Timer
Procedure:
- Place one balloon in the freezer for at least 30 minutes.
- Fill a bowl with warm water (comfortable to touch).
- Simultaneously, inflate two balloons—one at room temperature and the other warmed in the water—for the same amount of time (e.g., 1 minute).
- Measure the circumference of both balloons using the measuring tape.
Observation and Results: Record the size of each balloon after inflation. Note any differences in size between the room temperature balloon and the one exposed to warmth.
Conclusion: This experiment shows the effect of temperature on air expansion within a balloon, demonstrating a fundamental principle of thermodynamics.
Safety Note: Ensure the water is not too hot to prevent burns. Adult supervision is recommended, especially when handling balloons as they can be a choking hazard.
80. Colorful Meltdown: Testing Crayon Melting Points
Objective: To determine if crayons of different colors melt at the same temperature.
Materials:
- Crayons of various colors (preferably from the same brand)
- Oven
- Aluminum foil
- Baking sheet
- Oven mitts
- Timer
- Thermometer (optional)
Procedure:
- Preheat the oven to a low temperature (e.g., 150°F or 65°C).
- Place crayons of different colors on a baking sheet lined with aluminum foil, spaced apart.
- Put the baking sheet in the oven and observe.
- Check every 5 minutes to see which crayons start to melt.
Observation and Results: Note the order and time at which each crayon begins to melt. Record any differences in melting times between colors.
Conclusion: This experiment helps explore whether the melting point of crayons differs by color, offering insights into the composition of crayons and how additives may affect melting points.
Safety Note:Always use oven mitts to handle hot materials. Supervision is required to ensure safety when using the oven. Do not touch the crayons until they have completely cooled after removing them from the oven.
81. Sparkling Smiles: Creating Mini Lightning in Your Mouth
Objective: To demonstrate the production of tiny electrical sparks (triboluminescence) by chewing certain candies in the dark.
Materials:
- Wintergreen-flavored hard candies (like Life Savers Wint-O-Green)
- A dark room (must be very dark)
- Mirror (optional)
Procedure:
- Go into a very dark room and give your eyes a few minutes to adjust to the darkness.
- Place a wintergreen-flavored candy in your mouth.
- Bite down hard on the candy and observe any sparks or flashes of light.
- Optionally, you can do this in front of a mirror to better see the sparks.
Observation and Results: Watch for tiny flashes of blue light when the candy is crushed. These are small sparks of electricity.
Conclusion: This experiment shows how friction and breaking sugar crystals in the candy can produce visible electrical energy, a phenomenon known as triboluminescence.
Safety Note: Be careful while chewing hard candies to avoid choking. This activity should be performed under adult supervision. Ensure that the room is safe and free of obstacles to prevent accidents in the dark.
82. Mysterious Journey: Guiding Water Along a String
Objective: To investigate how water can travel down a string due to capillary action.
Materials:
- A cup or glass filled with water
- A second empty cup or glass
- A piece of yarn or cotton string (about 20-30 cm long)
- Tape or a clip to secure the string
Procedure:
- Fill one cup with water and place the empty cup next to it.
- Attach one end of the string to the bottom of the inside of the full cup (using tape or a clip).
- Run the other end of the string over the rim and into the empty cup, ensuring the string touches the bottom.
- Observe the string and the empty cup over time.
Observation and Results: Watch how the water slowly travels along the string from the full cup to the empty cup. Record the time it takes for water to start dripping into the empty cup.
Conclusion: This experiment demonstrates capillary action, the ability of a liquid to flow in narrow spaces without the assistance of external forces.
Safety Note: Ensure the cups are stable and won’t tip over. Perform the experiment on a surface that can tolerate spills.
83. Sweet Science: Exploring Osmosis with Gummy Bears
Objective: To observe osmosis in action using gummy bears and various solutions.
Materials:
- Gummy bears
- Water
- Saltwater solution
- Sugar water solution
- Three clear cups or bowls
- Ruler or measuring tape
- Notebook for recording observations
Procedure:
- Place a gummy bear in each of the three cups.
- Fill one cup with plain water, the second with saltwater, and the third with sugar water.
- Leave the gummy bears in the solutions overnight.
- The next day, remove the gummy bears and measure their size.
Observation and Results: Record the size and texture of the gummy bears before and after soaking in the solutions. Note any changes in size or appearance for each bear in the different solutions.
Conclusion: This experiment demonstrates osmosis, the movement of water through a semi-permeable membrane, illustrated by the gummy bears absorbing water and changing in size.
Safety Note: Ensure that the gummy bears are not consumed after the experiment. Adult supervision is recommended.
84. Shadow Play: Crafting a Homemade Camera Obscura
Objective: To explore the principles of optics and image projection by building a simple camera obscura.
Materials:
- A cardboard box (shoebox size works well)
- A small piece of aluminum foil
- A pin or needle
- Tape
- White paper
- Scissors
Procedure:
- Cut a small hole on one side of the cardboard box.
- Cover the hole with aluminum foil and tape it securely.
- Make a tiny pinhole in the center of the foil.
- Tape a piece of white paper on the inside of the box, opposite the pinhole.
- In a dimly lit room, point the pinhole towards a well-lit scene (like a window).
Observation and Results: Observe the image that appears on the paper inside the box. Note how the scene is projected upside down and reversed.
Conclusion: This experiment demonstrates how light travels and how images can be projected through a small aperture, illustrating the basic function of a camera.
Safety Note: Be careful with scissors and the pin or needle. Ensure the box is stable to prevent it from falling while observing the projected image. Adult supervision is recommended.
85. Sky in a Bottle: Creating a Miniature Cloud
Objective: To demonstrate cloud formation through a simple and safe experiment.
Materials:
- A clear plastic bottle with a tight-sealing cap
- Warm water
- Matches (to be used by an adult)
- Ice cubes
Procedure:
- Pour a small amount of warm water into the plastic bottle, just enough to cover the bottom.
- Have an adult light a match and hold it inside the bottle for a few seconds before dropping it in the water.
- Quickly seal the bottle with the cap.
- Place ice cubes on top of the bottle cap.
- Watch the inside of the bottle for cloud formation.
Observation and Results: Observe the cloud that forms inside the bottle. Note how the warm air inside the bottle reacts with the cold surface of the bottle cap to form a cloud.
Conclusion: This experiment demonstrates how temperature and pressure changes in the atmosphere contribute to cloud formation.
Safety Note: Adult supervision is necessary, especially for handling matches. Be careful with the hot water and ensure the bottle is securely sealed to avoid spills.
86. The Magical Water Path: Guiding Water with a String
Objective: To explore the concept of adhesion and cohesion by directing the flow of water down a string.
Materials:
- A glass of water
- A long piece of cotton string (about 30 cm)
- Tape
- Another empty glass or container
Procedure:
- Tape one end of the string to the inside bottom of the full glass of water.
- Hold the empty glass lower than the full one, and place the other end of the string inside it.
- Tilt the full glass so water starts to flow down the string.
- Try to pour the water down the string into the empty glass.
Observation and Results: Observe how the water travels along the string instead of falling straight down. Note how the water’s adherence to the string guides its path.
Conclusion: This experiment demonstrates the properties of adhesion and cohesion in water, showing how water molecules stick to each other and to other materials.
Safety Note: Perform the experiment over a sink or tray to catch any spills. Ensure the glasses are stable and won’t easily tip over. Adult supervision is recommended.
87. Rainbow in a Glass: Exploring Density with Colorful Layers
Objective: To understand how differences in density affect the layering of liquids by creating a colorful water column.
Materials:
- Water
- Sugar
- Food coloring (various colors)
- Measuring spoons
- Five clear glasses
- Spoon for stirring
Procedure:
- Dissolve different amounts of sugar in each glass of water (e.g., 1 tsp in the first glass, 2 tsp in the second, and so on).
- Add a few drops of different food coloring to each glass and stir well.
- Carefully layer the solutions in one tall glass, starting with the most sugary (dense) solution at the bottom and ending with the least sugary (light) on top.
Observation and Results: Observe the formation of distinct colored layers. Record how each layer corresponds to its sugar content.
Conclusion: This experiment demonstrates that liquids with different densities do not mix easily and can form distinct layers, an important concept in chemistry and environmental science.
Safety Note: Be careful while pouring the solutions to maintain distinct layers. Adult supervision is recommended, especially when handling glasses and liquids.
88. Air Dance: The Levitating Ping Pong Ball
Objective: To demonstrate the principles of air pressure and airflow with a floating ping pong ball.
Materials:
- A hair dryer
- A ping pong ball
- An open space with no wind
Procedure:
- Plug in the hair dryer and turn it on to the highest setting.
- Hold the hair dryer so it points straight up.
- Carefully place the ping pong ball in the stream of air from the hair dryer.
Observation and Results: Watch as the ping pong ball floats in the air above the hair dryer. Observe how the ball stays within the stream of air, even when the hair dryer is slightly tilted.
Conclusion: This experiment shows how the force of air from the hair dryer (air pressure) can counteract gravity, allowing the ping pong ball to float. It also demonstrates the principle of airflow and balance.
Safety Note: Ensure the hair dryer is used in a safe area away from water and is handled by an adult or under adult supervision. Keep hair and loose clothing away from the air intake of the hair dryer to prevent accidents.
89. Balancing Act: Uncovering the Secrets of the Center of Mass
Objective: To understand the concept of the center of mass and how it affects the balance and stability of objects.
Materials:
- A ruler or a straight stick
- Two forks
- A coin or a small weight
- A sturdy, flat surface (like a table)
Procedure:
- Interlock the prongs of the two forks.
- Attach the coin or small weight to one end of the ruler or stick.
- Carefully balance the combined forks and coin on the edge of the table using the ruler or stick.
Observation and Results:
Observe how the forks and the weight balance on the edge of the table. Note how the position of the weight affects the balance.
Conclusion: This experiment demonstrates the importance of the center of mass in balancing objects. It shows that the position of the center of mass can be manipulated to achieve stability in seemingly unstable conditions.
Safety Note: Ensure the table or surface used is stable. Be cautious when balancing the objects to prevent them from falling and causing injury. Adult supervision is recommended.
90. Launch and Learn: Building a Mini Catapult
Objective: To understand the basics of physics and engineering by constructing and testing a simple catapult.
Materials:
- Popsicle sticks (around 10-15)
- Rubber bands
- Plastic spoon
- Small, soft objects for launching (like marshmallows or pom-poms)
Procedure:
- Stack 8-10 popsicle sticks and secure them at both ends with rubber bands.
- Take 2 more sticks, and attach them at one end with a rubber band to form a V shape.
- Insert the stack between the V-shaped sticks and secure all sticks together at one end with another rubber band.
- Attach the plastic spoon to the top stick using a rubber band.
- Place a small object in the spoon, pull back, and release to launch.
Observation and Results: Observe how far the objects are launched. Experiment with different angles and pulling strengths to see how they affect the launch distance.
Conclusion: This experiment demonstrates the principles of tension and projectile motion, showing how energy can be stored and released to propel an object.
Safety Note: Ensure that the objects being launched are soft and lightweight to prevent injury or damage. Always launch in a safe direction away from people or fragile items. Adult supervision is recommended.
91. Breath of Life: Simulating Lungs with Balloons
Objective: To demonstrate how lungs work by creating a simple model using balloons and a plastic bottle.
Materials:
- Two balloons
- A large plastic bottle (like a 2-liter soda bottle)
- Scissors
- Two rubber bands
- A straw
Procedure:
- Cut the bottom off the plastic bottle.
- Attach a balloon to one end of the straw using a rubber band, ensuring it’s airtight.
- Insert the straw into the bottle’s neck and secure the balloon inside the bottle.
- Attach the second balloon to the cut end of the bottle with a rubber band, covering the opening completely.
- Gently pull and release the bottom balloon to simulate lung expansion and contraction.
Observation and Results: Observe how the balloon inside the bottle inflates and deflates as the bottom balloon is manipulated. Record the movement and compare it to how lungs fill and empty with air.
Conclusion: This experiment models how the diaphragm works in breathing, demonstrating the basic mechanism of lung expansion and contraction in respiration.
Safety Note: Be careful with scissors when cutting the plastic bottle. Adult supervision is recommended to ensure safety during the construction of the model.
92. Owl’s Dinner: Uncovering the Diet of a Night Hunter
Objective: To investigate the diet of owls by examining the contents of owl pellets.
Materials:
- Owl pellets (can be ordered from science supply companies)
- Tweezers
- Gloves
- Magnifying glass
- Tray or large sheet of paper
- Chart of small animal bones (for identification)
Procedure:
- Put on gloves and place an owl pellet on the tray or paper.
- Carefully use the tweezers to dissect the pellet, separating bones and fur.
- Use the magnifying glass to examine and identify the bones using the chart.
- Record the types of animals found in the pellet.
Observation and Results: Note the variety of bones and their sizes. Identify as many as possible to determine the range of the owl’s diet.
Conclusion: This experiment allows insight into the food chain and the role of owls in the ecosystem, showing the diversity of their diet.
Safety Note: Wear gloves while handling the pellets to maintain hygiene. Ensure a clean workspace and dispose of the pellet remnants properly after the experiment. Adult supervision is recommended.
93. Spud Power: Creating Electricity with Potatoes
Objective: To demonstrate how a chemical reaction in potatoes can generate electricity.
Materials:
- Two large potatoes
- Two copper coins or strips
- Two zinc nails or galvanized nails
- Three alligator clip wires
- A small light bulb or LED
Procedure:
- Insert a copper coin and a zinc nail into each potato, making sure they don’t touch each other.
- Connect one alligator clip wire to the copper coin in the first potato and the other end to the positive terminal of the light bulb.
- Attach another wire to the zinc nail in the same potato and connect it to the copper coin in the second potato.
- Connect the third wire from the zinc nail in the second potato to the negative terminal of the light bulb.
Observation and Results: Observe if the light bulb lights up. Note the reaction causing the bulb to illuminate.
Conclusion: This experiment demonstrates how a chemical reaction between zinc and copper in the presence of an acid (potato juice) can create an electrical current, illustrating a basic principle of batteries.
Safety Note: Be careful not to short-circuit the wires. Ensure that the copper and zinc do not touch inside the potato. Adult supervision is recommended.
94. Gentle Touch: Testing the Safety of Baby Products
Objective: To investigate the mildness and safety of various baby products on delicate skin.
Materials:
- Different baby products (baby lotion, shampoo, soap)
- pH test strips
- Cotton swabs
- Small bowls for each product
- Water
- Notebook for recording observations
Procedure:
- Place a small amount of each baby product in separate bowls.
- Dip a cotton swab into the first product and then dab it onto a pH test strip.
- Compare the color change on the test strip with the pH scale to determine the product’s pH level.
- Repeat the process for each baby product.
- Record the pH levels in the notebook.
Observation and Results: Note the pH levels of each product. Products with a pH close to that of human skin (around 5.5) are generally milder and safer for delicate skin.
Conclusion: This experiment helps to understand the importance of pH balance in baby products and how it affects their suitability for sensitive skin.
Safety Note: Avoid direct contact with eyes and mouth when testing the products. Wash hands thoroughly after handling. Adult supervision is recommended.
95. Battle of the Blots: Testing Homemade Stain Removers
Objective: To explore the effectiveness of different household substances in removing stains.
Materials:
- White cloth or paper towels
- Common staining agents (e.g., coffee, ketchup, ink)
- Household cleaning agents (e.g., vinegar, baking soda, lemon juice)
- Small bowls
- Water
- Spoon for mixing
- Timer
Procedure:
- Apply a small amount of each staining agent on separate sections of the cloth or paper towels.
- Prepare a solution of each cleaning agent in a bowl (mix with a small amount of water if necessary).
- Apply each cleaning solution to a corresponding stain.
- Allow the solutions to sit on the stains for 5 minutes.
- Rinse the cloth or paper towels with water and observe the results.
Observation and Results: Record the appearance of each stain before and after treatment. Note which cleaning agents were most effective at removing stains.
Conclusion: This experiment demonstrates the chemical properties of various household substances in treating different types of stains.
Safety Note: Avoid mixing cleaning agents together, as some combinations can be dangerous. Wear gloves if sensitive to cleaning solutions. Adult supervision is recommended.
96. Cookie Chemistry: Crafting the Perfect Batch
Objective: To explore how varying ingredient amounts affect the taste and texture of cookies.
Materials:
- Standard cookie ingredients (flour, sugar, butter, eggs, baking soda, salt)
- Measuring cups and spoons
- Mixing bowls
- Baking sheet
- Oven
- Timer
- Notepad for recording variations
Procedure:
- Prepare a basic cookie dough recipe.
- Divide the dough into small batches.
- Alter one ingredient at a time in each batch (e.g., more sugar, less flour).
- Label each batch and bake them according to the recipe instructions.
- Allow cookies to cool.
Observation and Results: Taste each batch and observe differences in texture, flavor, and appearance. Record which alterations made the cookies softer, crisper, sweeter, etc.
Conclusion: This experiment shows how changing ingredient ratios can significantly alter the outcome of a baking recipe, highlighting the importance of precise measurements in cooking.
Safety Note: Always use oven mitts when handling hot trays. Ensure adult supervision during baking, especially when using the oven. Keep the kitchen area clean to avoid slips or spills.
97. Bright Smiles: Comparing the Effectiveness of Teeth Whiteners
Objective: To examine the effectiveness of different teeth whitening methods on stained surfaces.
Materials:
- Hard-boiled eggs (to simulate teeth enamel)
- Coffee, tea, or cola (to stain the eggs)
- Various teeth whitening products (whitening toothpaste, baking soda, hydrogen peroxide)
- Bowls for soaking
- Timer
- Notebook for observations
Procedure:
- Soak hard-boiled eggs in coffee, tea, or cola overnight to stain them.
- Rinse and divide the eggs into groups, each for a different whitening method.
- Apply the whitening products to the eggs as per instructions or common practices (e.g., brushing with toothpaste, soaking in baking soda solution).
- Rinse the eggs after the recommended time and compare their color to unstained eggs.
Observation and Results: Record any changes in the stain color of the eggs. Note which products were most effective in restoring the eggs to their original color.
Conclusion: This experiment helps understand the relative effectiveness of various teeth whitening methods and the importance of proper dental hygiene.
Safety Note: Handle the eggs gently to avoid breakage. If using hydrogen peroxide, handle with care and under adult supervision. Do not consume the eggs after the experiment.
98. Crunchy Calculations: Measuring the Grease in Chips
Objective: To investigate and compare the amount of grease in different types of potato chips.
Materials:
- Assorted brands and types of potato chips
- Brown paper bags or parchment paper
- Pen or marker for labeling
- Ruler
- Notebook for recording observations
Procedure:
- Label the brown paper bags or parchment paper with the name of each chip brand or type.
- Place a few chips from each brand on the respective labeled paper.
- Leave the chips for at least 30 minutes.
- Observe the grease marks left by the chips on the paper.
Observation and Results: Measure the diameter of the grease marks from each type of chip. Record these measurements and compare them to determine which chips are greasier.
Conclusion: This experiment demonstrates the varying amounts of grease in different brands and types of potato chips, providing insight into their nutritional content.
Safety Note: Ensure cleanliness in the working area. Do not consume the chips if they have been left out for an extended period. Adult supervision is recommended.
99. The Physics of Free Throws: Exploring Basketball Science
Objective: To understand the principles of physics in basketball, focusing on the perfect free throw.
Materials:
- A basketball
- A basketball hoop
- Tape measure
- Notebook and pen for recording observations
- Stopwatch
Procedure:
- Measure and mark the free-throw line according to official basketball rules.
- Shoot free throws from the marked line, trying different techniques (e.g., varying the angle and force of the throw).
- Record each attempt, noting the technique used and whether the shot was successful.
- Time how long the ball is in the air for several throws using the stopwatch.
Observation and Results: Note the most successful techniques for making a free throw. Observe the relationship between the angle, force, and timing of the throw and the success of the shot.
Conclusion: This experiment demonstrates the application of physics in sports, showing how factors like angle and force impact the success of a basketball free throw.
Safety Note: Ensure the area around the basketball hoop is clear to prevent tripping or collisions. Adult supervision is recommended, especially when retrieving balls near streets or driveways.
100. Squashy Fun: Crafting Pumpkin Slime for Autumn Science
Objective: To explore chemical reactions and material properties by making slime with a pumpkin twist.
Materials:
- 1/2 cup of pumpkin puree
- 1/2 cup of white school glue
- 1/2 teaspoon of baking soda
- 1-2 tablespoons of contact lens solution (containing boric acid)
- Orange food coloring (optional)
- Mixing bowl
- Spoon for stirring
- Measuring spoons
Procedure:
- In the mixing bowl, combine the pumpkin puree and white glue.
- Add a few drops of orange food coloring for a more vibrant pumpkin color (optional).
- Stir in the baking soda.
- Gradually add the contact lens solution and stir continuously until the mixture becomes thicker and starts to form slime.
- Knead the slime with your hands until it’s less sticky.
Observation and Results: Observe the changes in texture and consistency as the ingredients mix. Note how the contact lens solution transforms the mixture into slime.
Conclusion: This experiment demonstrates a chemical reaction between glue and boric acid, creating a new, fun, and stretchy material.
Safety Note: Ensure the workspace is clean and avoid ingesting any materials. Wash hands after handling slime. Adult supervision is recommended, especially when using contact lens solution.
Anatomy and Physiology
101. Pulse of Life: Constructing a Working Heart Model
Objective: To create a simple model demonstrating how the human heart pumps blood.
Materials:
- A medium-sized balloon
- Two small balloons
- A plastic bottle (500 ml)
- Two straws
- Scissors
- Tape
- Red food coloring (optional)
- Water
Procedure:
- Cut the bottom off the plastic bottle.
- Cut one small balloon in half and stretch the open end over the bottom of the bottle.
- Cut the neck off the second small balloon and attach it to the bottle’s neck as a valve.
- Insert the straws into the neck of the bottle, securing them with tape. Ensure they don’t touch inside the bottle.
- Fill the bottle with water and a few drops of red food coloring.
- Press and release the balloon at the bottom to simulate the heart pumping.
Observation and Results: Observe how pressing the balloon forces water through the straws. Note the one-way flow created by the balloon valve.
Conclusion: This model demonstrates the basic mechanics of the heart, showing how it functions as a pump in the circulatory system.
Safety Note:Be careful with scissors. Avoid spilling water, especially on slippery surfaces. Adult supervision is recommended during the construction of the model.
102. Breathe Easy: Building a Lung Model
Objective: To construct a model that demonstrates how the lungs inflate and deflate during breathing.
Materials:
- Two balloons
- A large plastic bottle (2-liter soda bottle works well)
- Scissors
- Two straws
- Tape
- Modeling clay or Play-Doh
Procedure:
- Cut the bottom off the plastic bottle.
- Attach a balloon to the end of each straw using tape, ensuring a tight seal.
- Insert the straws into the bottle’s neck, with the balloons hanging inside the bottle.
- Seal around the bottle’s neck with modeling clay to ensure no air can escape.
- Gently pull and push the balloons at the open end of the bottle to simulate lung inflation and deflation.
Observation and Results: Observe how pulling the balloons inflates them and pushing them deflates them, mimicking the action of lungs during breathing.
Conclusion: This model illustrates the mechanics of breathing, showing how the diaphragm’s movement changes the air pressure in the lungs, causing them to inflate and deflate.
Safety Note: Be cautious when cutting the plastic bottle. Ensure the area is clean and dry to prevent slips. Adult supervision is recommended for this activity.
103. Nature’s Storytellers: Unveiling Secrets of Owl Pellets
Objective: To dissect an owl pellet and explore the diet of owls, understanding their role in the ecosystem.
Materials:
- Owl pellet(s)
- Tweezers
- Disposable gloves
- Magnifying glass
- Tray or large sheet of white paper
- Small containers or bags for bone collection
- Bone identification chart
Procedure:
- Put on disposable gloves and place the owl pellet on the tray or paper.
- Gently use tweezers to tease apart the pellet.
- Carefully extract bones and other materials, placing them in the containers.
- Use the magnifying glass to examine and identify the bones using the chart.
- Try to reconstruct the skeletons of the prey animals.
Observation and Results: Record the types and number of bones found, identifying the prey animals. Observe the variety of species in the owl’s diet.
Conclusion: Dissecting an owl pellet provides insight into the owl’s feeding habits and its role as a predator in the ecosystem.
Safety Note: Always wear gloves while handling owl pellets to maintain hygiene. Work in a well-ventilated area. Dispose of the pellet remnants and gloves properly after the experiment. Adult supervision is recommended.
Creative and Fun Experiments
104. Botanical Explorer: Inside the World of Flowers
Objective: To dissect a flower and identify its different parts, learning about plant biology.
Materials:
- A fresh, large flower (such as a lily or rose)
- Tweezers
- Scissors
- Magnifying glass
- Paper and pencil for labeling and notes
- Tray or clean work surface
Procedure:
- Place the flower on the tray or work surface.
- Gently remove the petals with tweezers and lay them out on the paper.
- Use the scissors to carefully cut the stem and observe the inside.
- Identify and separate other parts of the flower like the stamen, pistil, and sepals.
- Use the magnifying glass to examine each part closely.
- Label the parts on the paper and make notes about their appearance and function.
Observation and Results: Note the structure, color, and texture of each part of the flower. Record how each part contributes to the flower’s reproduction and survival.
Conclusion: This dissection reveals the complex structure of flowers and their role in plant reproduction, showcasing the beauty and intricacy of nature.
Safety Note: Handle scissors with care. Be gentle with the flower parts to prevent tearing. Adult supervision is recommended for younger children.
105. Apple Smash: Physics in Motion
Objective: To demonstrate principles of momentum and kinetic energy using an apple as a makeshift wrecking ball.
Materials:
- A large apple
- A sturdy rope or string (about 1-2 meters long)
- A lightweight structure to demolish (made of blocks, cups, or cardboard)
- Open space with no breakables nearby
- Safety goggles
Procedure:
- Tie the rope securely around the apple.
- Construct a small, lightweight structure with the blocks, cups, or cardboard.
- Find a safe, open space and hold the rope with the apple at one end, ensuring no one is close by.
- Swing the apple like a pendulum to hit the structure.
- Observe the effect of the apple’s impact on the structure.
Observation and Results: Note how the speed and angle of the apple affect the damage to the structure. Record any changes in the apple’s motion after hitting the structure.
Conclusion: This experiment illustrates the concepts of momentum, energy transfer, and the effects of kinetic energy in motion.
Safety Note: Wear safety goggles to protect your eyes. Ensure that the area is clear of people, pets, and breakable items. Adult supervision is recommended, especially for the swinging of the apple.
106. Egg-citing Physics: The Egg in a Bottle Trick
Objective: To demonstrate air pressure and temperature change by pulling an egg into a bottle.
Materials:
- A hard-boiled egg (peeled)
- A glass bottle with an opening slightly smaller than the egg
- Matches or a lighter
- A strip of paper
- Safety goggles
Procedure:
- Put on safety goggles.
- Light the strip of paper and place it in the glass bottle.
- Quickly place the egg on the bottle’s opening after lighting the paper.
- Observe the egg as the flame goes out.
Observation and Results: Watch as the egg gets sucked into the bottle. Note how the change in air pressure inside the bottle pulls the egg in.
Conclusion: This experiment shows how changes in temperature affect air pressure. As the air inside the bottle cools, it creates a vacuum that pulls the egg into the bottle.
Safety Note: Use caution when handling matches or a lighter. Ensure there is adult supervision. Perform the experiment in a well-ventilated area. Be careful with the glass bottle to prevent breakage.
107. Soda-Powered Vessel: Propelling a Boat with Baking Soda
Objective: To explore the reaction between baking soda and vinegar as a means to power a small boat.
Materials:
- A small plastic container or cut-out plastic bottle
- Baking soda
- Vinegar
- A straw
- Tape
- Scissors
- A large tub of water or a bathtub
Procedure:
- Cut the straw to a length of about 10 cm and tape it horizontally to the bottom of the boat (container or bottle).
- Place the boat in the water tub or bathtub.
- Pour a small amount of vinegar into the boat.
- Add a teaspoon of baking soda and quickly step back.
Observation and Results: Observe how the reaction between baking soda and vinegar creates bubbles and propels the boat forward. Note the duration and speed of the boat’s movement.
Conclusion: This experiment demonstrates a chemical reaction producing carbon dioxide gas, which in turn creates propulsion, illustrating basic principles of chemistry and physics in motion.
Safety Note: Conduct the experiment in a well-ventilated area. Avoid ingesting any substances. Be careful with scissors. Adult supervision is recommended.
108. Light-Up Joy: Creating Illuminated Holiday Cards
Objective: To craft a unique holiday greeting card that incorporates a simple electric circuit with an LED light.
Materials:
- Cardstock paper
- LED light(s)
- Coin cell battery
- Copper tape
- Tape
- Scissors
- Markers or crayons for decoration
Procedure:
- Fold the cardstock paper to create a greeting card.
- Plan the circuit layout on the card, ensuring the LED light and battery will be connected when the card is closed.
- Stick the copper tape along the planned circuit path, creating a loop that connects back to the battery.
- Attach the LED light to the copper tape, ensuring the correct polarity (the longer leg of the LED to the positive side).
- Secure the coin cell battery in place so it completes the circuit when the card is closed.
- Decorate the card, using the light as part of the design.
Observation and Results: Observe how the LED light illuminates when the circuit is completed. Note how the placement of components affects the circuit’s functionality.
Conclusion: This project demonstrates basic principles of electrical circuits and creativity in integrating science with art.
Safety Note: Be cautious with the scissors and ensure the LED and battery are correctly installed to prevent short circuits. Adult supervision is recommended.
109. Hop to the Future: Building a Solar-Powered Grasshopper
Objective: To create a simple solar-powered robot grasshopper, demonstrating renewable energy in action.
Materials:
- Solar-powered grasshopper kit (includes solar panel, motor, and body parts)
- Screwdriver (if required by the kit)
- Sunlight or a strong artificial light source
Procedure:
- Assemble the grasshopper kit following the provided instructions. This typically involves attaching the solar panel to the motor and assembling the body parts.
- Once assembled, place the grasshopper in a sunny area or under a strong artificial light.
- Observe how the grasshopper starts to move when exposed to light.
Observation and Results: Note how the grasshopper reacts to different intensities of light. Observe the movement and speed of the grasshopper in direct sunlight versus artificial light.
Conclusion: This experiment shows how solar energy can be converted into electrical energy, then into mechanical energy to power a small robot, illustrating the potential of renewable energy sources.
Safety Note: Follow the kit instructions carefully. Be cautious when using tools like screwdrivers. Ensure adult supervision, especially when assembling small or intricate parts.
110. Can-Do Camera: Crafting a Camera Obscura from Recycled Cans
Objective: To build a simple camera obscura using recycled cans, demonstrating basic principles of light and image projection.
Materials:
- A large, clean, empty can with a lid (like a coffee can)
- A pin or needle
- Black paint or black construction paper
- Tape
- Scissors
- Wax paper or tracing paper
Procedure:
- Paint the inside of the can black or line it with black construction paper to prevent light reflection.
- Make a small hole in the center of the can’s bottom using the pin or needle.
- Cut a piece of wax paper to fit over the open end of the can (where the lid was) and secure it with tape.
- In a dark room, point the pinhole towards a light source or a bright scene.
- Look at the image projected onto the wax paper from the opposite side.
Observation and Results: Observe the image on the wax paper. Note that the image will appear inverted and reversed due to the way light travels through the pinhole.
Conclusion: This project demonstrates how a camera obscura works, illustrating basic optical principles of light and image formation.
Safety Note:Be careful when making the pinhole to avoid injury. Use scissors with caution. Adult supervision is recommended for younger children, especially when handling sharp objects.
111. Defying Gravity: Exploring Root Growth Directions
Objective: To investigate how gravity affects the direction of root growth in plants.
Materials:
- Bean seeds
- Paper towels
- Zip-lock plastic bags
- Water
- Tape
- Cardboard box or similar to create a dark environment
- Marker for labeling
Procedure:
- Moisten a few paper towels and place a bean seed between the layers.
- Place the moist paper towel with the seed inside a zip-lock bag and seal it.
- Tape one bag to a wall or vertical surface, with the seed at the bottom.
- Tape another bag upside down, with the seed at the top.
- Place both in a dark environment, like a cardboard box.
- Observe the direction of root growth daily for a week.
Observation and Results: Record the direction in which roots grow in each setup. Note any differences in growth patterns between the two orientations.
Conclusion: This experiment demonstrates how gravity influences the direction of root growth, a phenomenon known as gravitropism.
Safety Note: Ensure the bags are securely taped to prevent them from falling. Handle water carefully to avoid spills. Adult supervision is recommended.
112. Absorbency Challenge: Testing Paper Towel Strength
Objective: To compare the absorbency and strength of different brands of paper towels.
Materials:
- Several brands of paper towels
- Water
- A measuring cup
- A timer
- A notebook and pen for recording observations
- A shallow tray or bowl
Procedure:
- Cut equal-sized squares from each brand of paper towel.
- Pour a measured amount of water into the tray or bowl.
- Submerge a paper towel square in the water for a fixed time (e.g., 30 seconds) using the timer.
- Carefully lift the paper towel and observe how much water it holds without breaking.
- Record the results for each brand, noting the amount of water absorbed and the towel’s integrity.
Observation and Results: Observe and note the amount of water each paper towel brand can absorb before breaking or tearing.
Conclusion: This experiment demonstrates the varying absorbency and strength of different paper towel brands, reflecting their quality and effectiveness for cleaning spills.
Safety Note: Ensure the experiment is conducted in a space where water spills can be easily cleaned up. Adult supervision is recommended.
113. Thirsty Paper: The Paper Towel Absorbency Test
Objective: To investigate and compare the absorbency levels of different brands of paper towels.
Materials:
- Several brands of paper towels
- A measuring cup
- Water
- Food coloring (optional)
- A stopwatch or timer
- A bowl or container
- A ruler
- Notebook for recording results
Procedure:
- Cut identical squares from each brand of paper towel.
- Fill the measuring cup with a set amount of water. Add food coloring to make the water more visible, if desired.
- Place a paper towel square over the bowl and secure it with a rubber band, so it forms a surface over the top.
- Carefully pour water onto the center of the paper towel, starting the stopwatch simultaneously.
- Observe and measure how long it takes for the paper towel to leak or break.
- Record the time and amount of water held for each brand.
Observation and Results: Note the time each paper towel can hold the water without breaking and the amount of water absorbed before leaking.
Conclusion: This experiment illustrates the differences in absorbency and strength between various paper towel brands, which can be related to their material composition and manufacturing process.
Safety Note: Conduct the experiment in an area where water spills can be easily cleaned up. Handle water and food coloring carefully to avoid stains. Adult supervision is recommended.
114. Sky-High Sweets: The Mini Marshmallow Launcher Experiment
Objective: To explore the principles of energy transfer and projectile motion using a homemade marshmallow launcher.
Materials:
- Mini marshmallows
- Plastic cups
- Balloons
- Scissors
- Tape
- Ruler
- Notebook for recording results
Procedure:
- Cut the bottom off a plastic cup.
- Tie a knot at the end of a balloon and cut off the top part.
- Stretch the balloon over the open end of the cup to create a drum-like surface.
- Place a mini marshmallow inside the cup, on top of the balloon.
- Pull back the knotted end of the balloon and release to launch the marshmallow.
- Use the ruler to measure how far the marshmallow flies.
Observation and Results: Record the distance each marshmallow travels. Experiment with different levels of tension on the balloon to see how it affects the distance.
Conclusion: This experiment demonstrates how stretching the balloon stores potential energy, which is then converted into kinetic energy, propelling the marshmallow forward.
Safety Note: Make sure the launch area is clear of obstacles and people. Do not aim the launcher at anyone’s face. Adult supervision is recommended.
115. Flight School 101: The Paper Airplane Experiment
Objective: To understand the basics of aerodynamics and flight by creating and testing different paper airplane designs.
Materials:
- Different types of paper (construction paper, printer paper, cardstock)
- Ruler
- Scissors
- Stopwatch
- Notebook for recording results
Procedure:
- Fold several types of paper into airplanes using the same design.
- Mark a starting line and throw each airplane from this line.
- Use the stopwatch to time how long each airplane stays in the air.
- Repeat the process with different airplane designs.
Observation and Results: Record the flight time and distance for each airplane. Observe how different materials and designs affect the airplane’s performance.
Conclusion: This experiment shows how changes in design and material impact the flight of a paper airplane, demonstrating basic principles of aerodynamics and physics.
Safety Note: Ensure the flying area is clear of obstacles and people to avoid accidents. Do not throw airplanes at or near others.
116. Ant Adventure: Exploring Ant Behavior
Objective: To observe and understand the foraging behavior of ants and their response to different food sources.
Materials:
- White cardboard or large paper
- Sugar
- Crumbs (bread or cookie)
- Small pieces of fruit
- Magnifying glass (optional)
- Notebook and pen for recording observations
Procedure:
- Place the white cardboard or paper on a flat surface near an area where ants are commonly seen.
- Put small amounts of different food items (sugar, crumbs, fruit) on the paper, spaced well apart.
- Observe the ants’ behavior as they discover and collect the food, using a magnifying glass if desired.
- Record which food items attract the most ants and how they interact with each other.
Observation and Results: Note the time it takes for ants to find each food item and their preference. Observe if they recruit other ants to the food source and how they carry food back to their nest.
Conclusion: This experiment reveals the foraging patterns of ants and their ability to communicate and cooperate in gathering food.
Safety Note: Do not touch or disturb the ants. Conduct the experiment in a controlled environment to prevent attracting ants inside the home. Wash hands after handling food items. Adult supervision is recommended.
117. Color Symphony: Crafting a DIY Kaleidoscope
Objective: To explore the concepts of reflection and symmetry by creating a homemade kaleidoscope.
Materials:
- A paper towel tube
- Small mirrors or reflective foil
- Transparent beads or small colorful objects
- Clear plastic (from a recycled container)
- Scissors
- Tape
- Colored paper or stickers for decoration
- Ruler
Procedure:
- Cut the mirrors or reflective foil into three long, equal strips and tape them together to form a triangular prism. Fit this inside the paper towel tube.
- Place the colorful beads or objects into a small, clear plastic circle cut to fit one end of the tube.
- Secure the plastic circle with tape, ensuring the beads can move around.
- Decorate the outside of the tube with colored paper or stickers.
Observation and Results: Look through the kaleidoscope and turn it to observe the changing patterns. Record how the reflections create symmetrical patterns and how changing the objects inside affects the visuals.
Conclusion: This experiment demonstrates the principles of reflection and symmetry, showing how light and mirrors can create intricate patterns.
Safety Note: Be careful when cutting and handling mirrors or foil. Ensure all edges are securely taped to avoid cuts. Adult supervision is recommended.
118. Eggstraordinary Balance: The Egg Walking Challenge
Objective: To demonstrate the strength of eggshells and explore the concepts of weight distribution and pressure.
Materials:
- Multiple cartons of large eggs
- A flat, washable surface
- Old newspapers or plastic sheet (for mess control)
- Bare feet or socks (for participants)
Procedure:
- Lay down newspapers or a plastic sheet on a flat surface.
- Place the eggs in their cartons on the covered surface, ensuring they are close together.
- Carefully step onto the eggs with bare feet or socks, trying to distribute your weight evenly.
- Attempt to walk across the eggs without breaking them.
Observation and Results: Observe how the eggs can support weight when it is evenly distributed. Record any observations about the eggs that do break versus those that don’t.
Conclusion: This experiment demonstrates the surprising strength of eggshells when pressure is evenly distributed, highlighting principles of engineering and physics.
Safety Note: Proceed slowly and carefully to avoid falls. Conduct this experiment on a level surface and have someone nearby for balance support. Clean up any broken eggs immediately to avoid slipping hazards. Adult supervision is recommended.
119. Leprechaun’s Magic Potion: St. Patrick’s Day Fizzing Pot
Objective: To explore chemical reactions by creating a fizzing, colorful pot inspired by St. Patrick’s Day.
Materials:
- A small pot or large bowl
- Baking soda
- Vinegar
- Green food coloring
- Glitter (optional)
- Spoon
- Measuring cup
- Tray to contain mess
Procedure:
- Place the pot on the tray and fill it with a couple of spoonfuls of baking soda.
- Add a few drops of green food coloring and a sprinkle of glitter for a magical touch.
- Slowly pour vinegar into the pot and watch the reaction.
- Experiment with different amounts of vinegar and baking soda to see how it changes the reaction.
Observation and Results: Observe the fizzing and bubbling reaction when vinegar mixes with baking soda. Record the intensity of the reaction with different amounts.
Conclusion: This experiment showcases a chemical reaction between an acid (vinegar) and a base (baking soda), resulting in the release of carbon dioxide gas, which causes the fizzing effect.
Safety Note: Conduct the experiment in a well-ventilated area. Avoid inhaling fumes directly and wash hands after handling the materials. Adult supervision is recommended.
120. Calm and Concentrated: The Steady Hands Challenge
Objective: To understand the importance of hand-eye coordination and steady hand control through a simple wire loop game.
Materials:
- A long, flexible wire
- A wire coat hanger (to create a loop)
- Batteries
- Buzzer or small light bulb
- Electrical tape
- Scissors
Procedure:
- Shape the flexible wire into a winding path and secure it to a flat surface.
- Bend the coat hanger into a loop, ensuring it can move along the wire without touching it.
- Connect the wire path, loop, batteries, and buzzer or light in a circuit. When the loop touches the wire, the circuit completes, triggering the buzzer or light.
- Try to move the loop along the wire path without touching it and setting off the buzzer or light.
Observation and Results: Record the number of times the loop touches the wire and the buzzer or light activates. Note how concentration and hand steadiness affect performance.
Conclusion: This experiment demonstrates the importance of fine motor skills and hand-eye coordination, and how practice can improve these skills.
Safety Note: Be cautious when handling wires and scissors. Ensure the circuit is safely set up and disconnect the battery when not in use. Adult supervision is recommended.
121. The Great Popcorn Pop-Off: A Kernel’s Tale
Objective: To investigate what causes popcorn to pop and the factors affecting the number of popped kernels.
Materials:
- Unpopped popcorn kernels
- A stove or microwave
- Cooking oil (for stove method)
- A large pot with a lid (for stove method)
- Measuring cup
- Stopwatch
- Notebook and pen for recording observations
Procedure:
- Measure a consistent amount of popcorn kernels for each test.
- For the stove method, heat oil in a pot, add kernels, cover with a lid, and time the popping process. For the microwave method, use a microwave-safe bowl or popcorn bag.
- Record the time it takes for the popping to start and when it ends.
- Count and record the number of unpopped kernels after each test.
Observation and Results: Observe the differences in popping time and the number of unpopped kernels between methods. Note any changes when using different amounts of heat or oil.
Conclusion: This experiment demonstrates the effects of heat on popcorn kernels, illustrating the science behind why and how popcorn pops.
Safety Note: Use caution when handling hot pots, oil, and the microwave. Always have an adult present when using the stove or microwave. Avoid opening the pot or microwave until popping has stopped to prevent burns.
122. Mysteries of the Sky: Creating a Cloud in a Jar
Objective: To demonstrate how clouds form in the atmosphere by creating a cloud in a jar.
Materials:
- A clear glass jar with a lid
- Hot water
- Ice cubes
- Aerosol hairspray
Procedure:
- Fill the jar about one-third full with hot water.
- Swirl the water in the jar to warm the sides.
- Place the lid upside-down on top of the jar and fill it with ice cubes.
- Quickly remove the lid and spray a small amount of hairspray into the jar.
- Replace the lid with the ice still on top.
- Observe what happens inside the jar.
Observation and Results: Watch as a cloud forms inside the jar when the warm, moist air from the water meets the cold air near the ice. Record how the cloud looks and how long it lasts.
Conclusion: This experiment shows how clouds form when warm, moist air rises and cools, and water vapor condenses around small particles in the air.
Safety Note: Handle hot water with care to avoid burns. The experiment should be conducted in a well-ventilated area due to the use of aerosol hairspray. Adult supervision is recommended.
Final Words
As we wrap up this exciting journey through our “6th Grade Science Fair Projects” guide, we hope you’ve found inspiration and a spark of curiosity to explore the wonders of science. Remember, each experiment is a stepping stone towards understanding the complex, yet fascinating world around us. Science is not just about theories and formulas; it’s about experiencing, questioning, and discovering.
We encourage you to share this guide with friends, family, or anyone you know who has a passion for learning and experimentation. Your enthusiasm and support can inspire others to embark on their own scientific adventures. And don’t forget to try these experiments yourself – nothing beats the thrill of hands-on learning!
For more intriguing and educational content like this, be sure to subscribe to our newsletter. We regularly update our resources with new and exciting projects, ideas, and insights that cater to young minds eager to explore the realms of science. By subscribing, you’ll get the latest and greatest in educational content right in your inbox.
Thank you for joining us, and we look forward to being a part of your scientific explorations. Keep experimenting, stay curious, and continue to share the joy of science!